Making salt dough ornaments has become a wonderful holiday tradition at our house. And these Sourdough Discard Salt Dough Ornaments are going to put you in the holiday spirit! They're a great craft to make with family and friends, decorate your home for the holidays, or to give as a gift.
I'll be very upfront about this: you do not need sourdough in order to make salt dough ornaments. In fact, I share some notes below on how to do this without sourdough as well. But if you do have a sourdough starter, and you find yourself with a lot of sourdough discard that you want to use up, making Sourdough Discard Salt Dough Ornaments is a wonderful, festive way to do it!

If you're looking for other holiday recipes (no sourdough needed), check out these Dried Sliced Oranges, Candied Orange Slices, and this Homemade Vanilla Extract.
And if you are in the mood for more sourdough discard recipes, try these Sourdough Discard Cinnamon Rolls, this Sourdough Discard Gingerbread Loaf, and these Sourdough Discard Bagels.
If you're new to working with sourdough starter, check out these in-depth posts on how to feed sourdough starter, how to use sourdough discard, and tips for struggling sourdough starter.
Jump to:
- Why you'll love this recipe
- Ingredients
- Equipment
- My Favorite Cookie Stamps
- How to make Sourdough Discard Salt Dough Ornaments
- Expert Tips
- What is sourdough discard?
- Why use sourdough discard in this recipe?
- Can you make salt dough ornaments without sourdough discard?
- Drying Salt Dough Ornaments
- Storage
- Recipe FAQ
- Sourdough Discard Salt Dough Ornaments
Why you'll love this recipe
- These Sourdough Discard Salt Dough Ornaments are easy to make and beautiful! There is a good bit of drying time, but it's very easy to do a step, then come back to it the next day or whenever is convenient!
- They're a fun craft to make with family and friends, and also make a great gift during the holidays.
- It's a great way to use up some of your sourdough discard without making something food-related.
- Salt dough ornaments can last for many years (decades, even?) if they're sealed and stored properly!
Ingredients
There are only four simple ingredients you'll need to make these ornaments.
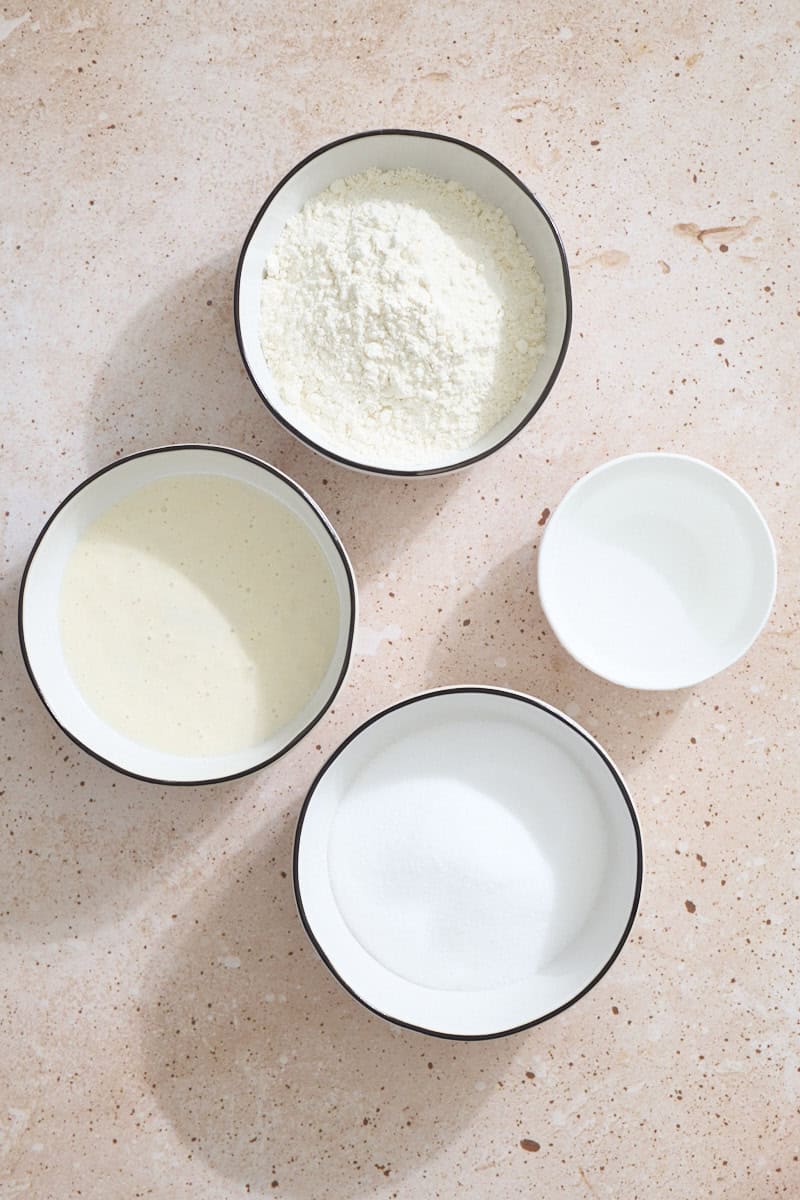
- Sourdough discard: The sourdough discard should be unfed for this recipe. This is also designed to be made with a sourdough starter that uses a 1:1 ratio (when you feed your starter, it's with 1 part flour and 1 part water). If your starter uses a different ratio, it will still work, but you may need to adjust the amount of flour or water in the recipe.
- All-purpose flour: This recipe uses all-purpose flour, but could be made with different types of flour in a pinch.
- Salt: The salt acts as the preservative in this recipe. Smaller salt crystals will also give you a smoother dough, so I don't recommend using any kind of coarse salt crystals.
- Water: Since we are not trying to activate any yeast in this recipe, we do not need to use warm water. Ideally, use room temperature or cool water.
See full recipe below for detailed directions.
Equipment
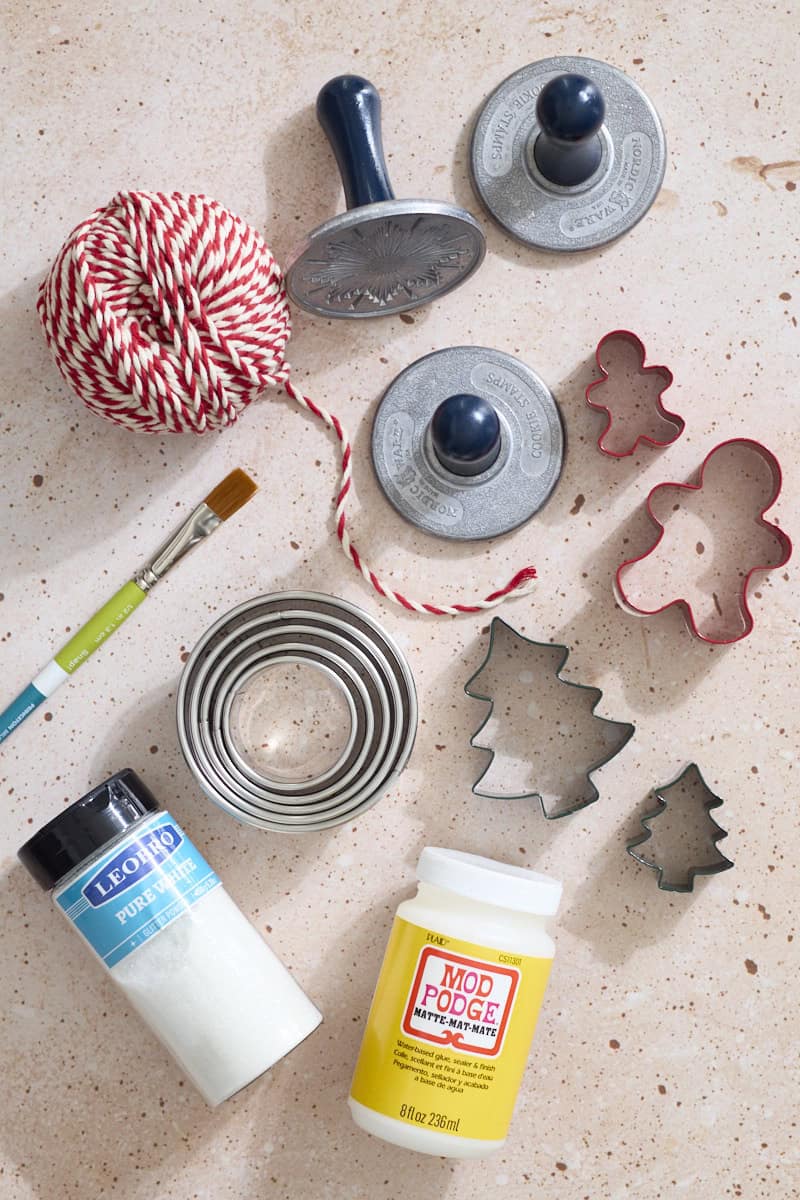
You'll need the following equipment to make these ornaments:
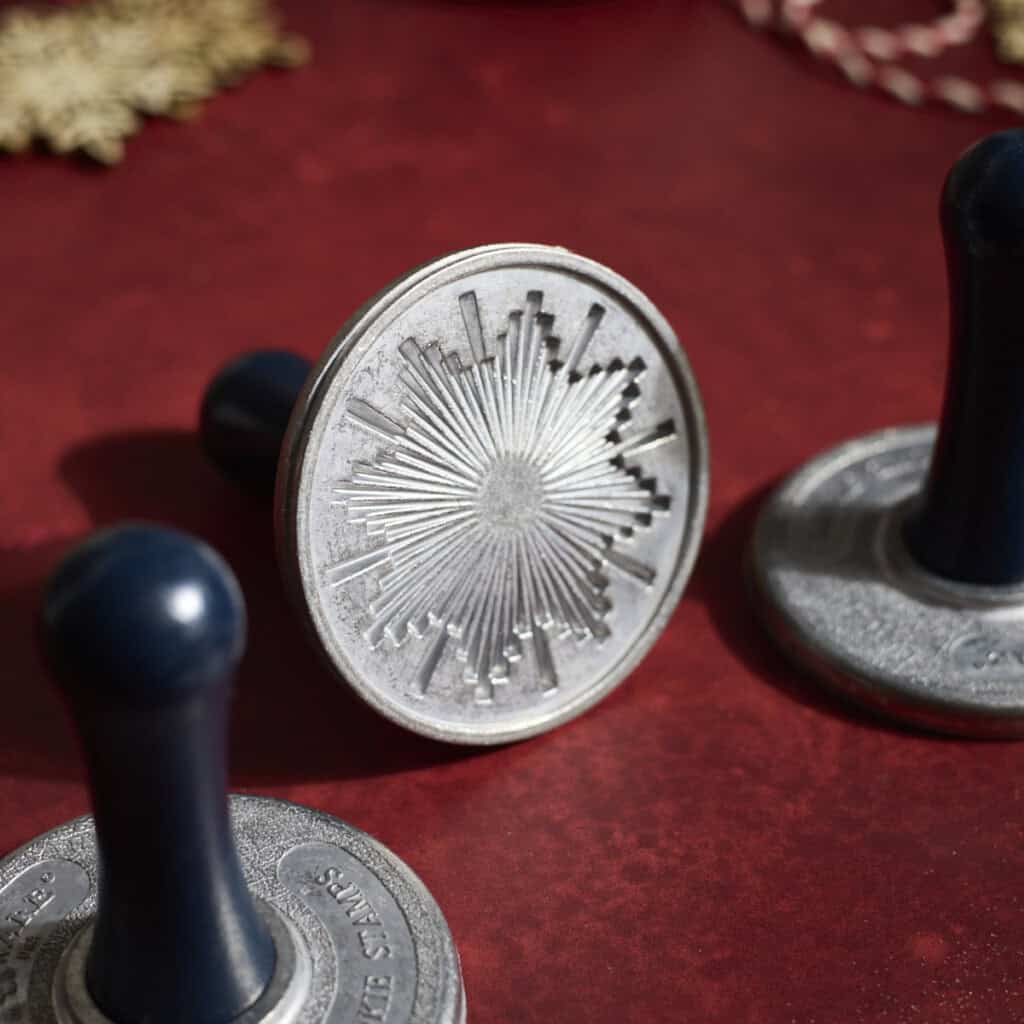
- Cookie stamps or cookie cutters and biscuit cutters: Cookie stamps are my favorite to use! I then use a biscuit cutter to trim around the edge to make it a perfect circle. If using cookie cutters, you'll also need a rolling pin to roll the dough before cutting.
- A straw to poke the hole for the ribbon or string in each ornament.
- A baking sheet lined with parchment paper or a silicone baking mat, and a cooling rack where the ornaments will dry.
- 220-grit sandpaper (very fine) to sand the edges of the ornaments. This is optional, but I recommend it!
- Toothpicks or skewers to make sure the holes for the ribbon or string are clear after the Mod Podge and glitter.
- Mod Podge Matte Sealer and a small paint brush to seal the ornaments.
- Fine glitter works the best so you keep as much detail as possible from the cookie stamps or shapes! This could be any color you like, but I like to use white for a snowy look!
- Ribbon or butcher's twine to hang the ornaments.
kitchen essentials
My Favorite Cookie Stamps
The best cookie stamps for salt dough ornaments!
How to make Sourdough Discard Salt Dough Ornaments
You'll need to be patient with the drying times, but it's very easy to do one step, and then come back whenever you have time again (in a few hours, the next day, etc). The full recipe with detailed directions is at the bottom of this post.
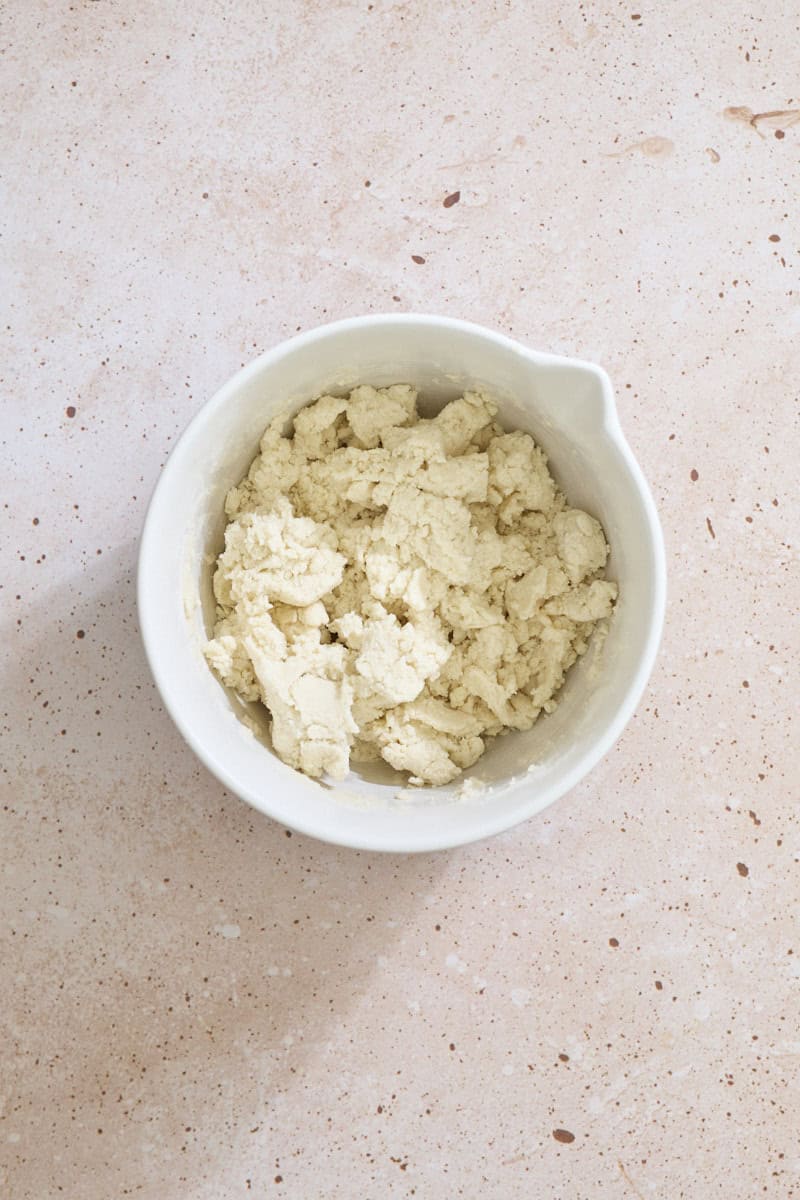
- Step 1: Combine all dough ingredients in a large bowl and mix until a shaggy dough forms.

- Step 2: Transfer to a work surface and knead until smooth.

- Step 3: Divide the dough into portions (approximately 2 Tablespoons). Roll into a ball in the palm of your hand. Press down on the dough ball with a cookie stamp until the dough reaches just past the edges of the stamp.
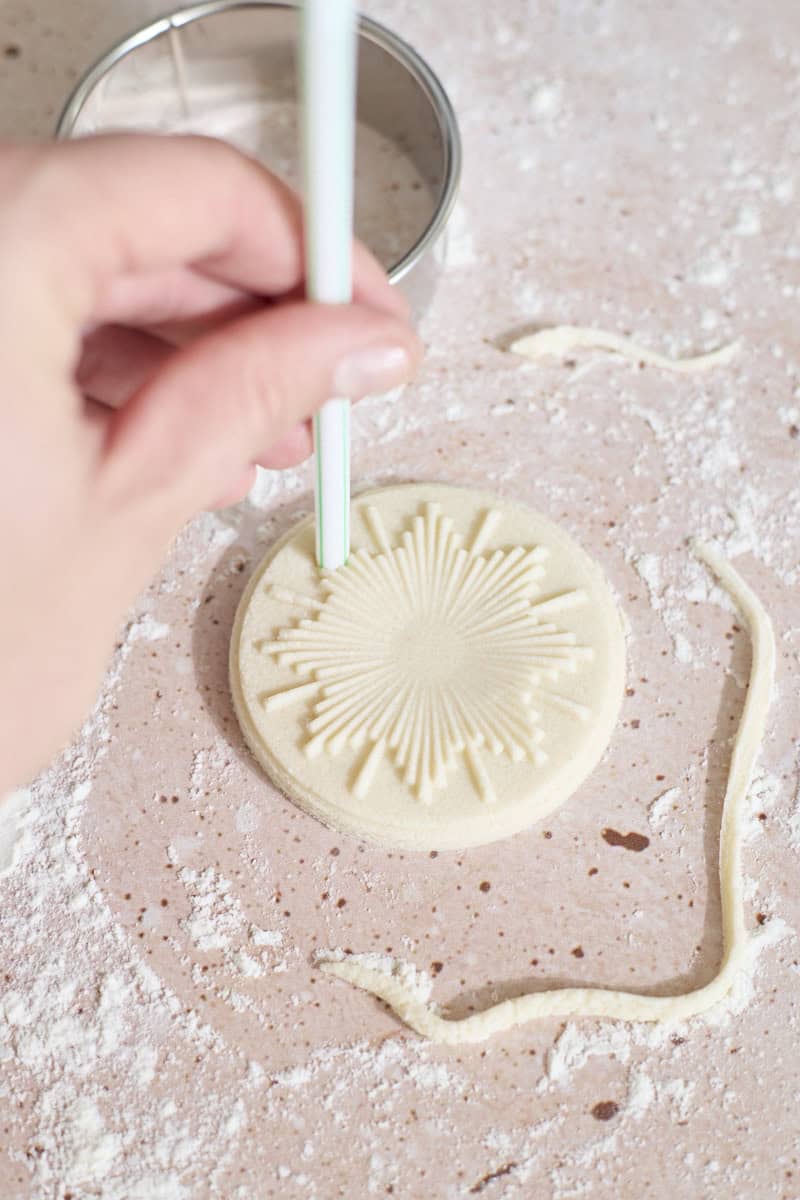
- Step 4: Carefully remove the dough from the stamp. Use a biscuit cutter to trim the edges to be perfectly round. Use a straw to poke the hole for the string or ribbon.
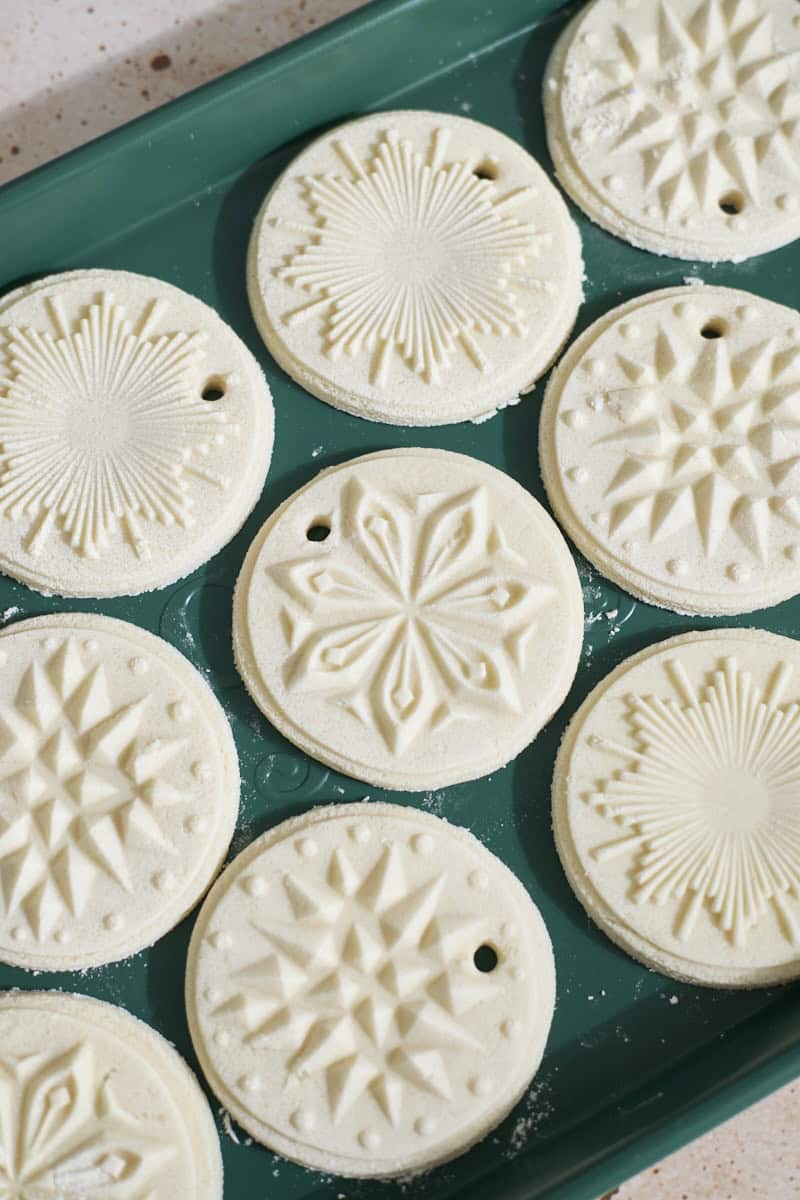
- Step 5: Let the ornaments dry completely (see drying notes in recipe below).
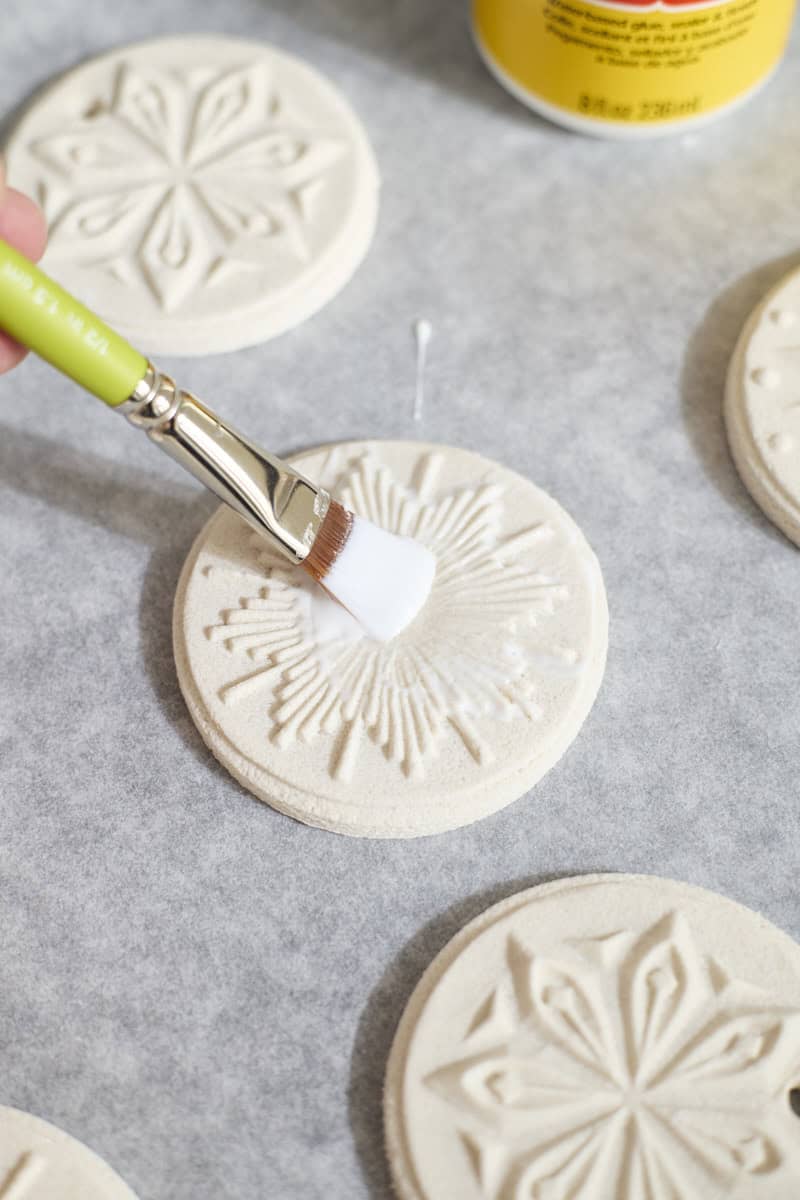
- Step 6: Once fully dried, brush the ornaments with Mod Podge.
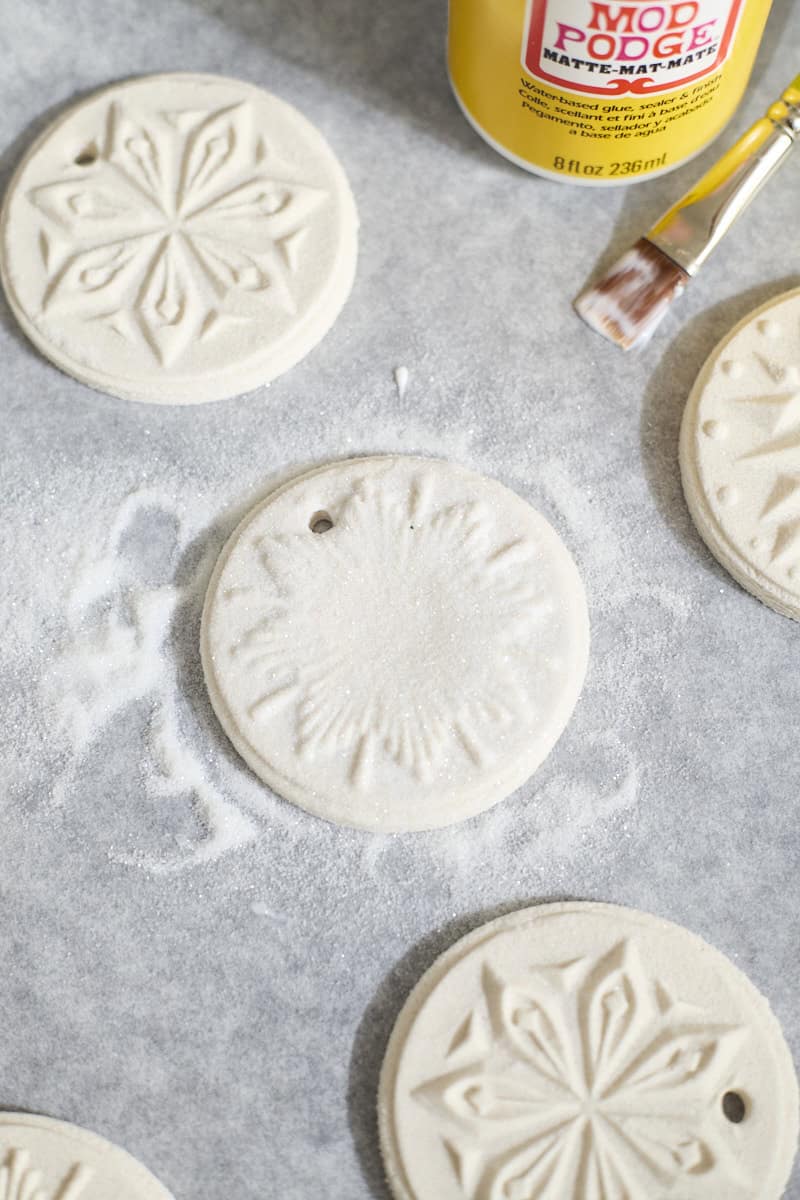
- Step 7: Sprinkle with glitter and shake off any excess. Let dry, then repeat on other side.

- Step 8: Once fully dried, pass a string or ribbon through the hole of each ornament and tie a knot. Your ornaments are now ready to hang!
Expert Tips
- Flour your work surface and the cookie stamps or cookie cutters (if possible). This will help keep the dough from sticking, and it will brush off or fall off once the dough is dry.
- Don't roll or press the dough too thin. Especially if you're using cookie stamps, it will make it very hard to peel the dough off of the stamps without it sticking.
- Let the ornaments air dry. Yes, this takes more time, but I find they have a better final shape and color when air-dried instead of oven-dried.
- Briefly sanding the edges of the ornaments is worth it. It will only take a few minutes, and you'll have smooth edges all around.
- Pour the glitter over a parchment paper-lined baking sheet. This way, you can easily move if you need to (you don't have to leave them on your kitchen countertop!). And you can pick up the parchment paper to pour any excess glitter back into the container to use again.
What is sourdough discard?
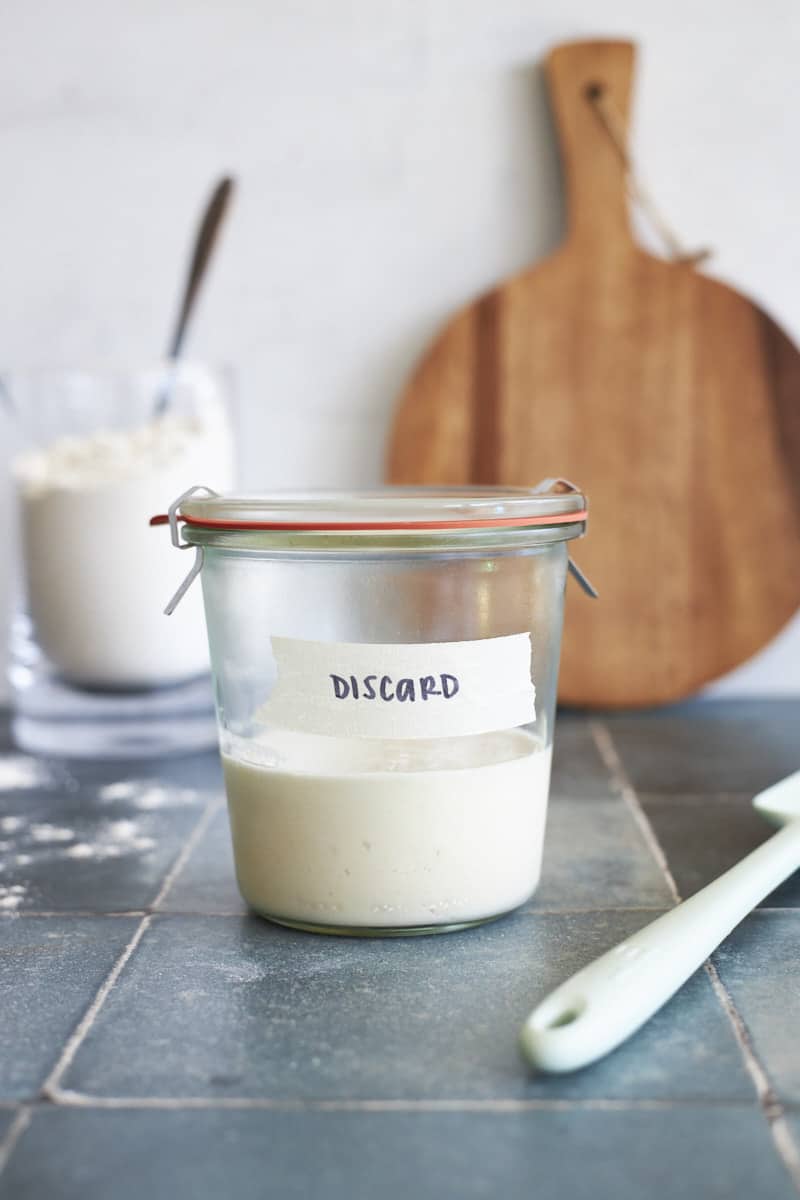
Sourdough discard is what is leftover after you feed your sourdough starter. You can either literally discard it (in the trash or compost), or you can use it to make sourdough discard recipes like this one!
This recipe is designed for a sourdough starter with a 1:1 ratio (when you feed your starter, it's with 1 part flour and 1 part water). If your starter uses a different ratio, you may need to adjust some of the ingredients in this recipe to make the dough the right consistency.
If you're new to working with sourdough starter, check out these in-depth posts on how to feed sourdough starter, how to use sourdough discard, and tips for struggling sourdough starter.
Why use sourdough discard in this recipe?
You do not need sourdough discard to make salt dough ornaments. But if you have a lot of it (like many people who have a sourdough starter!), this is a nice way to put it to use. And while these ornaments are not edible (and you can use sourdough discard to make all kinds of wonderful discard recipes), it can be nice to use the discard for something other than baked goods! At the end of the day, the purpose of this recipe is to make something fun and festive, and not let the discard go to waste.
Can you make salt dough ornaments without sourdough discard?
Yes, definitely! To do so, you would omit the sourdough discard and increase the flour and water in the recipe. The new measurements would be as follows:
- 2 cups all-purpose flour
- 1 cup salt
- ¾ cup + 1 Tablespoon water
The full recipe with detailed directions is below. If needed, you can add more flour or water to reach your desired dough consistency.
Drying Salt Dough Ornaments
There are two methods for drying these Sourdough Discard Salt Dough Ornaments. Choose which option suits your schedule and environment the best!
Air-Dry: You can let these ornaments air dry on a baking sheet initially, then transfer to a cooling rack until dried fully. If you are in a very wet or humid environment, it may be a challenge for your ornaments to dry this way. Final dried ornaments will be completely hard and consistently white.
- Time: 2-7 days, depending on your environment and thickness of your ornaments.
Oven-Dry: You can dry these ornaments in the oven as well. Preheat the oven to 175 degrees (F) and dry for 2-4 hours, flipping the ornaments every hour, until fully dried. Final dried ornaments will be hard, but still a little dough-colored (not completely white, like the air-dried ornaments).
- Time: 2-4 hours, depending on the thickness of your ornaments.
Storage
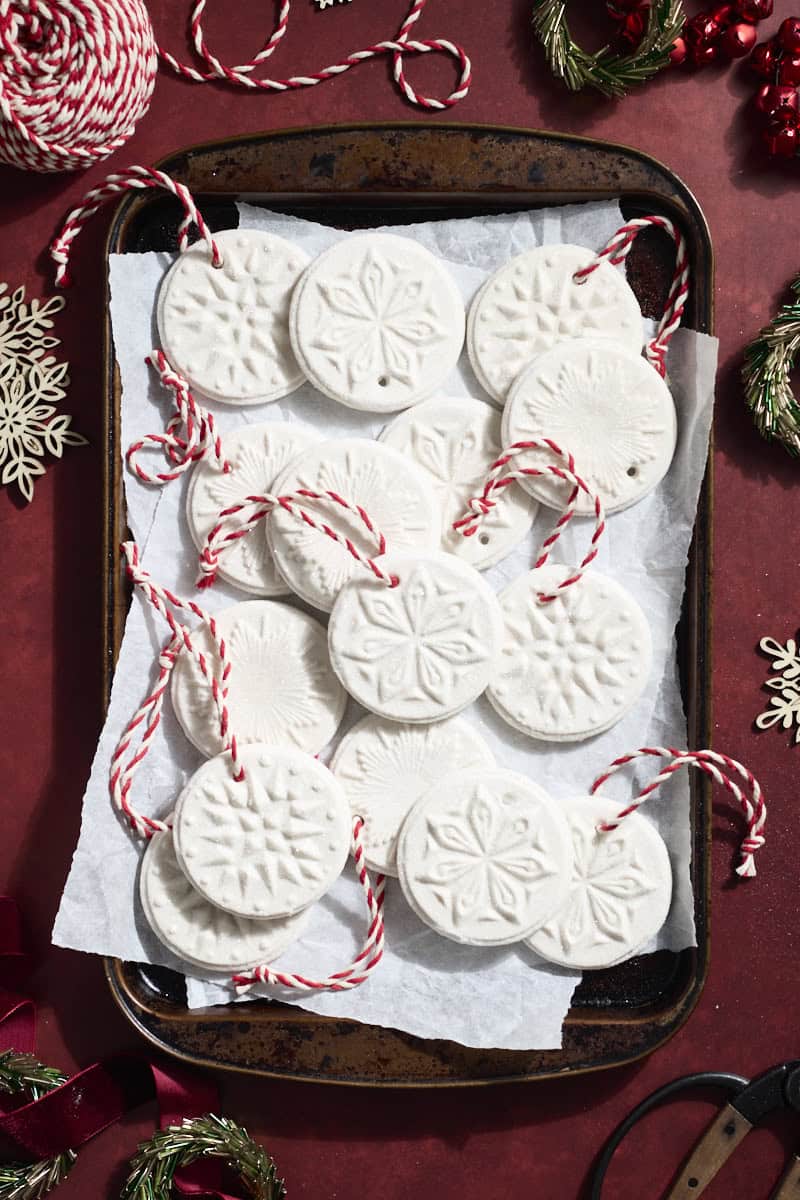
Sourdough Discard Salt Dough Ornaments should be stored carefully away from moisture. I recommend storing in a large ziplock bag (to prevent any moisture), and then inside of a sturdy tin or container to avoid any potential breakage. If stored properly, salt dough ornaments should last years, or even decades!
Recipe FAQ
No, the ornaments can be considered "finished" after they're fully dried. The Mod Podge seals the ornaments and helps to preserve them. The glitter is decorative and optional.
You can let the ornaments air dry or dry in the oven.
This will depend on the drying method you're using, your environment, and the thickness of your ornaments. If you're air-drying, this could take anywhere from 2-7 days, depending on your environment (a humid, or wet environment will take longer to dry). If you're drying in the oven, this will take 2-4 hours.
This is not necessary and not recommended. We do not want the ornaments to rise at all, especially if you're drying in the oven, so using active starter would not be ideal.
No, Sourdough Discard Salt Dough Ornaments are not edible.
Sourdough Discard Salt Dough Ornaments
Equipment
- Parchment paper or silicone baking mat
- Butcher's twine or ribbon
Ingredients
- 1 ¼ cups all-purpose flour
- 1 cup salt
- 200 grams (about ¾ cup) sourdough discard unfed, at room temperature
- ⅓ cup water
Instructions
Make the Dough
- In a large bowl, stir together the flour and salt. Add the sourdough discard and water, stirring until a rough dough forms. The dough will be fairly dry, so it may be easier to mix with your hands.
- Transfer the dough to a smooth work surface and knead until smooth, about 3-4 minutes. The dough should be very smooth and not sticky. If the dough seems sticky or too dry (falling apart), add more flour or water (1 Tablespoon at a time) to reach your desired consistency.
Cut the Shapes
- If using cookie stamps, lightly flour your work surface and divide the dough into portions of approximately 2 Tablespoons each. Roll the dough into a smooth ball in your palm, place it on your work surface, and flour your cookie stamp. Use the stamp to press down on the dough until the dough reaches just past the edge of the stamp.Carefully remove the dough from the stamp and transfer to a baking sheet. Use a biscuit cutter to create perfectly round edges around the stamped design. Use a straw to poke the hole for the string or ribbon. Repeat with all remaining dough. Note: You want your ornaments to be about ¼-inch thick. If you press the dough too thin, it will be harder to remove from the stamps.
- If using cookie cutters, use a rolling pin to roll out the dough to about ¼-inch thickness. Press your cookie cutters into the dough, cutting as many as you can. Transfer the cut dough shapes to a baking sheet. Use a straw to poke the hole for the string or ribbon. Repeat with any remaining dough.
Dry the Ornaments
- Make sure you have poked the holes for your string / ribbon before drying!
- To air-dry: Let the ornaments air-dry on the baking sheet at room temperature overnight. The next day, carefully flip the ornaments over and let the bottom begin drying. After at least a few hours, transfer all ornaments to a drying rack to cool fully, flipping occasionally. If you flip them or transfer to the cooling rack too quickly, you'll risk crushing some of the design from your stamps, and potentially see gridlines in your dough from the cooling rack. This process will take 2-7 days, depending on your environment and the thickness of your ornaments. Finding a dry, warm spot (maybe even in direct sunlight!) is great for drying. Final, dried ornaments will be completely dry on both sides, hard, and white. This takes time, but this is my preferred drying method.
- To oven-dry: Preheat the oven to 175℉. Bake the ornaments for 2-4 hours, flipping every hour. Total time will depend on the thickness of your ornaments. Final, dried ornaments will be completely dry on both sides, hard, but will still be slightly dough-colored (not completely white, as with air drying).
Decorate the Ornaments
- Transfer the dried ornaments to a baking sheet lined with parchment paper. Use 220-grit (fine) sandpaper to gently sand the edges of the ornaments until smooth (optional, but recommended).
- Brush one side of the ornament with Mod Podge Matte Sealer. Sprinkle with fine glitter and shake off any excess. Let dry completely on the baking sheet, then repeat with the other side of the ornament. Don't forget the edges, too!If the holes for the string / ribbon get filled with Mod Podge, use a toothpick to clear the space. Let the ornaments dry completely and shake off any excess glitter. Once the ornaments are finished, you can pick up the parchment paper from the baking sheet and pour the unused glitter back into the bottle to be used again.
- Once dried, finish the ornaments with ribbon or string. Cut lengths of ribbon or string about 10-inches long. Pass the ribbon or string through the hole, tie a knot, and tighten. If you have a hard time passing the string through, use a bit of tape on the end of the string to make a more sturdy "point" that you can pass through like a needle. Cut off the taped end after you tie the knot. Your ornaments are now ready to hang!



soon to be empty nester says
Can these be dried in a dehydrator?
Jessica Vogl says
I'd recommend air drying or oven drying (I've found air drying to work better).
Jessica Vogl says
These are so fun and festive and I love to give them as gifts during the holidays!
Emily says
Can you make the dough a day or 2 in advanced?
Jessica Vogl says
I haven't tried this! If you kept it tightly wrapped in the refrigerator (so it retains its moisture), this should work!
Karly Hudson says
Making these tomorrow with my family on Thanksgiving so we can all hang them on our Christmas trees this year. This is my first year making sourdough and I'm so excited to make ornaments out of my starter. I can't wait to share this with them!!
Jessica Vogl says
Aw yay! This will be so great! Happy holidays!
camille Solis says
Is there a way these can be made without using sourdough starter?
Jessica Vogl says
There is a section in the post above on how to make these without any sourdough (with measurements, etc.)!