

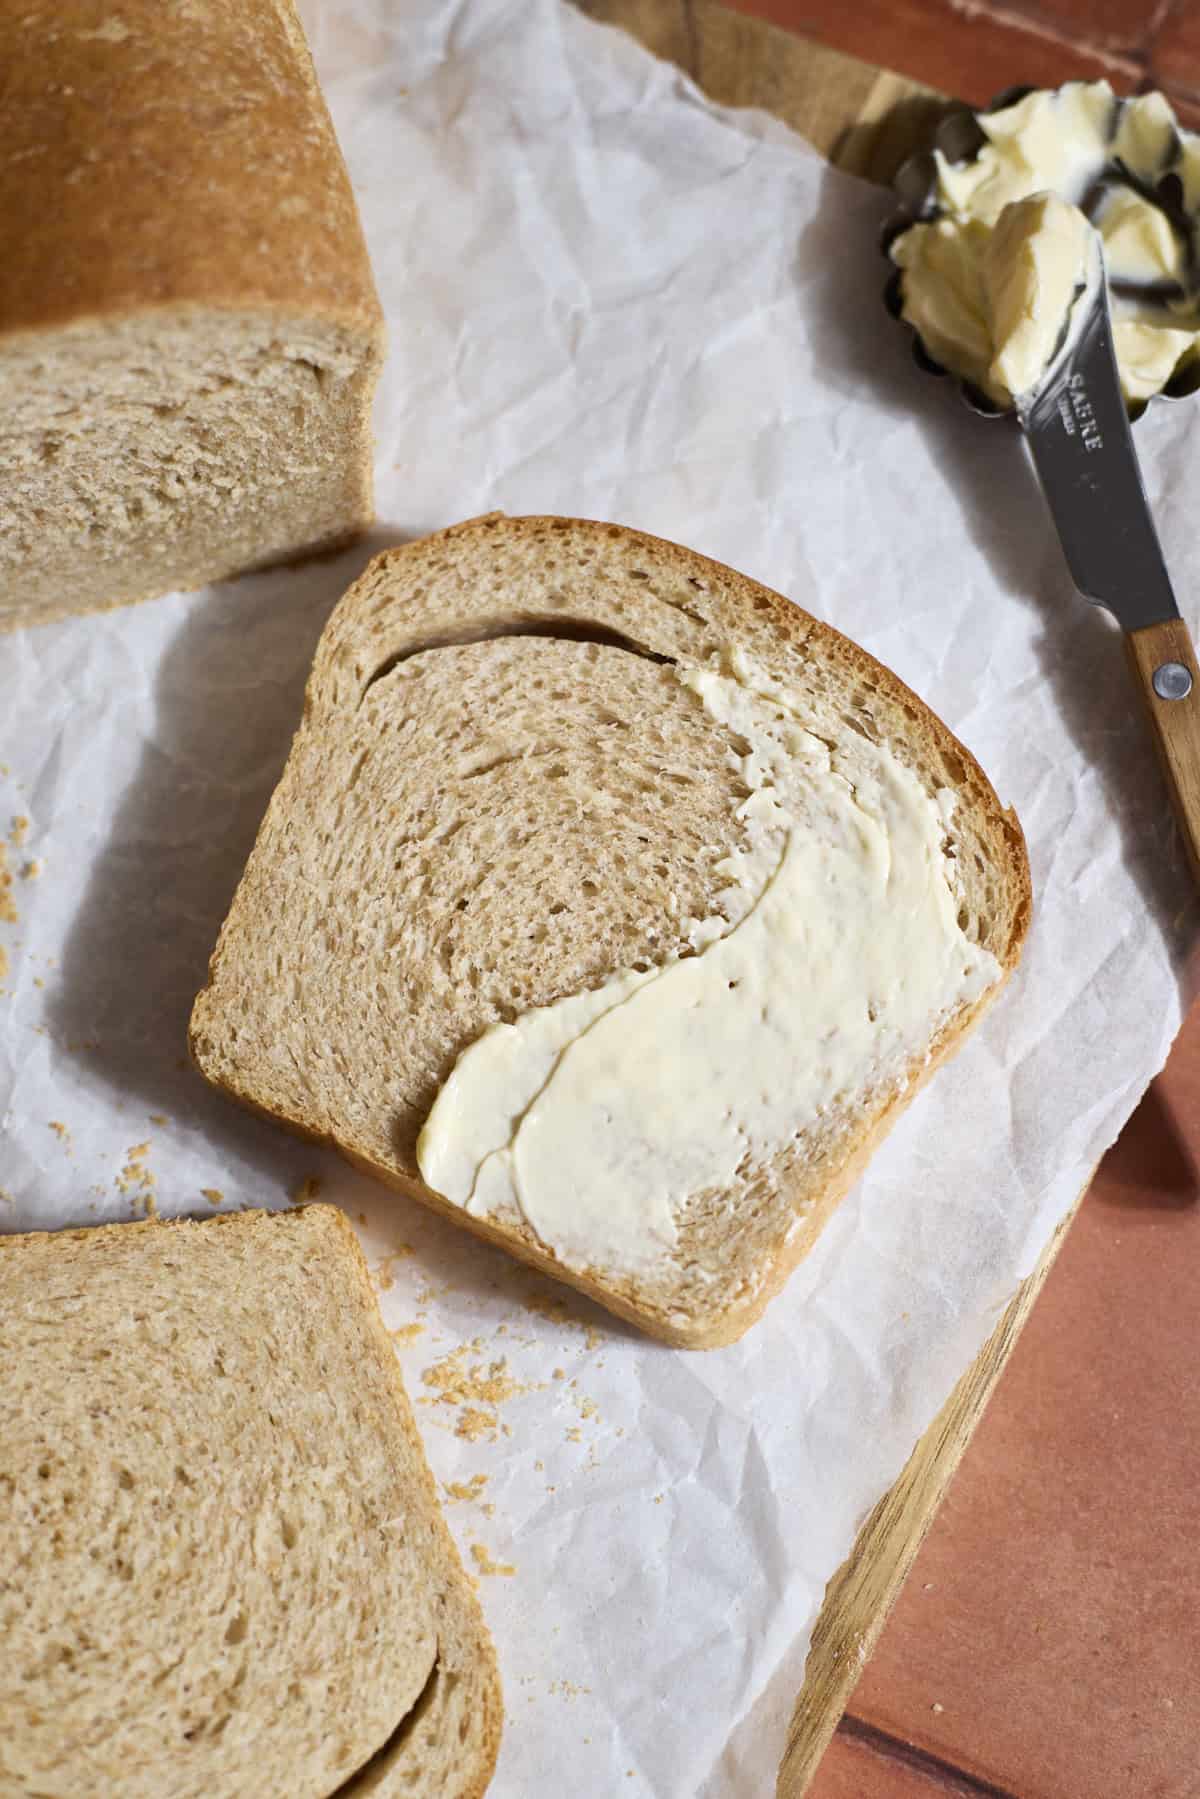
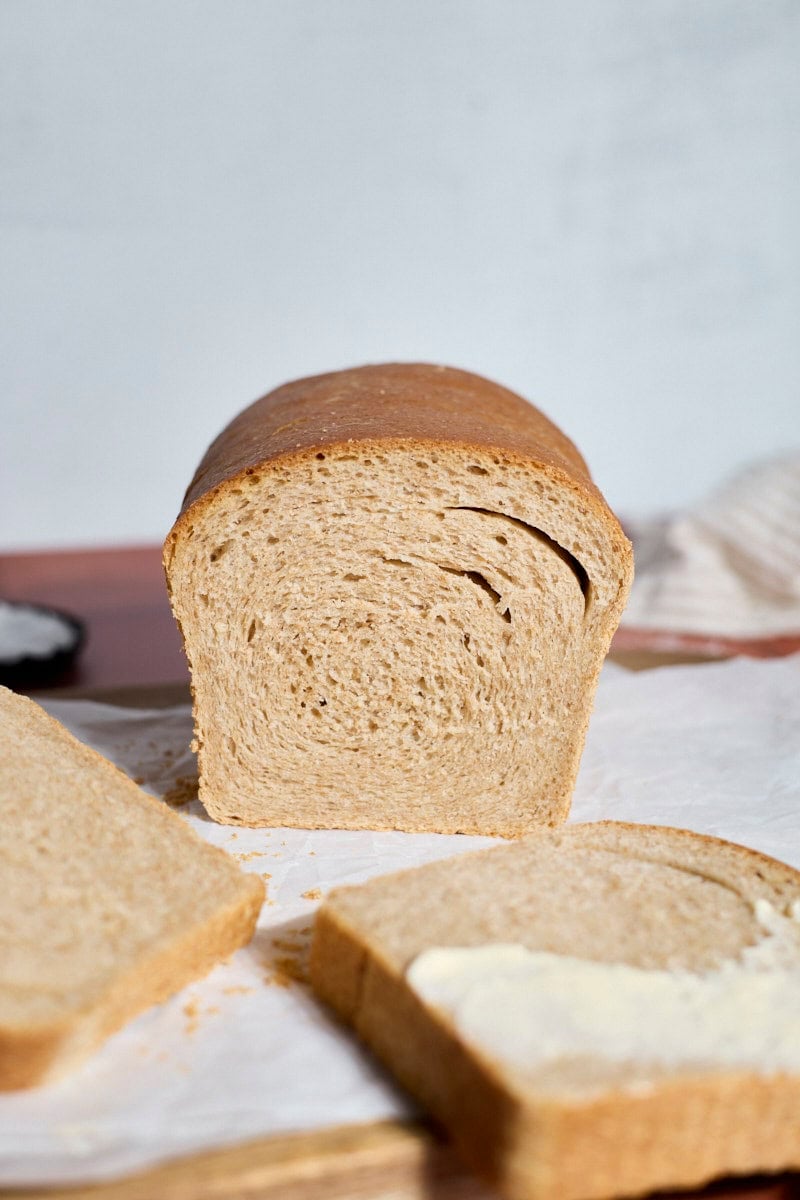
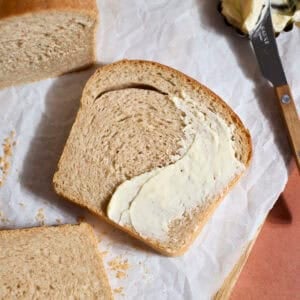
This Sourdough Discard Whole Wheat Sandwich Bread is perfect for sandwiches or toast and made with whole wheat flour for added nutritional benefits and flavor! It's light and fluffy, but will still hold up for the heartiest sandwich. And the honey and wheat combination gives it a bit of sweetness and a delicious flavor. The best part? It's an easy, same-day recipe, so you'll have a warm, fresh sandwich bread ready in a few hours.
Why you'll love this recipe
- This easy, same-day recipe is ready in just a few hours since we are using sourdough discard plus added yeast. And if you love this recipe, you should also try my Sourdough Discard Sandwich Bread!
- You do not need any special ingredients (like vital wheat gluten, which you might see in 100% whole wheat bread recipes).
- This is a 50/50 whole wheat bread recipe that uses 50% AP flour and 50% whole wheat flour. It gives you a light and fluffy bread that still has the taste and nutritional benefits of whole wheat flour.
- Using whole wheat flour adds fiber and vitamins, including B-1, B-3, and B-5, to your loaf, while still having the same calories as AP flour.
- You might also like these Sourdough Discard Protein Bagels!
- Looking for a more intermediate bread-baking project? Try this Sourdough Discard Brioche Bread.
Jump to:
Ingredients
There are only a few simple ingredients you'll need to make this Sourdough Discard Whole Wheat Sandwich Bread.
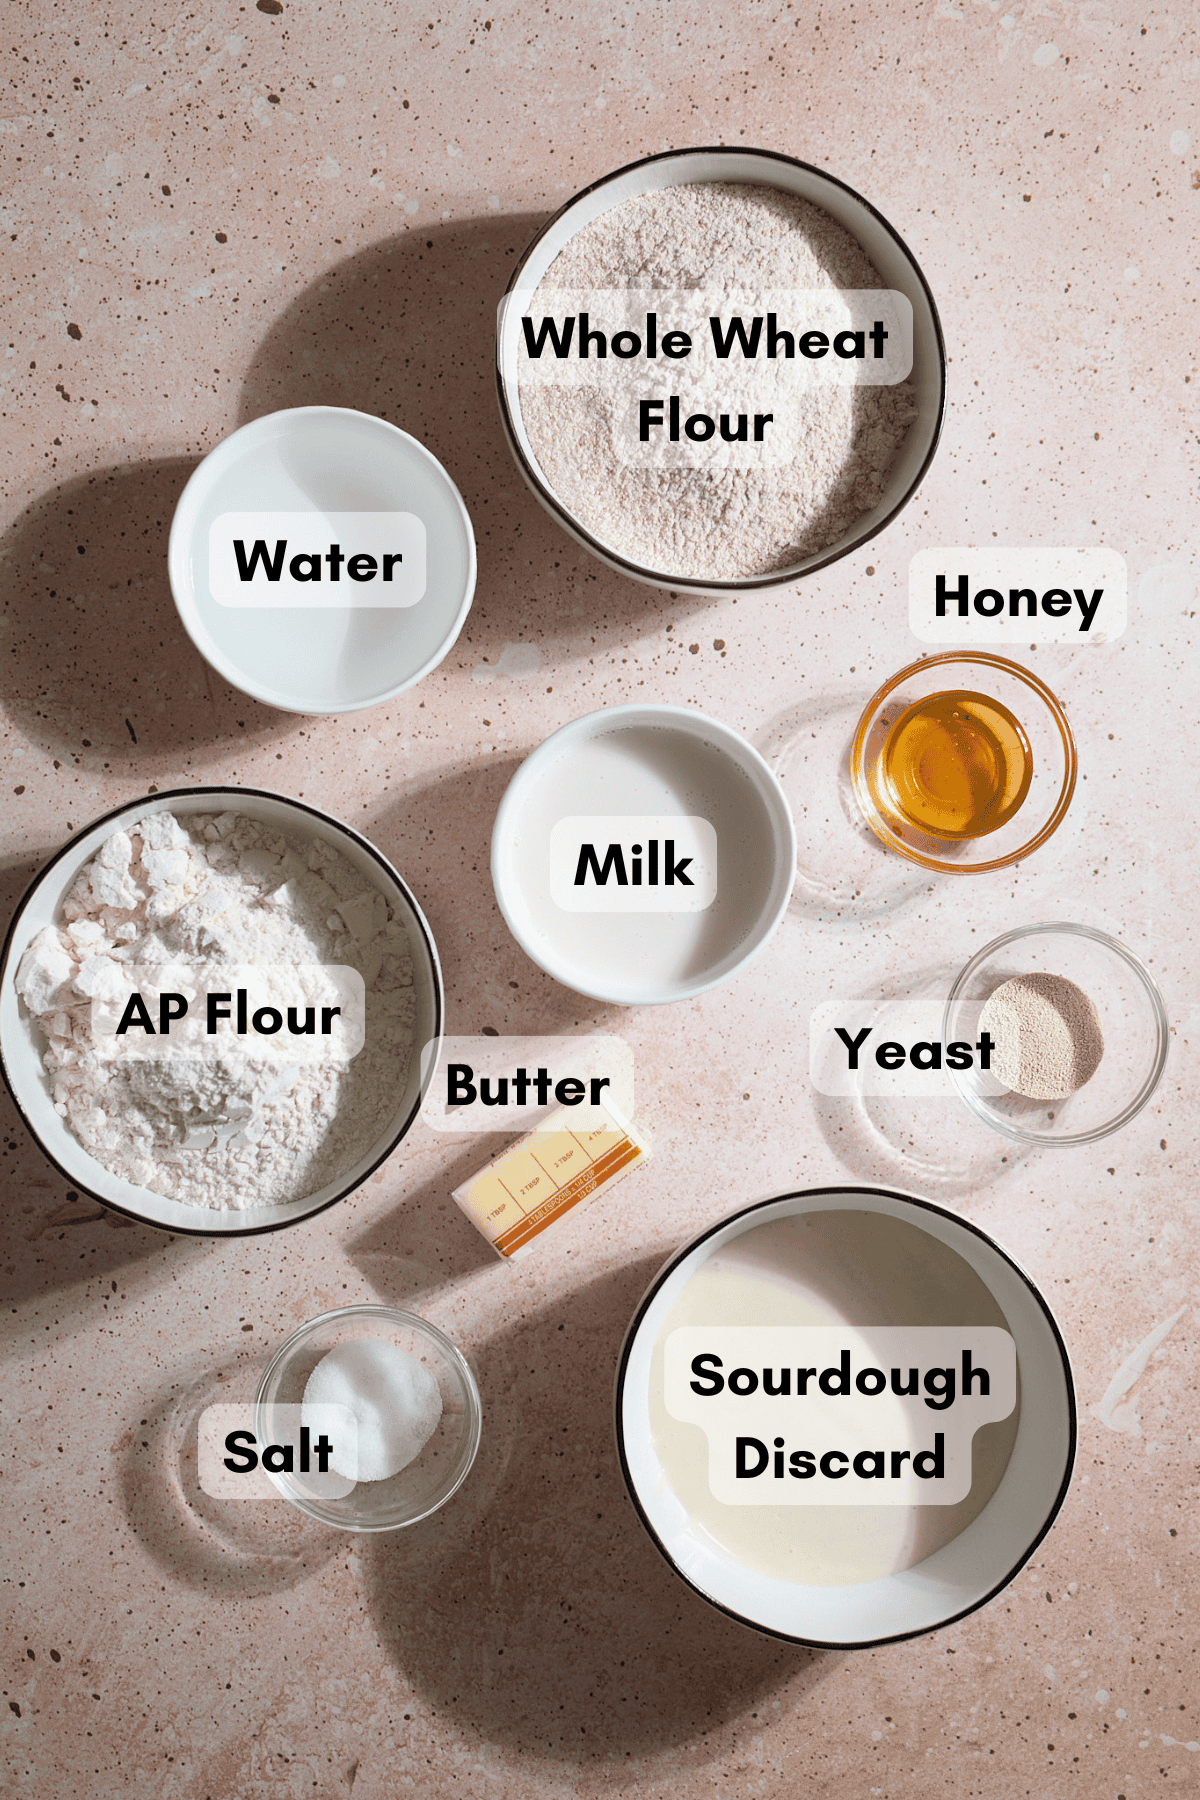
- Honey: In this recipe, we're using honey rather than granulated sugar to feed the yeast in the dough. It also gives the final bread a delicious honey flavor.
- Active dry yeast: Even though we are using sourdough discard, we still need to use a leavening agent (in this case, yeast) to ensure the dough rises predictably.
- All-purpose flour: This recipe uses 50% all-purpose flour, which is great for making the loaf light and fluffy.
- Whole-wheat flour: This recipe uses 50% whole wheat flour, which gives additional flavor and nutritional benefits.
- Sourdough discard: The sourdough discard should be unfed and at room temperature for this recipe. This recipe is designed for a sourdough starter with a 1:1 ratio (when you feed your starter, it's with 1 part flour and 1 part water). If your starter uses a different ratio, you may need to adjust some of the ingredients in this recipe.
- Learn more about how to make a sourdough starter.
See full recipe below for detailed directions.
Substitutions & Variations
This is a very adaptable recipe, and below are a few easy substitutions and variations you can try.
- Use active sourdough starter - If you want to make this recipe with active sourdough starter instead of discard, you can! To do so, omit the yeast and replace the sourdough discard with active starter (200g). You will also need to increase the rise times.
- You might also like this Easy Sourdough Bread!
- Add inclusions - This is a great base loaf for adding inclusions.
- Option 1: As you're kneading the dough, work any inclusions into the dough.
- Option 2: After you roll out the dough, spread or sprinkle with your inclusions, then roll into your loaf shape. If your inclusions contain moisture (for example, cheese), you may need to bake the loaf longer.
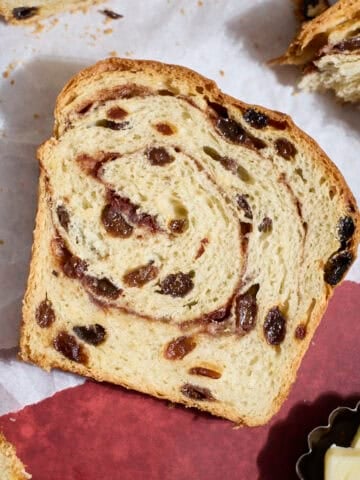
- You might also like this Sourdough Discard Cinnamon Raisin Bread!
- 100% whole wheat flour - If you'd like to use 100% whole wheat flour without any AP flour, there are some changes you would need to make to this recipe. You'll need a bit more liquid in the dough, and likely some citrus juice to combat the bitterness that you can taste in some whole wheat breads. It's something I plan on testing further, so stand by here!
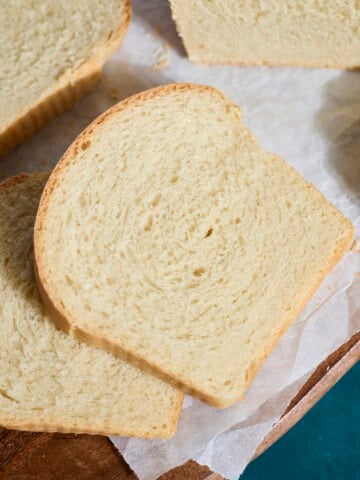
- If you're interested in a version of this recipe that only uses all-purpose flour, try my Sourdough Discard Sandwich Bread.
- You can also make these Sourdough Discard Rolls or Sourdough Discard Focaccia for another sandwich option!
How to make Sourdough Discard Whole Wheat Sandwich Bread
This is a very simple recipe with no stretch and folds needed. The full recipe with detailed directions is at the bottom of this post.
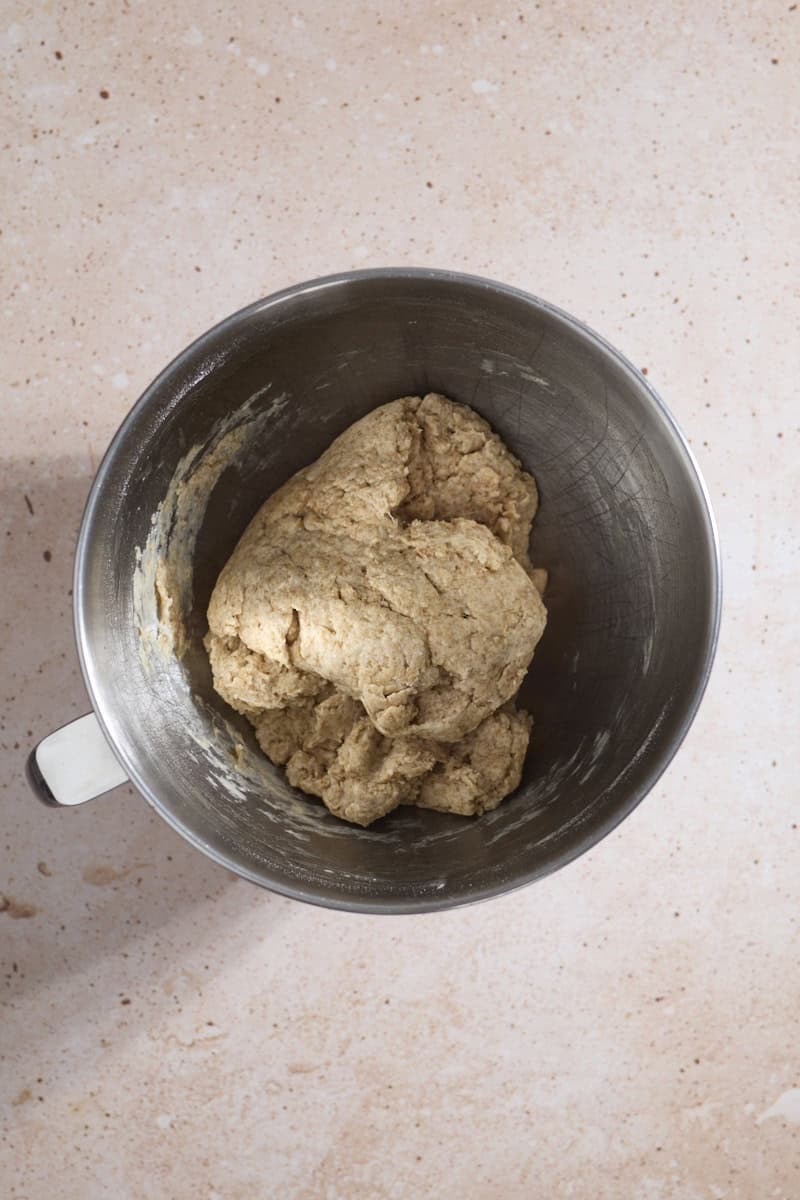
- Step 1: Combine all ingredients in the bowl of a stand mixer or in a large mixing bowl. Mix until a rough dough forms.

- Step 2: Transfer the dough to a smooth work surface and knead until smooth and soft. The dough should not feel sticky.
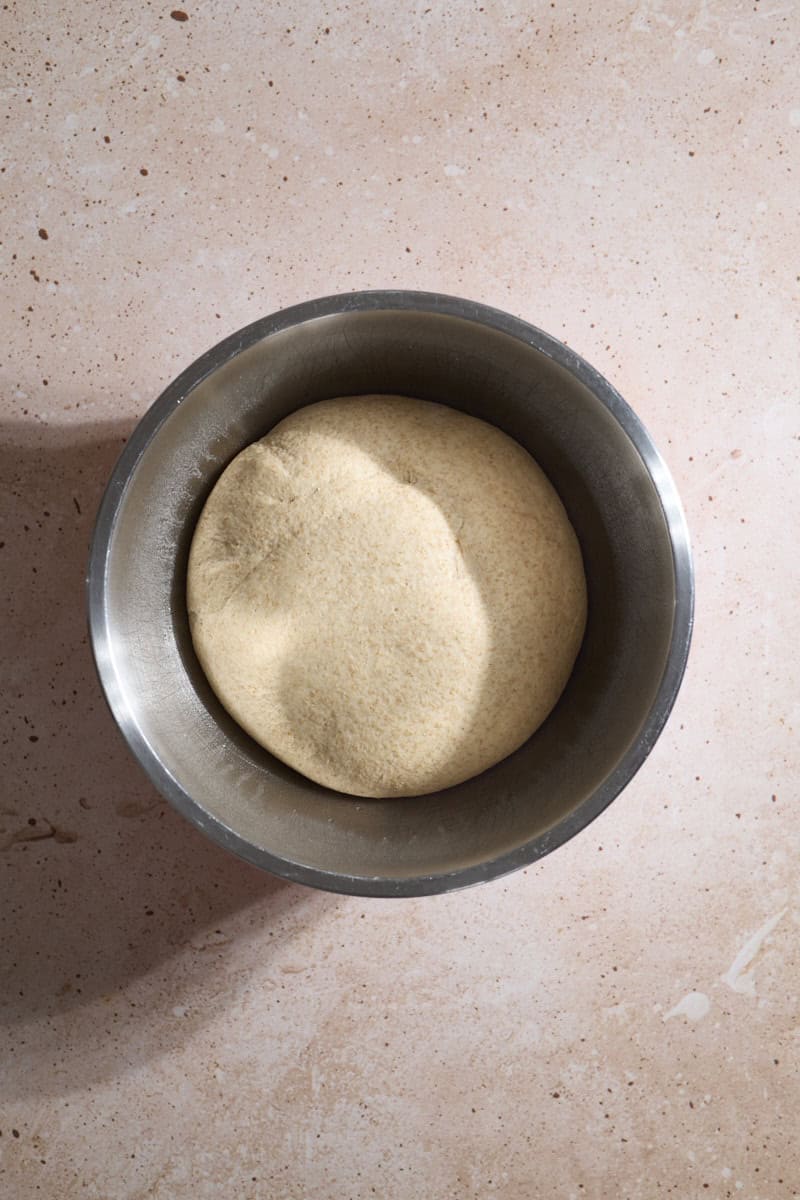
- Step 3: Place the dough in a large oiled bowl. Cover and let rise 1 ½ - 2 hours, or until doubled in size.
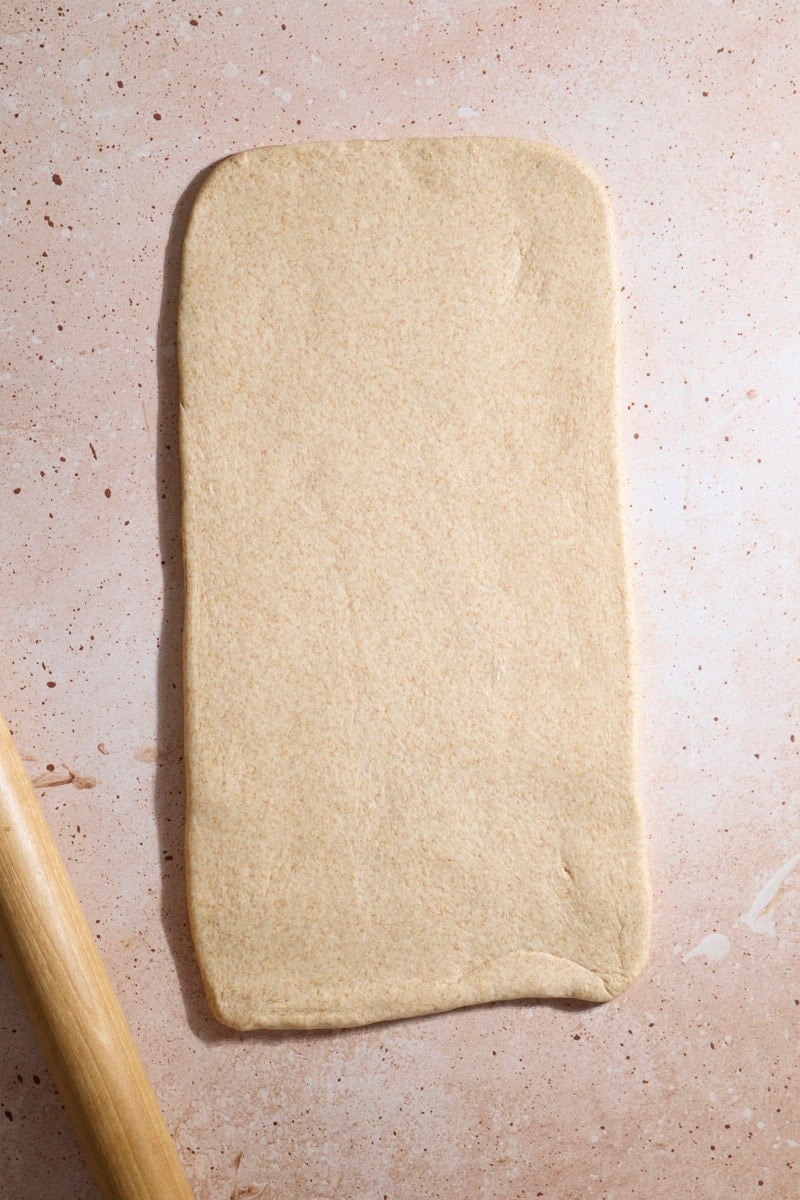
- Step 4: Roll the dough out into a 9x18-inch rectangle.
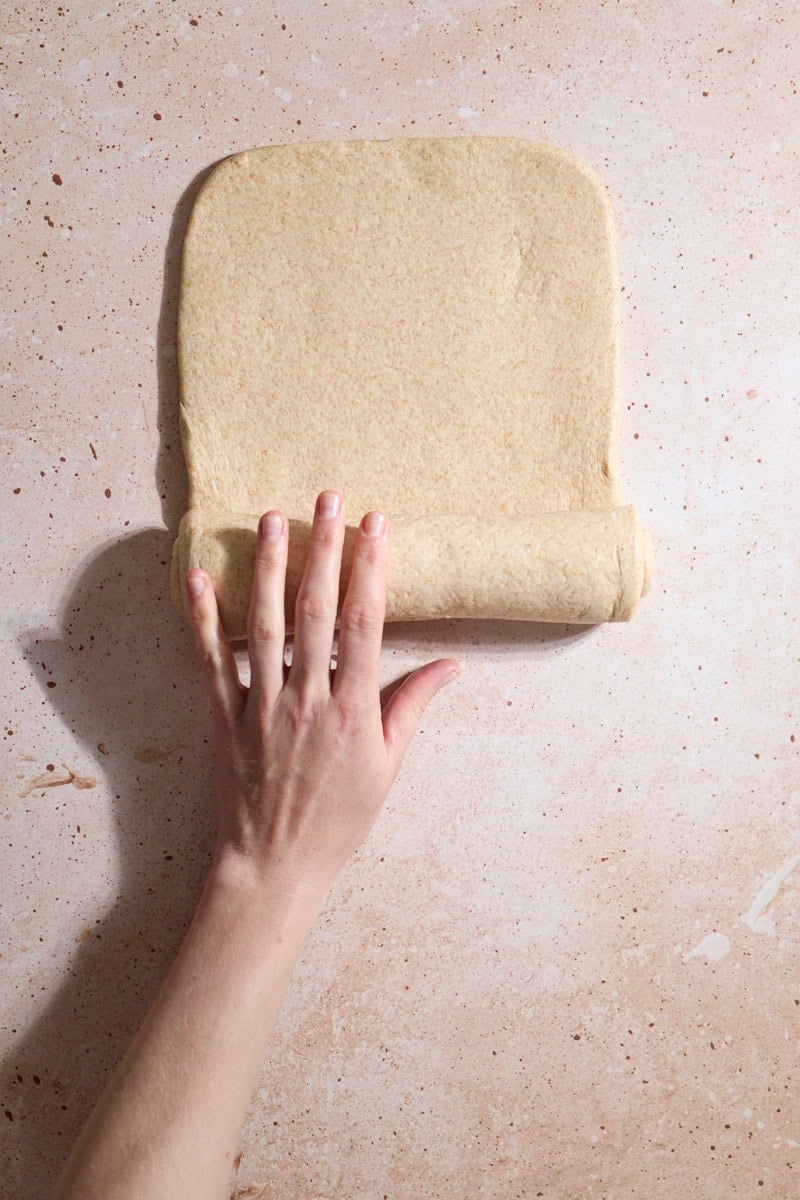
- Step 5: Roll the dough into a log from the short side of the rectangle.

- Step 6: Place the dough log into the baking pan, seam-side down.
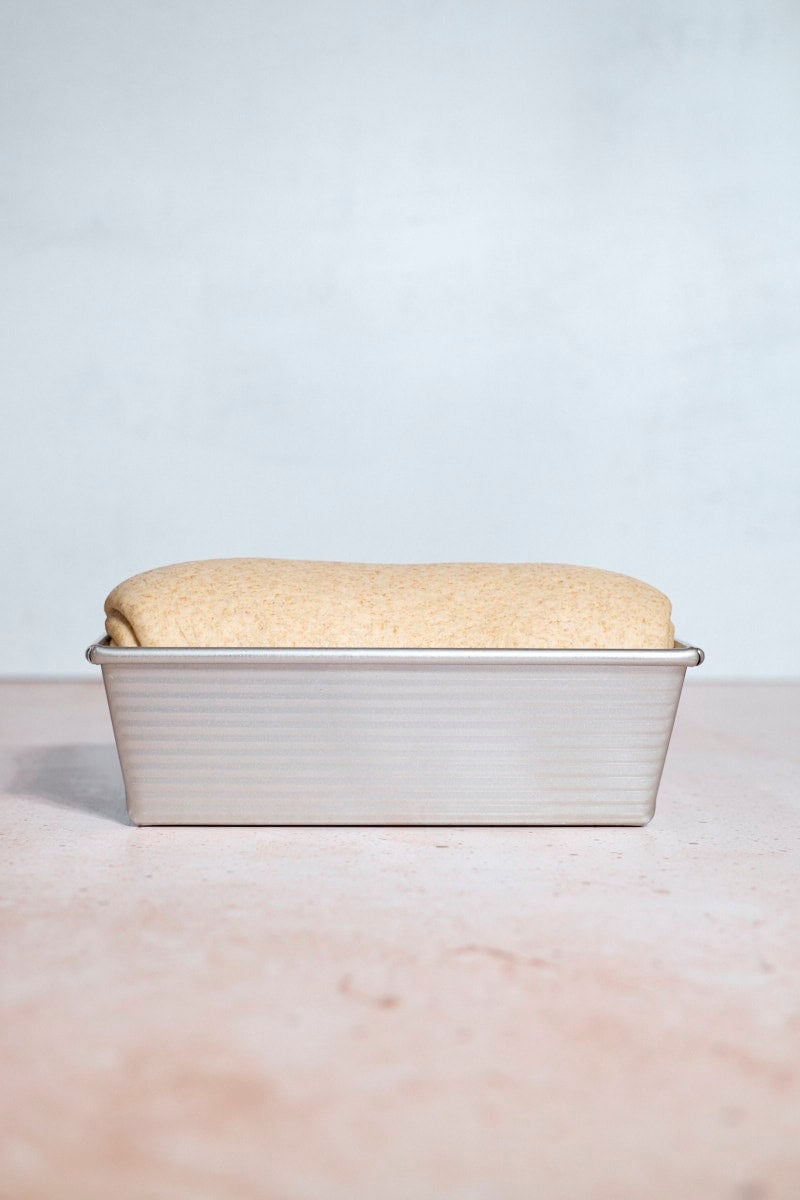
- Step 7: Cover with greased plastic wrap and let rise until the dough is about 1 ½ inches above the edge of the pan.
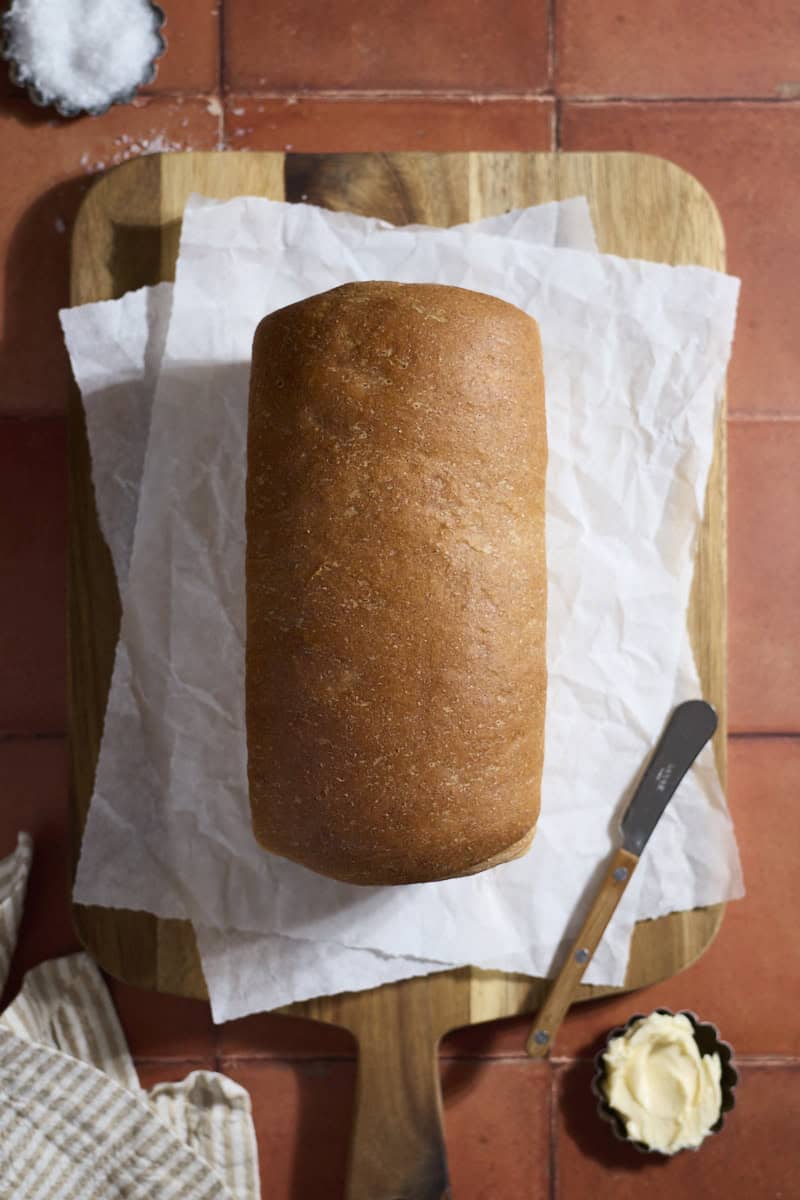
- Step 8: Bake until golden brown and the internal temperature of the loaf reaches 190 degrees F. Brush the crust with melted butter while warm. Let the loaf cool for at least an hour before slicing.
Expert Baking Tips
- Make sure to knead the dough long enough. It's important the dough is completely smooth and soft before the first rise, and that you knead long enough to activate the gluten (this is especially important when using whole wheat flour!). Don't worry about kneading too long. If in doubt, knead a bit more!
- The dough should not be sticky, or hard. After kneading, the dough will be very soft and smooth. If it's sticky or feels tough / hard, add more flour or water (1 teaspoon at a time) to reach your desired consistency.
- When rolling out the dough, make sure it's not wider than the width of your loaf pan. If it's too wide, you'll end up with an unevenly shaped final loaf.
- When shaping the loaf, roll it up like a burrito. You don't need to do anything fancy. It doesn't need to be tight (but you don't want it to be too loose, either). Just make it a solid roll and set it seam-side down in your loaf pan.
- Very loosely cover the loaf for the second rise. You can grease your plastic wrap so it doesn't stick to the dough, but also place it very loosely. You don't want to restrict the dough in any way while it is rising so you get an even shape.
- Bake until the internal temperature of the loaf reaches 190 degrees (F). It can be hard to tell from the outside when a loaf is finished. Take the internal temperature with a kitchen thermometer and you'll be certain!
Shaping the Loaf
When it comes to shaping your loaf, we want it to be as even end-to-end as possible. We don't want it to be leaning to one side, big on one side and small on the other, or anything else in between! There are a few things to keep in mind:
- Keep in mind the width of your pan - When you're rolling out the dough, remember that you don't want to roll your dough to be wider than the width of your pan. If it is, the loaf will be crunched in the pan and bigger on the ends.
- Roll it like a burrito - The dough doesn't need to be tight, but we also don't want it to be too loose. Think about it like rolling a burrito. You want it to be tight enough to keep the fillings in there, but not so tight that you tear your tortilla!
- Place the dough seam-side down - Place the dough seam-side down in your loaf pan. You don't need to do anything with the ends. They'll press against the ends of the pan and seal up on their own!
- Cover loosely for the second rise - Cover the dough loosely with greased plastic wrap (or a kitchen towel). You don't want this to stick to the dough, but you also don't want it to restrict your dough in any way while it's rising. This will help to give you an even final loaf shape after baking!
Whole Wheat vs. All-Purpose Flour
Whole wheat flour has additional nutritional benefits compared to all-purpose flour. According to an in-depth article by The Spruce Eats, whole wheat flour has a much higher fiber content than AP flour. It also has additional vitamins, including B-1, B-3, and B-5, while still having the same calories as AP flour.
This recipe uses 50% whole wheat flour and 50% AP flour by weight. You'll notice that the metric measurements for the flours are the same, but the cup measurements are different (1 ½ cups AP flour and 1 ⅔ cups whole wheat flour). This is because whole wheat flour is lighter in weight than AP flour. I highly recommend using a kitchen scale to weigh at least the flours and sourdough discard in the recipe, if not all the ingredients.
Storage
Room Temperature Storage: Once the loaf has cooled completely, store this sandwich bread in an airtight bag or container at room temperature for up to 3 days.
Freezer Storage: Once the loaf has cooled completely, place it in a freezer-safe plastic bag or container and remove as much air as possible. Freeze for up to 2 months. This will work for either the whole loaf, or with individual slices.
- Thawing individual slices: You can let the slices thaw at room temperature until no longer cold, or you can pop them in the toaster to warm them up.
- Thawing the whole loaf: When you're ready, let the bread thaw at room temperature until no longer cold. You can refresh the bread by reheating it in an oven at 350 degrees F until it's warmed through. Slice and serve.
Recipe FAQs
Yes, you can! To do so, omit the yeast and replace the sourdough discard with active sourdough starter (200g). You will also need to increase the rise times. You might also want to try my Sourdough Discard Sandwich Bread as an option that does not use whole wheat flour.
Not with the recipe as written; there are a few changes that would need to happen. You'll need a bit more liquid in the dough, and likely some citrus juice to combat the bitterness that you can taste in some whole wheat breads. It's something I plan on testing further, so stand by here!
There are a lot of methods to this as well, but I'd recommend visually looking for the dough to have risen about 1 - 1 ½ inches over the edge of the loaf pan. Once it reaches that height, it's generally ready to bake. King Athur has a great article with other tips, if you're interested.
There are a lot of different techniques here, but I'd recommend measuring the internal temperature of your loaf with a thermometer. A finished baked loaf should reach an internal temperature of 190 degrees (F). King Arthur Baking also has a great article on other techniques here.
More Sourdough Discard Bread Recipes


If you tried this Sourdough Discard Whole Wheat Sandwich Bread or any other recipe on my website, please leave a star rating and let me know how it went in the comments below. I'd love to hear from you! Happy Baking!
Sourdough Discard Whole Wheat Sandwich Bread
Ingredients
- ½ cup + 2 teaspoons water warmed to 110℉
- ¼ cup + 1 Tablespoon non-dairy or regular dairy milk warmed to 110℉
- 1 Tablespoon honey
- 1 ¼ teaspoons active dry yeast
- 1 ½ cups all-purpose flour
- 1 ⅔ cups whole wheat flour
- 200 grams (about ¾ cup) sourdough discard unfed, at room temperature
- 1 ½ teaspoons kosher salt
- 4 Tablespoons unsalted butter melted, plus more for finishing
Instructions
- Combine warm water and milk in the bowl of a stand mixer fitted with a dough hook attachment*. Add the honey, then sprinkle the active dry yeast on top. Let sit for 5 minutes until the yeast is foamy.If the yeast does not foam, the yeast is dead and you will need to start over with fresh yeast.
- Add both flours, sourdough discard, and salt. With the mixer on low speed, slowly pour in the melted butter. Mix until a rough dough forms. It should wrap around the dough hook and pull away from the sides of the bowl.
- Transfer the dough to a smooth work surface. Knead for 4-5 minutes until a soft, smooth dough forms. If the dough seems sticky or stiff, add more flour or water (1 Tablespoon at a time) to reach your desired consistency. Place the dough in a large oiled bowl and cover with plastic wrap or a clean kitchen towel. Let rise for 1 ½-2 hours until doubled in size.
- Grease a 9x5-inch loaf pan. Set aside.
- Place the dough on a lightly floured work surface. Use a rolling pin to roll the dough into a 9x18-inch rectangle. It's important that this is only as wide as the width of your loaf pan (9 inches wide for a 9x5-inch loaf pan). From the short side of the rectangle, roll the dough into a log. Think about this like rolling a burrito. Not too tight, not too loose, and the same thickness all the way across (not bigger on one side, etc.). Transfer the dough log into your prepared baking pan, seam-side down.
- Loosely cover the pan with a greased piece of plastic wrap or a kitchen towel. Let rise about 1 ½ hours, until the dough has risen about 1 ½ inches above the edge of the pan. Keep in mind that the dough will not rise much more while it's baking (so you're essentially looking at the final height of your loaf).
- Preheat the oven to 350℉. Bake the loaf for 45-50 minutes until golden brown and the internal temperature of the loaf reaches 190℉. While the loaf is warm, brush the crust with melted butter (optional).
- Let the loaf cool in the pan for about 10 minutes, then transfer to a cooling rack to cool fully (about an hour) before slicing.
Nat says
This is a great recipe.
Can I use sugar instead of honey?
Jessica Vogl says
Yes, that will work!
Christine Gray says
I just made this bread into a cinnamon swirl bread. After first rise, I rolled out dough, brushed with melted butter then sprinkled with 1/3 c brown sugar and then cinnamon. Rolled up tight and baked per recipe. Again great oven spring and wonderful taste!!
Christine Gray says
Hi Jess, I have been looking for a sourdough wheat bread recipe with yeast for awhile. My husband and I are divided on whether white or wheat is better. And I always make 2 loaves. This recipe hit a home run for me. Easy recipe. Faster than recommended rise time.( I proof mine in the oven) High oven spring!!! But best of all, great taste :). I will still need to do the white one for my husband but this one is for me. Inside temp reached 190-200 in one hour. Thank you for sharing this recipe.
Kevin says
Thanks for these recipes. Newbie on sourdough and baking in general, but great bonding experience with my young kids!
Quick question. This receipt and others all call for active yeast. What does the discard do in the recipe if we are using active yeast? Is it mainly the tangy taste?
Jessica Vogl says
Since the discard is inactive, we're using another leavening agent (yeast) for the rise. Alternatively, you could use active sourdough starter instead (and increase the rise times). The purpose of using sourdough discard in this recipe is 1) flavor and 2) so the discard doesn't go to waste!
debbie says
You mention measuring the flours in grams but the recipe says cups. How many grams of AP flour and Whole Wheat. I'm guessing 180 white and 210 whole wheat but want to be sure.
Jessica Vogl says
You can toggle between US Customary and Metric measurements in the recipe card. It's at the top of the list of ingredients.
debbie says
Many thanks Jess - I missed that completely.
Alanna says
Could I use this recipe in a breadmaker machine?
Jessica Vogl says
This article has some great tips for converting recipes to use with a bread machine! https://www.kingarthurbaking.com/blog/2018/04/30/how-to-convert-recipes-to-a-bread-machine
Diana says
Great use of sourdough discard! I am new to sourdough and bread baking in general and I found the instructions easy to follow. I made 2 loaves which came out fluffy and delicious as promised. Thank you for a great recipe!
Sadie says
Excellent use of sourdough discard. The bread is delicious. It's soft, light, and moist, and is great for sandwiches as well as toasted. I added flax seed, black sesame seeds, and a pinch of fennel. Instead of a 9x5 inch pan, I divided the dough into an 820 gram portion for an 8x4 inch pan, and made a large sandwich bun with the remaining dough. Both the loaf and bun had good oven spring.
Amy says
Hi Jess,
You say to increase the rise times if you switch from discard and yeast to an active starter - how long are these time adjustments, exactly? Or what am I looking out for to know when it's ready? Thank you.
Jessica Vogl says
Since this is designed to be a discard recipe, I don't have those times for you. You'd be looking for the visual cues that are mentioned in the recipe (dough doubling in size, reaching the edge of the pan, etc.).
Sonya says
The instructions need to be corrected; there is no granulated sugar in the ingredients list. My yeast was brand new and didn’t foam with honey. So I rolled the dice. It looks beautiful coming out of the oven. Just waiting for it to cool now.
Jessica Vogl says
I apoloogize for that mixup, and thank you for catching that! I've modified the directions now (honey is correct in this recipe). I hope your loaf turned out well!
Jessica Vogl says
The flavor from the honey and wheat combination is a 10/10. Love making this bread for sandwiches!