

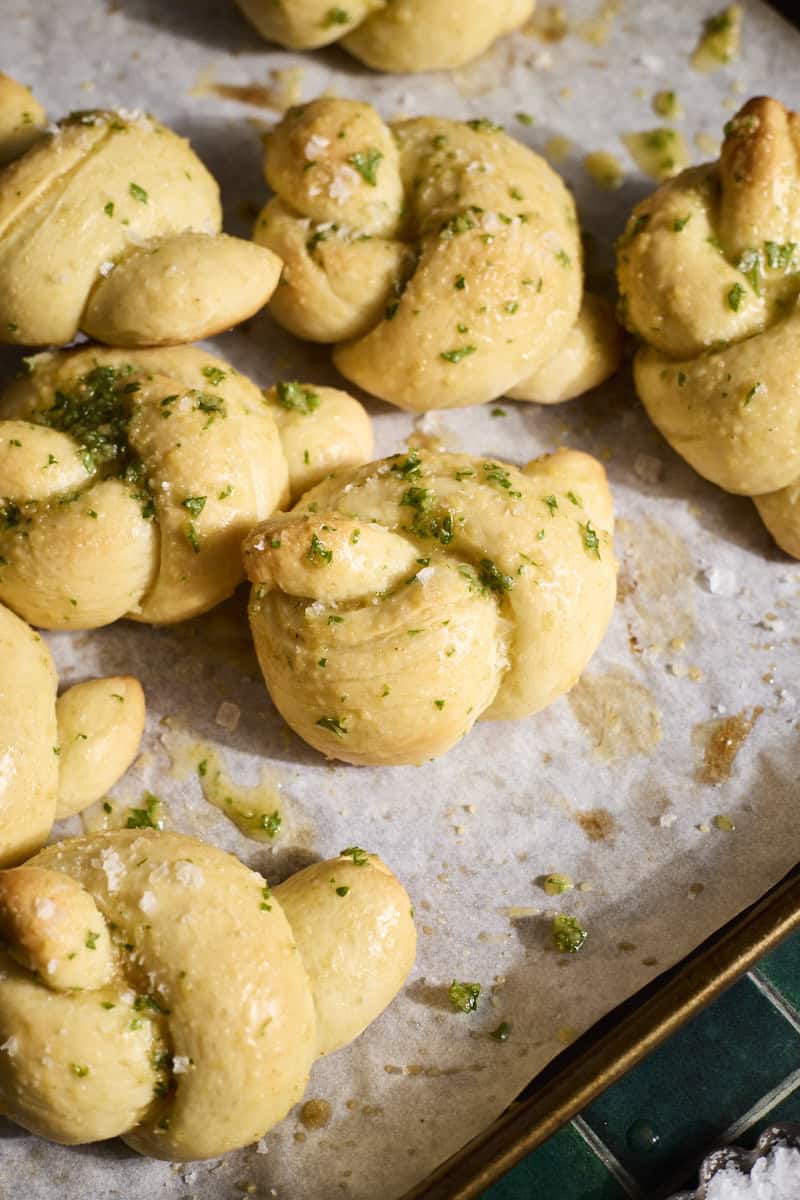
Garlic bread is wonderful in any form, but these Sourdough Discard Garlic Knots make it even more fun. They're buttery, garlicky, and delicious, and the knots are individually sized so you can easily eat one (or a few!) as a snack, appetizer or side dish! Plus, your kitchen will smell absolutely incredible!
Jump to:
Why you'll love this recipe
- These garlic knots are buttery, garlicky and packed with delicious flavor! They're perfect for an appetizer, snack, or as a side dish.
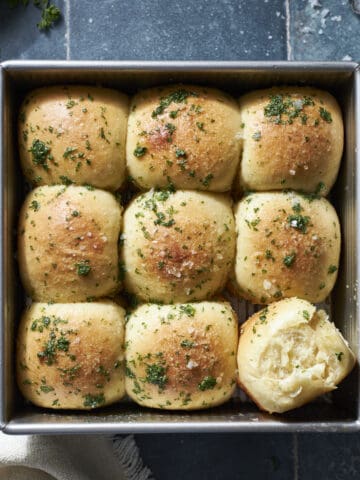
- You might also love these Sourdough Discard Garlic Rolls and this Sourdough Discard Tomato Focaccia.
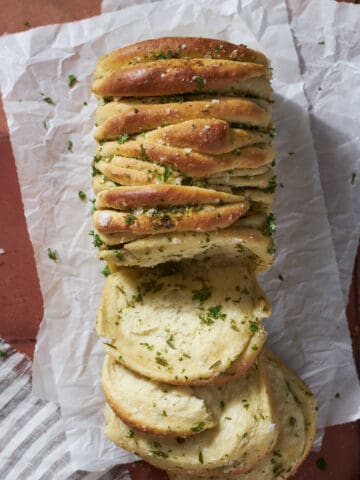
- This is an easy recipe and the irregularity of the knots is part of the charm, so you don't need to aim for perfection.
- If you love an irregular bake, this Sourdough Discard Garlic Pull Apart Bread is the one for you!
- Sourdough Discard Garlic Knots freeze well. You can eat some now, and freeze the rest to enjoy later!
- You can easily modify this recipe to be made with active sourdough starter instead of discard, if you prefer.
Ingredients
There are only a few key ingredients you'll need to bring these Sourdough Discard Garlic Knots together!
- Sourdough discard: The sourdough discard should be unfed and at room temperature for this recipe. This recipe is designed for a sourdough starter with a 1:1 ratio (when you feed your starter, it's with 1 part flour and 1 part water). If your starter uses a different ratio, you may need to adjust some of the ingredients in this recipe.
- Learn more about how to make a sourdough starter.
- Parsley: I'd highly recommend using fresh parsley rather than dried, if possible.
- Flaky sea salt: This is the little *chef's kiss* that really finishes these knots! I like to use Maldon Sea Salt.
See full recipe below for detailed directions.
Substitutions & Variations
This is a very adaptable recipe and below are a few easy substitutions and variations you can try.
- Use active sourdough starter - If you'd like to use active starter instead of discard, you can. To do so, omit the yeast and replace the sourdough discard with active sourdough starter (200g). You will also need to adjust the rise times.
- Use different herbs - Try fresh rosemary, or a mix, in place of the parsley!
- In a rosemary mood? Try these Sourdough Discard Rosemary Salt Bagels.
- Use whole garlic - If you'd rather use fresh garlic cloves instead of garlic powder, you can. I recommend doing this for the topping, not in the dough (raw garlic can hinder the dough rising). Remember, one fresh garlic clove is equal to about ¼ teaspoon of garlic powder.
- Add cheese - If you're interested, sprinkle the garlic knots with ¼ cup of shredded parmesan cheese before baking or just before serving.
How to Make Sourdough Discard Garlic Knots
As long as you're patient with the rises, you'll have buttery, garlicky, delicious garlic knots ready to eat soon! The full recipe with detailed directions is at the bottom of this post.
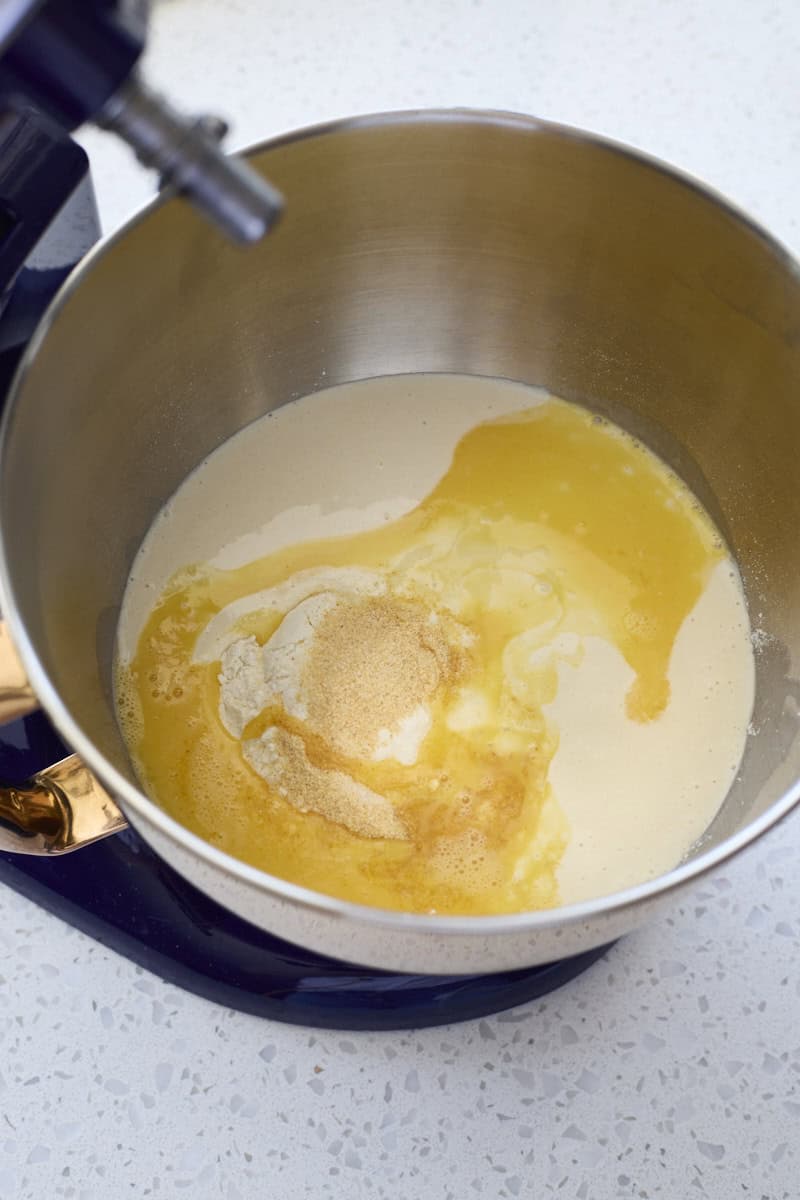
- Step 1: Combine all dough ingredients in the bowl of a stand mixer. Mix until a shaggy dough forms.
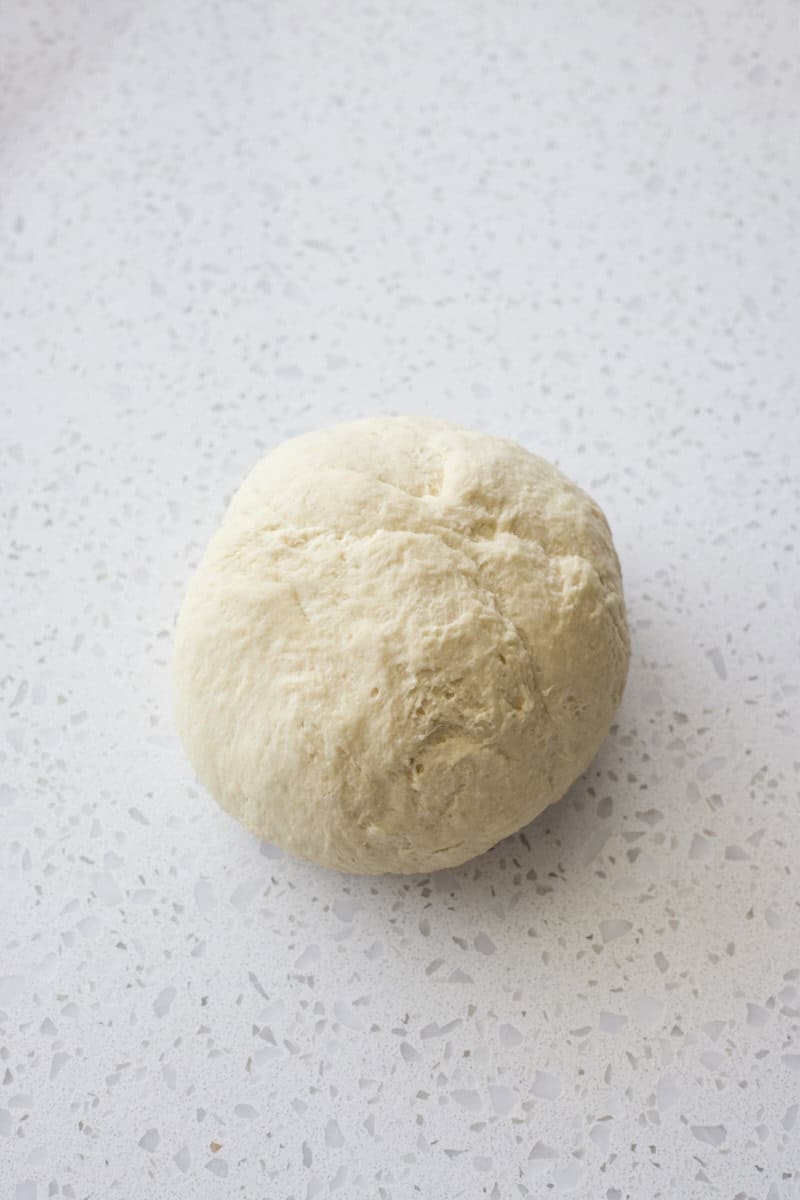
- Step 2: Transfer the dough to a work surface and knead until a smooth, soft dough forms. Transfer the dough to a large, oiled bowl and let rise for 90 minutes.
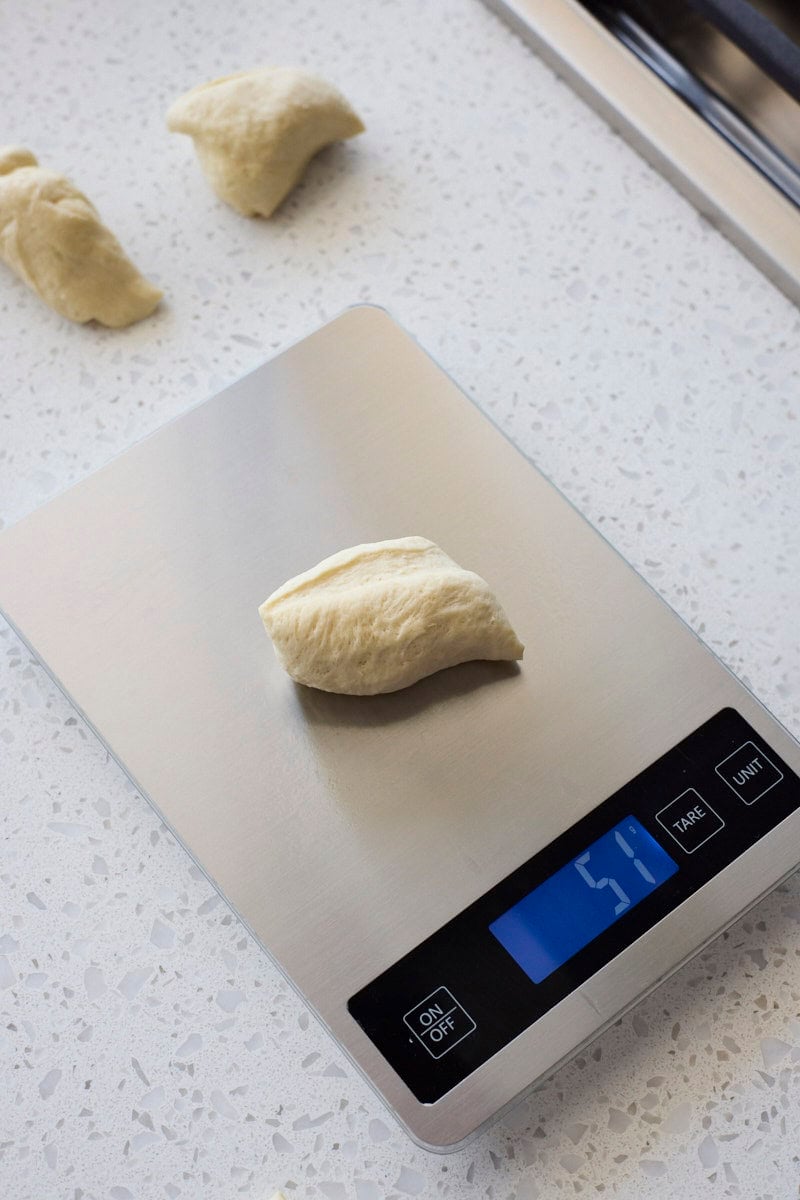
- Step 3: Divide the dough into 16 equal-size pieces. This doesn't have to be exact, but I find using a kitchen scale is much easier!
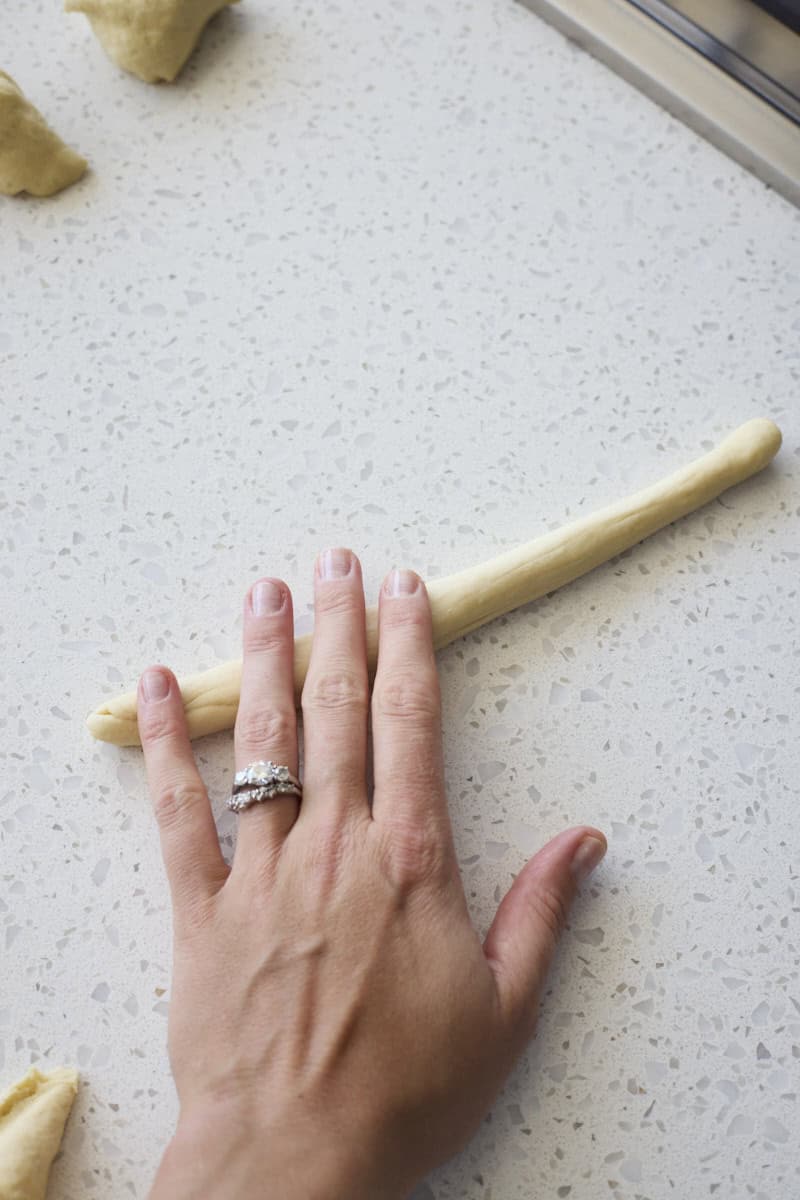
- Step 4: Roll each piece of dough into a rope about 10 inches long.
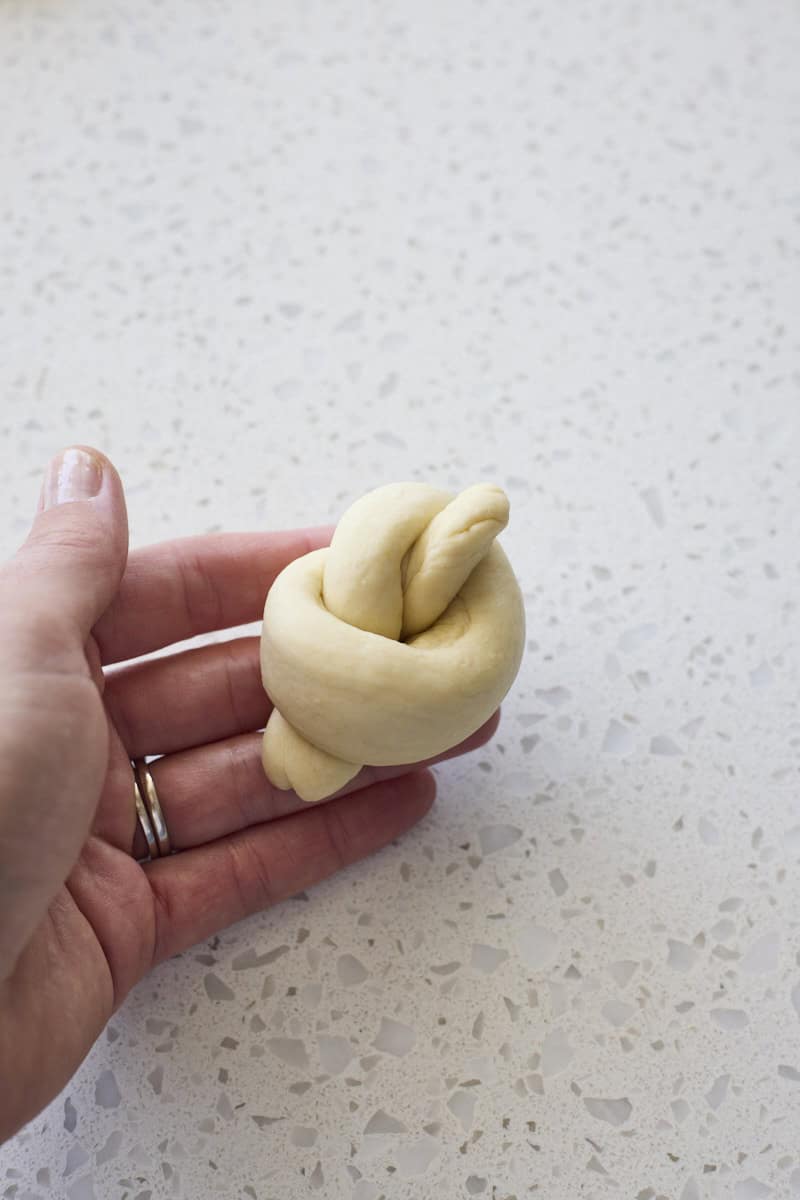
- Step 5: Fold the rope into a loose knot. There doesn't need to be any tension on the dough here!
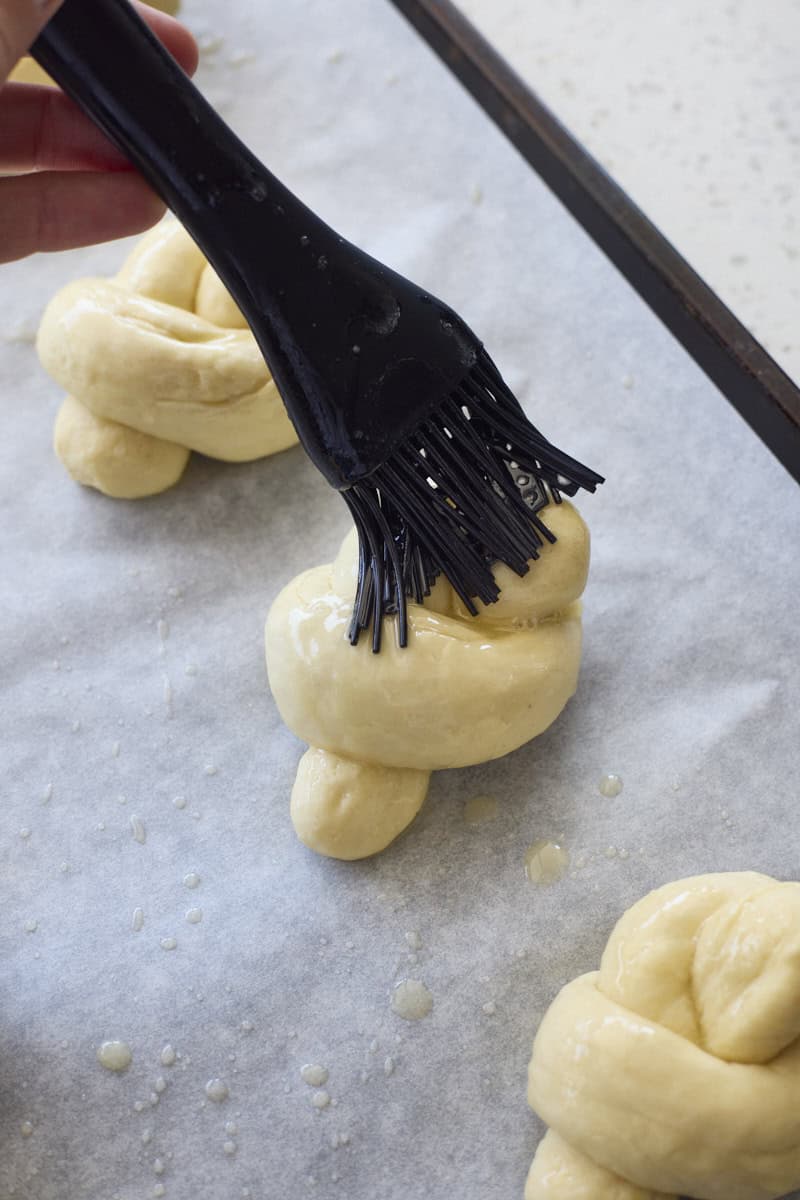
- Step 6: Let the knots rise for another 30 minutes, then brush with melted butter. Bake as directed.
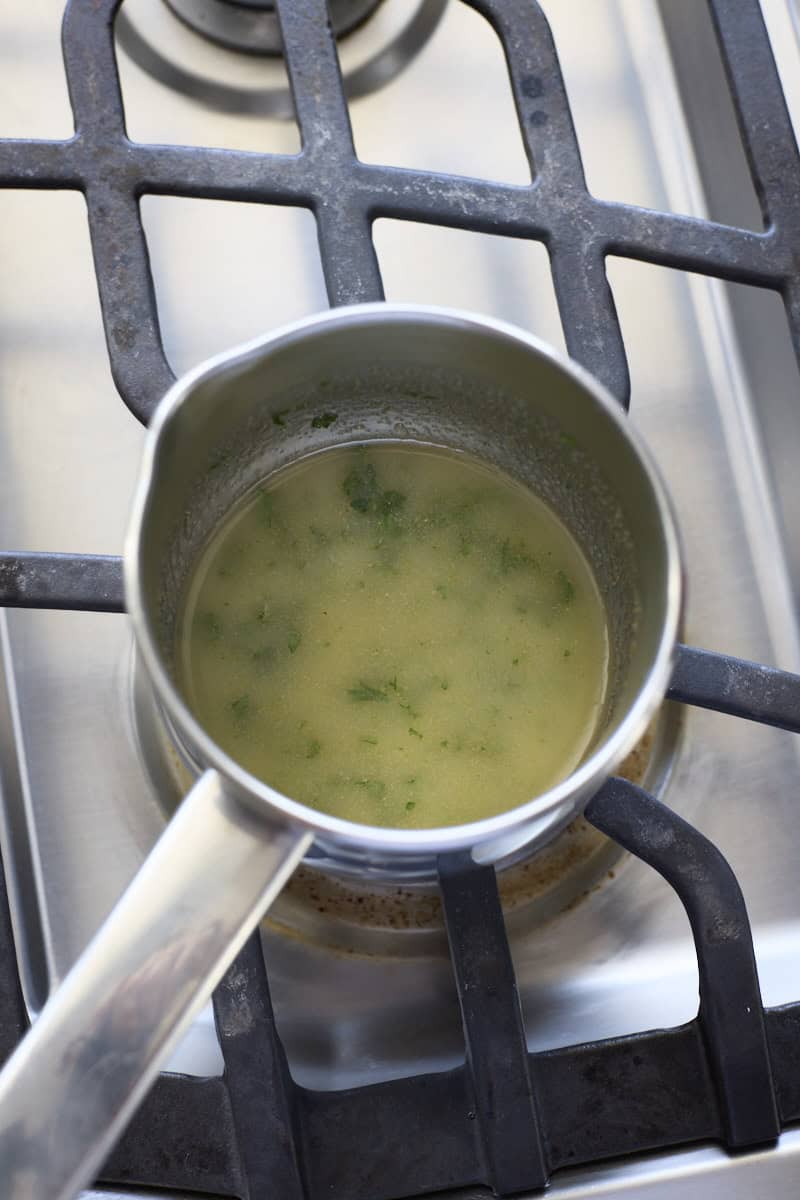
- Step 7: While the rolls bake, combine the ingredients for the melted butter topping.
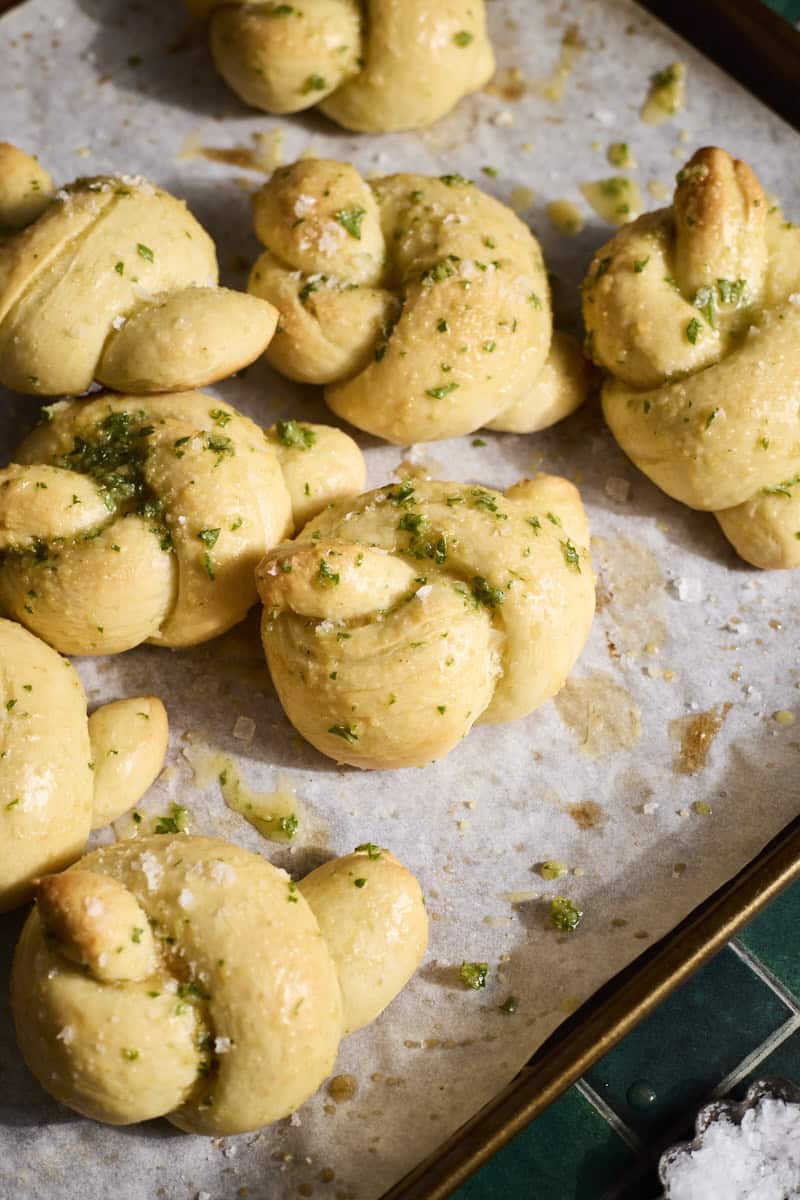
- Step 8: While the knots are still warm from the oven, brush with the melted butter mixture. Sprinkle with flaky sea salt and serve.
Expert Baking Tips
- Make sure to knead the dough long enough. The dough should be completely smooth and soft (but not sticky). If your final garlic knots look a bit shaggy or jagged, you likely didn't knead the dough long enough.
- You don't need to have any tension when you tie the knots. You're really laying the dough in a knot shape, rather than actually making a tight knot! If there is tension on the dough, it will likely break at that tension point while baking.
- Shaping the knots does not need to be precise. The irregularity is part of the charm! If you have some "long pieces" after tying the knots, you can always tuck them under the side for a slightly different shape.
- Add the melted butter topping while the knots are still warm. This will help those flavors really soak into the dough!
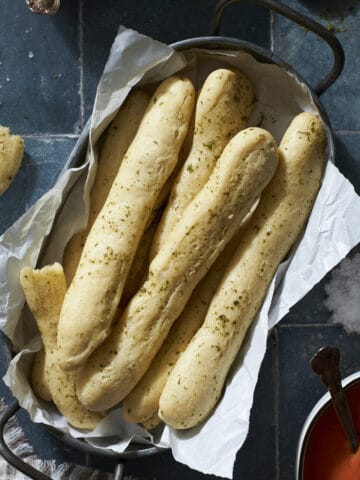
- Looking for other sourdough discard appetizer recipes? Try these Sourdough Discard Breadsticks, this Sourdough Discard Jumbo Pretzel, and these Sourdough Discard Miniature Pizzas!
Storage
Room Temperature Storage: Garlic knots are best fresh and warm, right from the oven! If you plan to eat these Sourdough Discard Garlic Knots within 1-2 days, store them in an airtight container at room temperature. You can reheat them in the microwave for about 30 seconds to make them warm and soft again.
Freezer Storage: Once fully cooled, transfer the knots to an airtight container or freezer-safe bag and freeze for up to 3 months. When you're ready to serve, let the rolls thaw to room temperature, then reheat in the microwave for 30-60 seconds to make them warm and soft again.
Recipe FAQs
You can. I do strongly recommend using fresh parsley if possible, but if you're in a pinch, dried would work as well.
Yes, definitely! You can shape them however you like.
Yes. If you'd rather use fresh garlic cloves instead of garlic powder in the topping, you can. I don't recommend using raw garlic in the dough as it can hinder the dough rising. Remember, one fresh garlic clove is equal to about ¼ teaspoon of garlic powder.
More Sourdough Discard Appetizer Recipes

If you tried these Sourdough Discard Garlic Knots or any other recipe on my website, please leave a ⭐ star rating and let me know how it went in the comments below. I'd love to hear from you! Happy Baking!

Sourdough Discard Garlic Knots
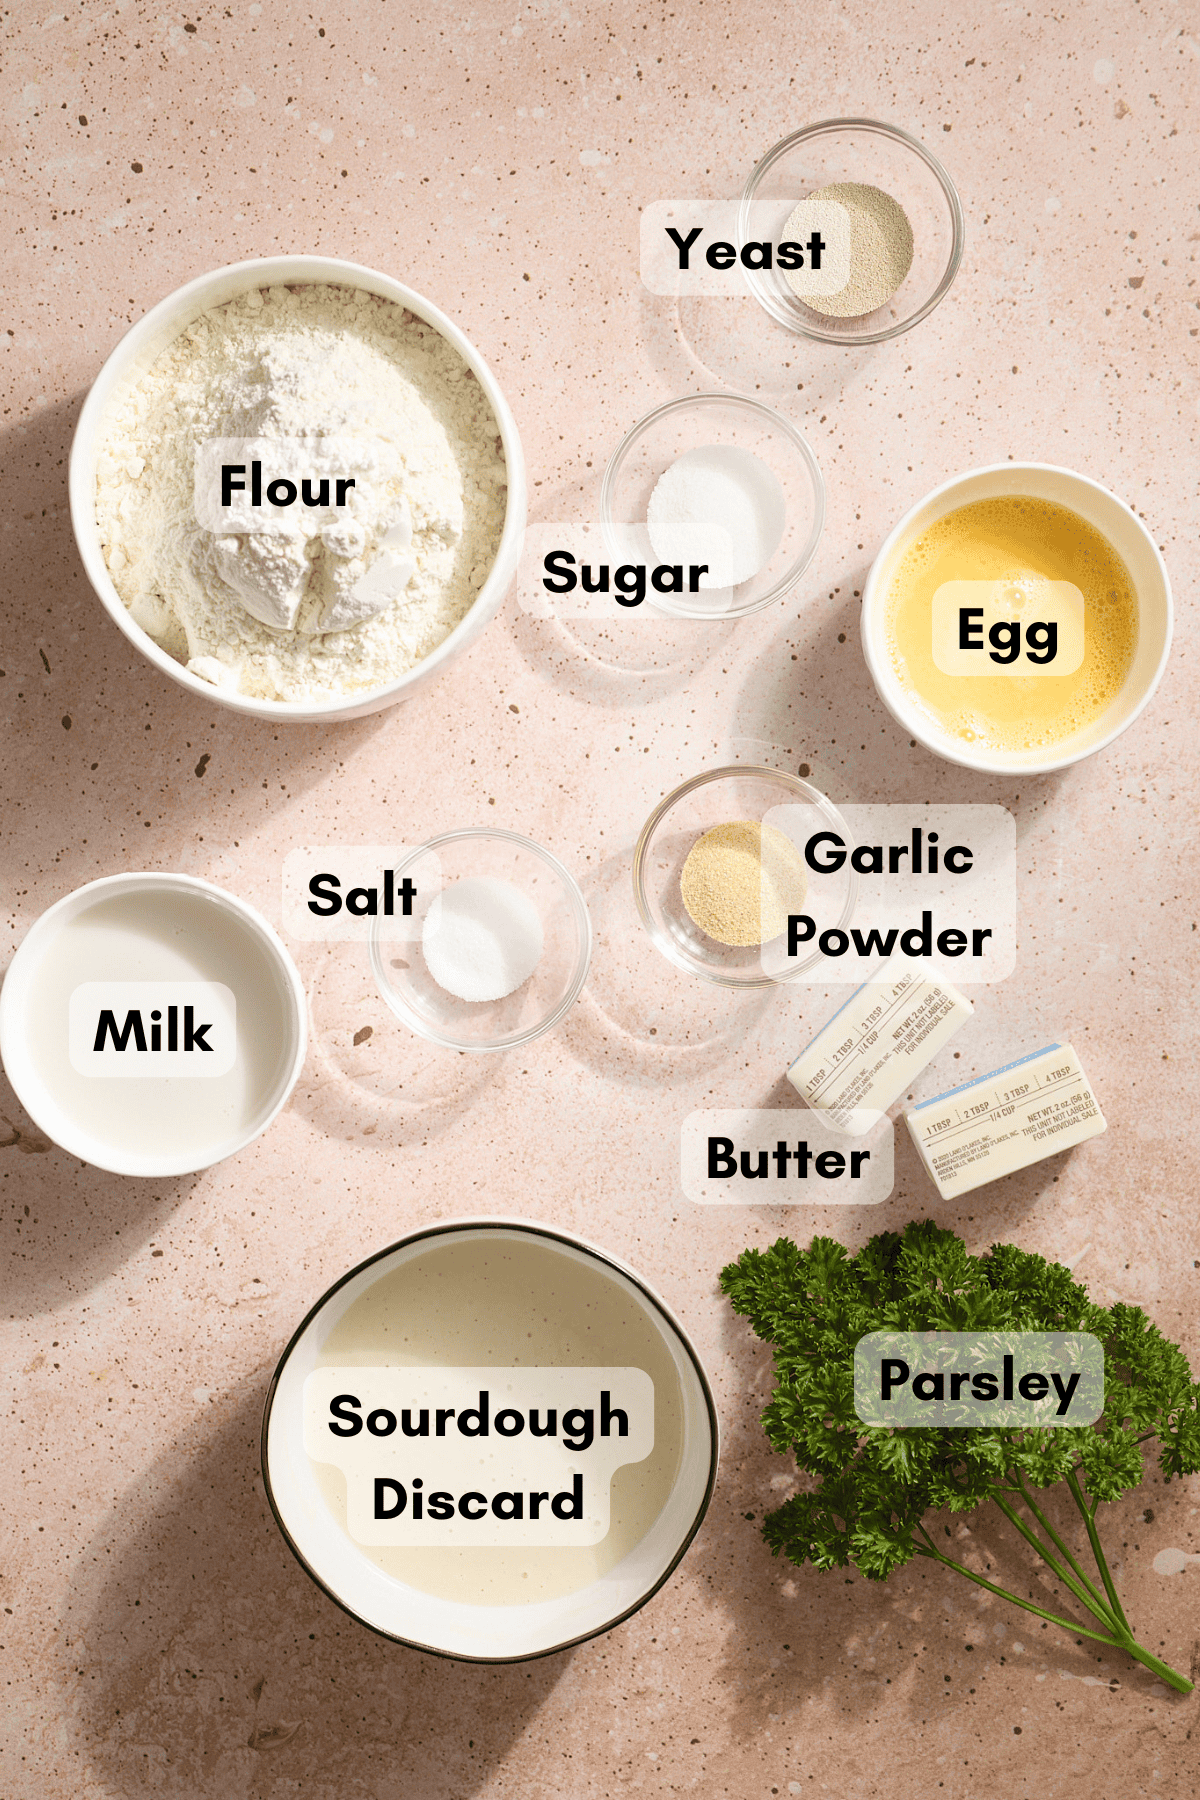
Ingredients
For the Dough
- ½ cup + 2 teaspoons non-dairy or regular dairy milk warmed to 110℉
- 2 teaspoons granulated sugar
- 1 ½ teaspoons instant yeast
- 2 ¾ cups all-purpose flour
- 200 grams (about ¾ cup) sourdough discard unfed, at room temperature
- 1 egg lightly beaten
- 1 ½ teaspoons garlic powder
- 1 teaspoon kosher salt
- 4 Tablespoons unsalted butter divided
For Topping
- 5 Tablespoons unsalted butter melted
- 1 Tablespoon fresh parsley chopped
- 2 teaspoons garlic powder
- flaky sea salt
Instructions
- Combine the warmed milk, granulated sugar and instant yeast in the bowl of a stand mixer*. Add the flour, sourdough discard, beaten egg, garlic powder and salt. With the mixer on low speed, slowly add 2 Tablespoons of melted butter. Increase speed to medium and mix until a shaggy dough forms.
- Transfer the dough to a smooth work surface and knead until a smooth dough forms, about 3-4 minutes. The dough should be smooth and slightly tacky (but not sticky). If needed, add more flour or milk (1 Tablespoon at a time) to reach your desired consistency.
- Transfer the dough to a large greased bowl and cover with plastic wrap. Let rise for about 90 minutes, or until doubled in size.
- Line two half-sheet baking pans with parchment paper and set aside.
- Turn the dough onto a smooth work surface and divide into 16 equal-sized pieces. If you want identical pieces, weigh the dough and divide that number by 16 to determine how much the dough for each roll should weigh (mine are about 51g each).
- Roll each piece of dough into a rope about 10 inches long. Fold the ends over each other and "tie" into a loose knot. There should not be any tension on the dough: you're really placing it in the shape of a knot. Place on the parchment paper-lined baking sheets. Repeat until you have shaped all 16 garlic knots. Cover the baking sheets with plastic wrap or a clean kitchen towel and let the dough rise for 30 minutes.
- Preheat the oven to 375℉. Brush the knots with 2 Tablespoons melted butter. Bake for 16-18 minutes until just beginning to brown.
- While the knots bake, make the topping. Melt 5 Tablespoons unsalted butter. Remove from heat, then add the chopped parsley and garlic powder and stir to combine. Remove the knots from the oven and immediately brush with the parsley and butter mixture. Sprinkle with flaky sea salt and serve while warm.
Paula W says
These turned out amazing. I didn't realize how easy it was to form the knots. The taste is amazing! I will definitely make them again
Jessica Vogl says
So glad to hear it! Yes, the knots are fun (and honestly, you can make them any shape that you like!).
Mackenzie Pelsang says
The best!!! I am at the early stages with my sour dough and needed recipes to discard. This was so yummy!!! Will be re-using this recipe in the future. Also the first time my dough was tacky, but not sticky which was an absolute dream. Usually it’s a nightmare with how much mess it is even when I do add extra flour. The ratio was perfect and also perfect recipe when I have so much sour dough starter that I need to use
Jessica Vogl says
So glad you loved it! Hopefully you'll get to try a few of my other discard recipes as well. Welcome to the sourdough world!
Olga says
Why my dough never rises? What do I do wrong?
Jessica Vogl says
Are you using warm milk? And room temperature discard? Is your yeast very old (possible it's no longer alive)? And is the temperature in your house cold? All of these factors play a huge role in how long it takes for dough to rise.
Sarah says
Turned out great ! Devoured by a group of teens. I o my had 150 g discard so u added another 1/4 teaspoon yeast as a just in case and it all turned out ok.
Oanh says
I just made these, and they turned out absolutely incredible! Thank you so much for sharing this recipe!!!
Ellen says
Just took them out of the oven. It did take a little longer to rise due to the house being cooler than normal, but that was ok. came out SOOO good! I will be making them more often as I keep a sour dough starter going constantly. Thank you for your recipes!
Jessica Vogl says
Love to hear it! Thanks, Ellen!
Jennifer says
Add 1/2 block of extra sharp cheddar to the mix and it tasted just like a Red Lobster roll
April Blevins says
I made these today. they turned out really great. thanks
leah says
Followed the recipe exactly and came out perfect! They’re like the Dominos ones but way less greasy.
I made them into knots, and then froze half of them at stage. Hopefully I’ll be able to pull them out, let them rise at room temp and bake.
Shelly says
I just made them tonight and froze some with the same method. Have you tried them from the freezer yet? If so, were they still good? Thanks.