

Dried Sliced Oranges are one of my favorite things to make for the holidays. They're beautiful on their own and great for decorations (like garlands, filling jars for a cocktail station, or even decorating wrapped gifts). They're also wonderful garnishes for cocktails and mocktails, they make a great hostess gift, and they ship well. An all-around holiday win!
Make one batch at the beginning of the holiday season, and you can use them all winter long!

Jump to:
Why you'll love this recipe
- Dried Sliced Oranges are easy to make and very versatile: use them for decoration (garlands, wreaths, tabletop), gift wrapping, in jars at a cocktail station, or to garnish your favorite cake or cocktail!
- Try them as a garnish with this Blood Orange Old Fashioned!
- You can dry the oranges in the oven or in a dehydrator.
- They store for a long time (up to a year) so you can make a batch at the beginning of the holidays and use them all season!
- Looking for a few other festive holiday recipes or projects? Try these Sourdough Discard Salt Dough Ornaments, Candied Orange Slices, and Homemade Vanilla Extract.
Ingredients
Really, the only things you'll need for this recipe are the oranges!
That said, it does make a difference what kind of orange you use.
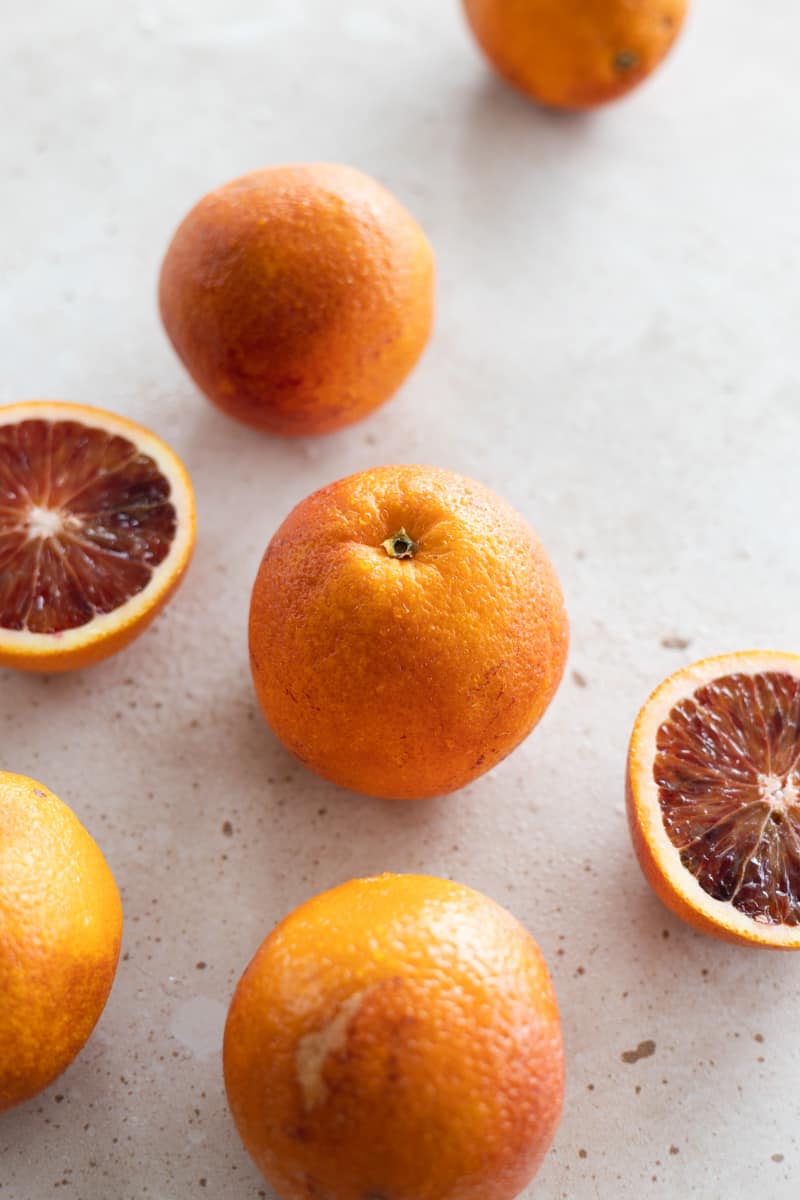
- Consider your drying space: These oranges will be thinly sliced and spread on baking sheets (for oven drying) or racks (for dehydrator drying). Either way, you'll only have a certain amount of space that you can use. I recommend using smaller oranges like Blood Oranges, Cara Cara oranges, or Tangelos as they're a great size for drying.
- Consider your color: Do you want the oranges to be orange? Red? Other? Blood oranges are great, but if you're going for that classic orange color, pick a small orange like a Tangelo or Cara Cara orange. You can also make this recipe with other citrus fruits like lemons and limes!
See full recipe below for detailed directions.
Substitutions & Variations
This is a very adaptable recipe and below are a few easy substitutions and variations you can try.
- Use a different type of orange: Try Blood Oranges, Cara Cara oranges or Tangelos for a different variety. Any small orange will work well here!
- Use other citrus fruits: Throw in some other citrus! Dried lime or lemon slices are also beautiful and can be used in a very similar way to dried oranges. This is great if you're garnishing a cocktail or mocktail station.
- Dip them in chocolate: These Dried Sliced Oranges are edible! If you want to eat them, try making them more decadent by dipping them in dark chocolate.
- Make Candied Orange Slices: If you're looking for more of a sweet treat (and less of a decoration), these are a great option!
I have not tested this recipe with other variations, but if you do, let us know how it turns out in the comments!
How to Make Dried Sliced Oranges
There are just a few key steps and you'll have Dried Sliced Oranges in no time! The full recipe with detailed directions is at the bottom of this post.

- Step 1: Thoroughly wash your oranges. You're keeping the peel (and it is edible), so you want to make sure they're clean!
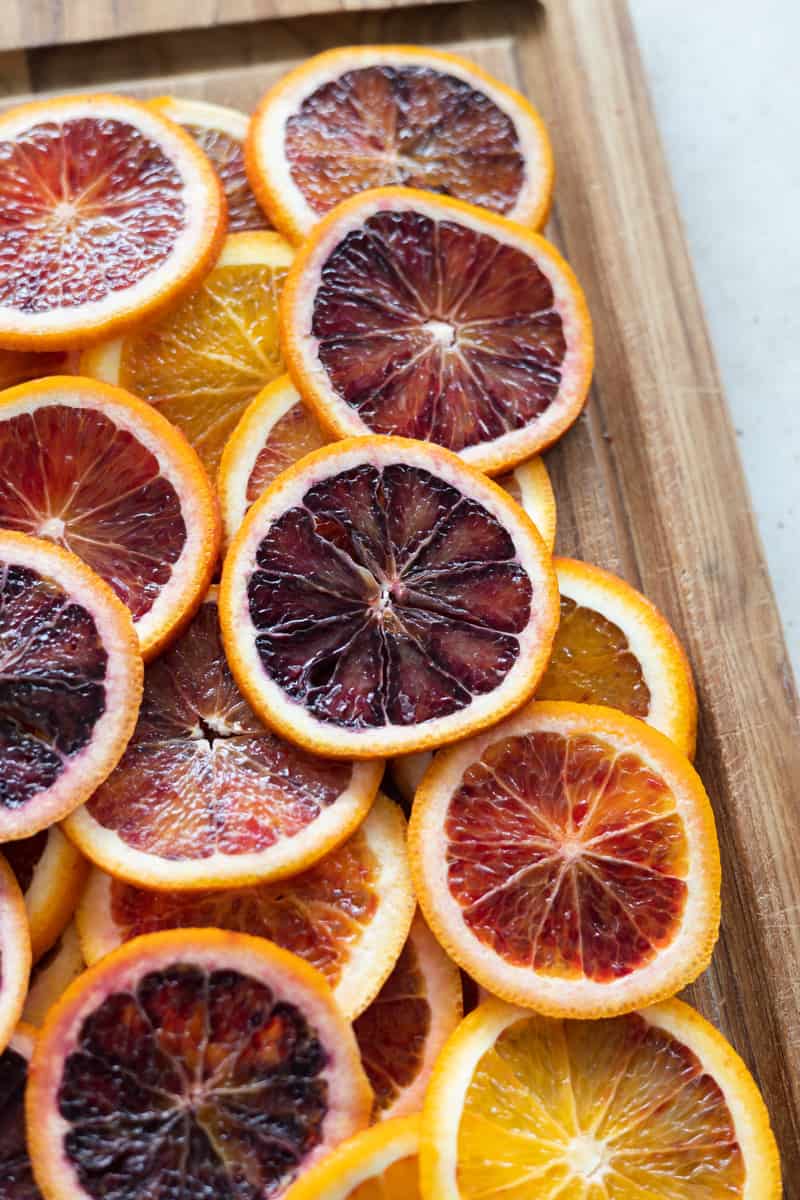
- Step 2: Use a mandoline (or a very sharp knife) to slice the oranges to approximately 3-5mm. Thicker slices will take longer to dry. Blot the slices with a paper towel to remove excess liquid.

- Step 3: For oven drying: Spread the slices on a parchment paper-lined baking sheet. Slices may be touching, but should not overlap. For dehydrator drying: Evenly spread the slices on the drying racks. They should not overlap.
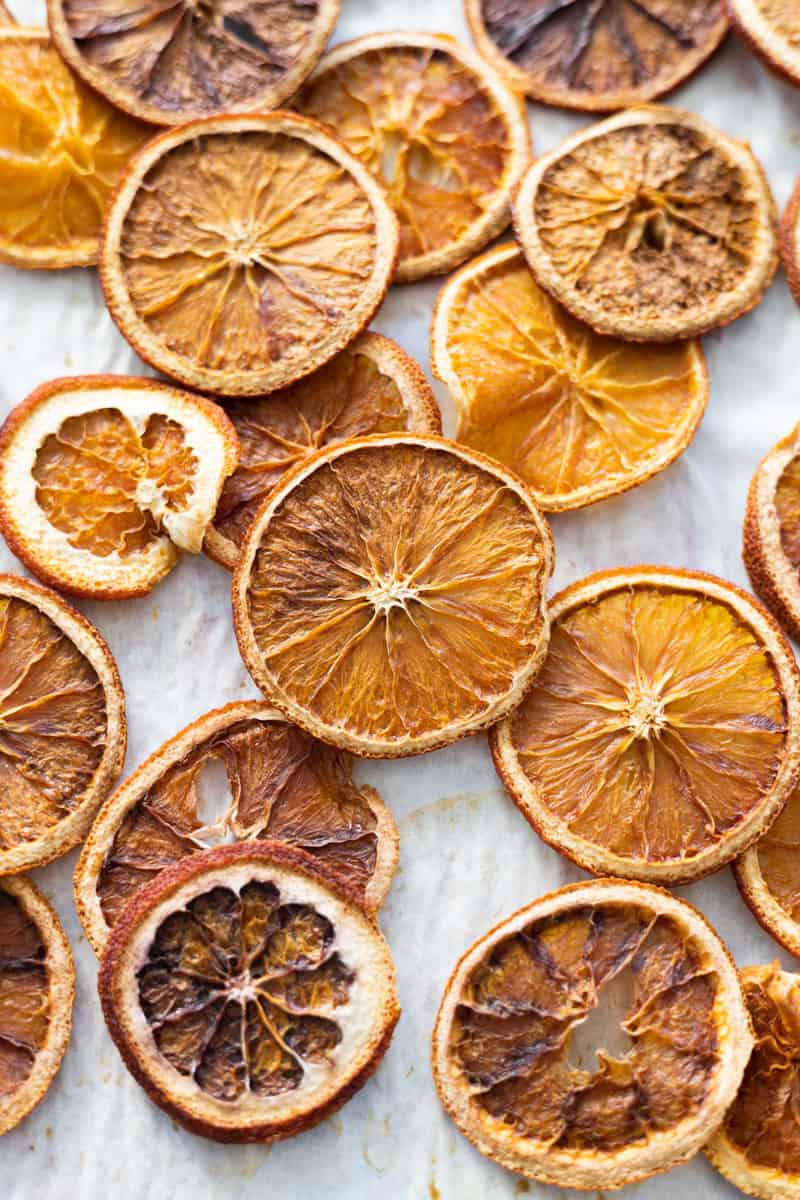
- Step 4: For oven drying: Bake for 3-4 hours, turning every hour until thoroughly dried and crisp. For dehydrator drying: Set the dehydrator to 135°F and dry for 4-8 hours. Start checking after 2 hours to see if they've thoroughly dried.
Expert Baking Tips
- Use a mandoline slicer to cut the oranges. This will help you achieve thinner slices that are all uniform and will dry at the same time. It's way easier than using a knife!
- Dry these oranges in the oven or in the dehydrator. The oven is a quicker drying method, but it does still take a few hours. I like to leave my oven open for other baking, and let these dry in the dehydrator (ideally overnight!).
- The time needed for drying will depend on the thickness of your orange slices. Whether you're using the oven or a dehydrator, you want the slices to be completely dried and hard. Flip and check the slices often to see if they've thoroughly dried.
- Make these at the beginning of the holiday season and then store in an airtight container. That way you can use them at any time during the coming months.
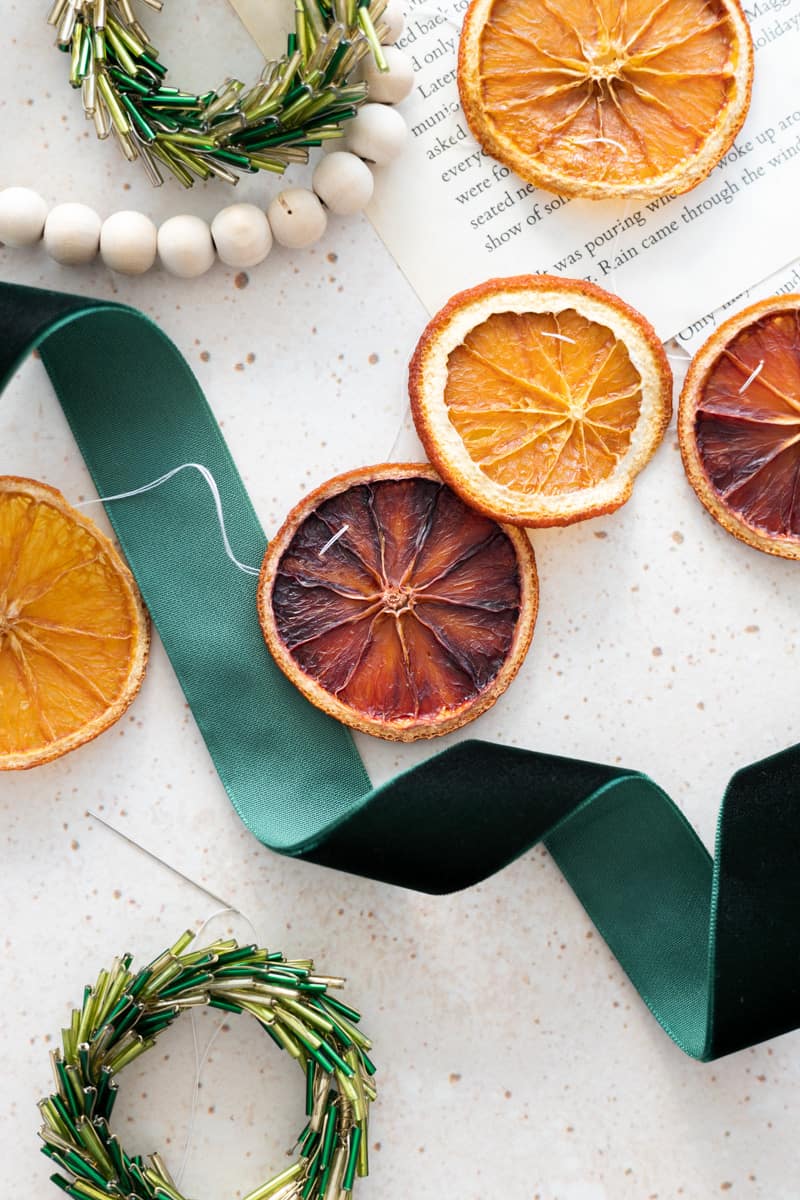
- Use these Dried Sliced Oranges for holiday decorations, gift wrapping, cocktail and cake garnishes, and more!
What to Do with Dried Sliced Oranges
Dried Sliced Oranges are very versatile and can be used in many ways.
- Give as a gift: Dried Sliced Oranges are a great hostess gift or stocking stuffer. They also ship well, if you need to ship a gift package!
- Use as a decoration: These are great for decorations! Make a table centerpiece or hang on wrapped packages. You might also like these Sourdough Discard Salt Dough Ornaments.
- Make a holiday garland or wreath: Dried Sliced Oranges are easy to string together to create a garland, or to add as a wreath decoration.
- Use as a cocktail garnish: These are great to use as cocktail garnishes and instantly elevate any cocktail. Try this Blood Orange Old Fashioned and top with a Dried Sliced Orange!
- Eat for dessert: These are edible and great to dip in chocolate. They are also beautiful on a holiday charcuterie board or in a cookie box!
Storage
Room Temperature Storage: Once the oranges are dried, you can keep them for up to a year! Store Dried Sliced Oranges in an airtight container or bag, and pull them out whenever you need. If you're making these for decorations (like a garland), you'll likely be able to keep that garland and use it again next year.
The only issue with storing Dried Sliced Oranges is if they're not completely dried, or if they get wet. If there is still any moisture in the slices, they will mold. Make sure they are thoroughly dried before storing.
Recipe FAQs
Any kind of oranges will work. I find smaller oranges (or other citrus) generally work better as you can fit more slices on your baking sheets or in your dehydrator.
If you use large oranges, it will still work, but you will quickly run out of space on your baking sheets for drying. I recommend Blood Oranges, Cara Cara oranges, or Tangelos.
Drying time will vary based on the thickness of your orange slices and the drying method that you use. Also, make sure to blot the sliced oranges with a paper towel to remove any excess moisture before beginning the drying process.
Yes, the orange slices will shrink as they dry, so they'll be a bit smaller than when they are sliced.
When finished, the slices will be completely dry and hard. They should not feel wet or sticky at all. If you're unsure, let them dry a little longer!
More Holiday Baking Ideas


If you tried these Dried Sliced Oranges or any other recipe on my website, please leave a ⭐ star rating and let me know how it went in the comments below. I'd love to hear from you! Happy Baking!

Dried Sliced Oranges
Equipment
- Dehydrator if dehydrating
- baking sheets if oven-drying
- Parchment paper if oven-drying
Ingredients
- 4 oranges
Instructions
- Thoroughly wash the oranges. Use a mandoline or sharp knife to cut the oranges in approximately 4-5mm slices. If you find your oranges are too soft, place them in the freezer for about 1 hour before slicing to help them firm up.
- Place the orange slices in an even layer on a paper towel. Cover with another layer of paper towels and press with your palms to remove excess moisture from the oranges.
For Oven Drying:
- Preheat the oven to 175°F. Line two baking sheets with parchment paper. Spread the slices on the prepared baking sheets. The oranges may be touching, but should not be overlapping.
- Bake for 3-4 hours, turning every hour, until completely dried and crisp to the touch. Drying time will depend on the thickness of your slices. Let cool, then store in an airtight container.
For Dehydrator Drying:
- Set the dehydrator to 135℉. Spread the sliced oranges on the drying racks. The oranges may be touching, but should not be overlapping.
- Dry for 4-8 hours, flipping and checking the dryness occasionally after about 2 hours. Drying time will depend on the thickness of your slices. Continue drying until the slices are completely dried and crisp to the touch. Let cool, then store in an airtight container.
Esther says
What is the best type of oranges to use?
Jessica Vogl says
There is a section above that talks about the types of oranges!