

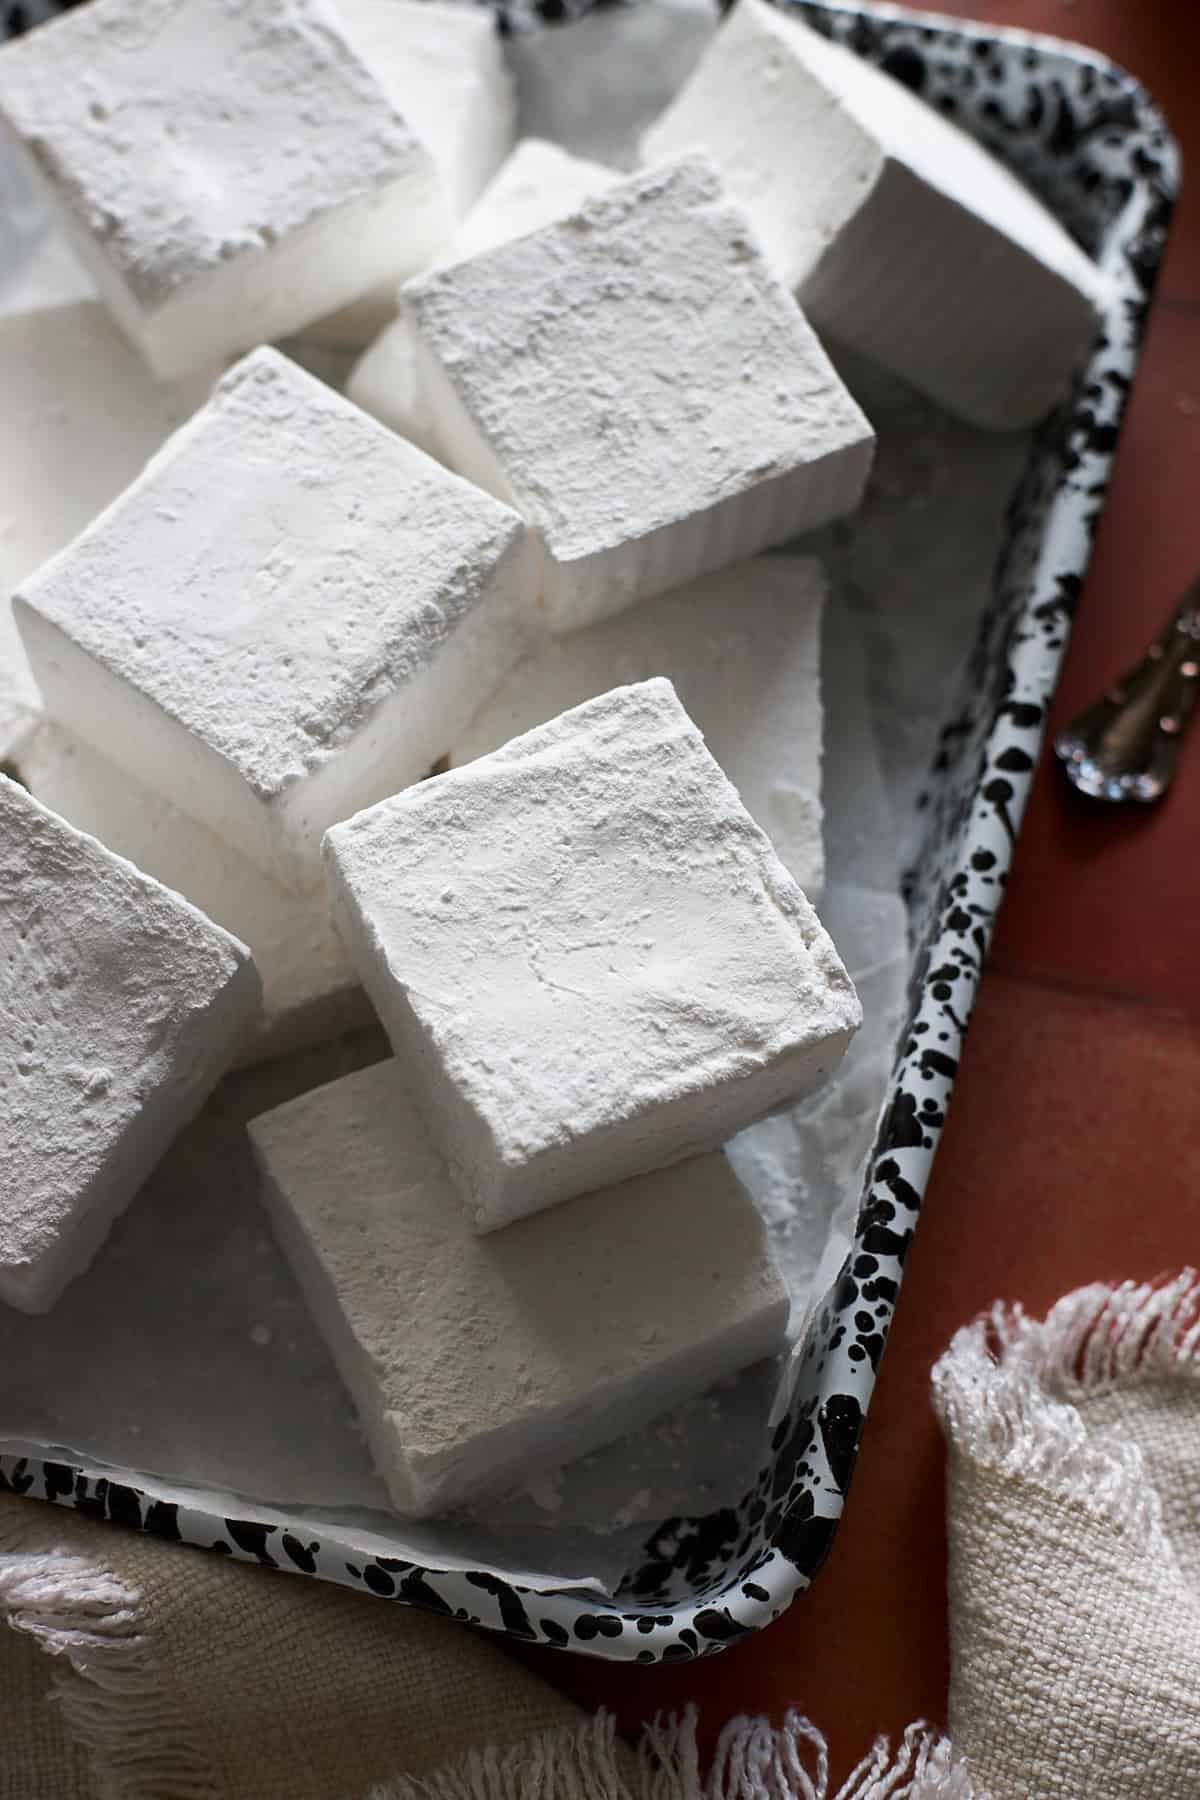
Homemade marshmallows are a dessert that is wildly different from the storebought version, and once you've tried them, you'll never look at a marshmallow the same! These Classic Vanilla Marshmallows are a delicious treat that you can serve on their own, roast for a s'more, add to a cup of hot chocolate, and more!
Why you'll love this recipe
- These marshmallows are great to eat on their own, roasted for s'mores, or floating in hot chocolate. You can also use them for other baking projects (like these Molasses Marshmallow Stuffed Cookies).
- Homemade marshmallows are a no-bake recipe so you don't even need the oven!
- There are easy substitutions to make these marshmallows without gelatin or corn syrup.
- Marshmallows store well and can keep for up to several weeks!
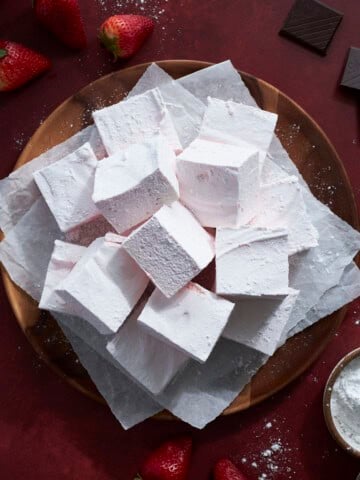
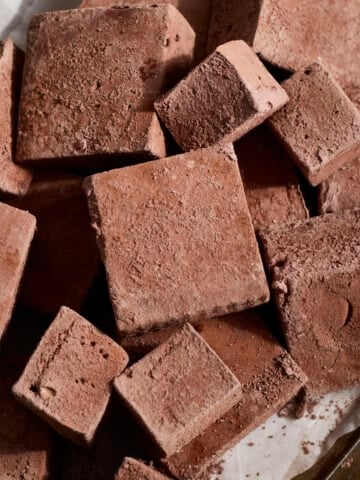
- Try these Strawberry Pink Marshmallows, Chocolate Marshmallows, and Blackberry Marshmallows, too!
Jump to:
- Why you'll love this recipe
- Ingredients
- Substitutions & Variations
- How to Make Classic Vanilla Marshmallows
- Expert Baking Tips
- Common Marshmallow Challenges
- How to Clean Up After Making Marshmallows
- How to Eat Classic Vanilla Marshmallows
- Storage
- Recipe FAQs
- More Homemade Marshmallow Recipes
- Classic Vanilla Marshmallows
Ingredients
There are a few ingredients you'll need to pull together these homemade marshmallows.
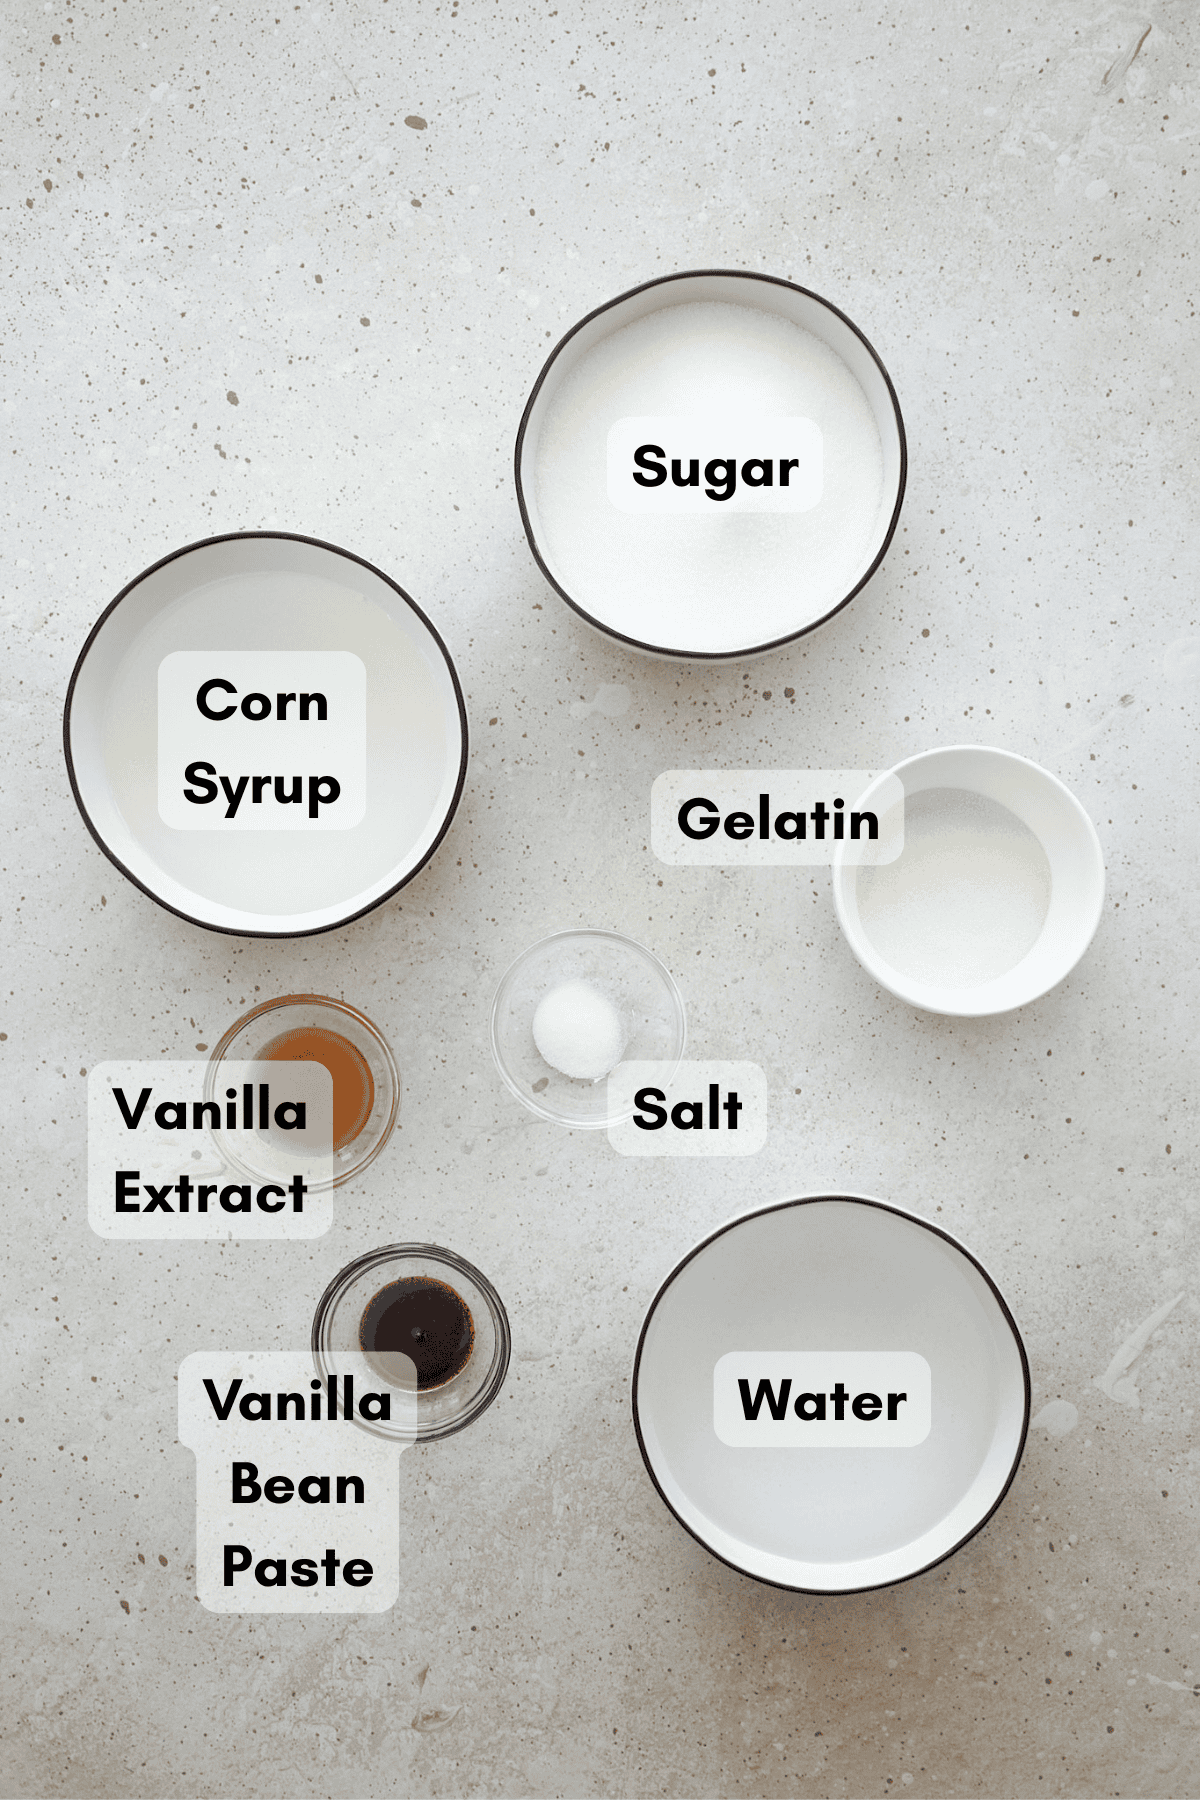
- Unflavored powdered gelatin: This is what helps the marshmallow set up to be firm. Substitutions are listed below.
- Corn syrup: Corn syrup adds additional sweetness, but also prevents the crystallization of the sugar as it's melted. Substitutions are listed below.
- Vanilla bean paste: This is optional, but adds additional vanilla flavor and those beautiful vanilla bean specks to the marshmallows. I used the Vanilla Bean Paste from Native Vanilla.
See the full recipe below for detailed directions.

Substitutions & Variations
This is a very adaptable recipe and below are a few easy substitutions and variations you can try.
- Homemade marshmallows without corn syrup - If you'd rather not use corn syrup, you can use agave nectar, honey or maple syrup in a 1:1 substitute for the corn syrup. Keep in mind, you will taste those agave nectar, maple syrup or honey flavors in the final marshmallow.
- A note on gelatin - There is no easy substitute for gelatin to make these marshmallows vegan. I had previously recommended agar agar, but it is not as simple as making a 1:1 substitution.
- Add toppings - These would be great for adding toppings! Before the marshmallow sets, press in crumbled cookies, candies (peppermint would work well for the holidays!), or any other toppings you'd like to add!
- To make Halloween Marshmallows (pictured above), top the warm marshmallow with 10-12 crushed OREO cookies and edible candy eyeballs. Then continue with the recipe as written.
- Dip them in chocolate - Dip or drizzle the finished marshmallows with a bit of melted dark chocolate.
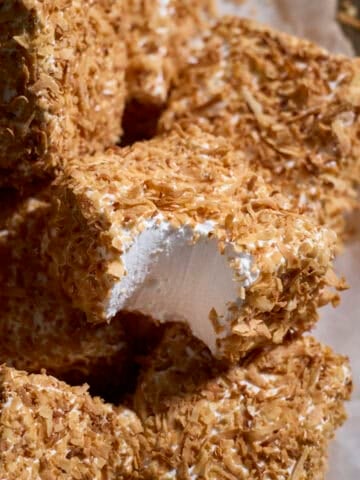
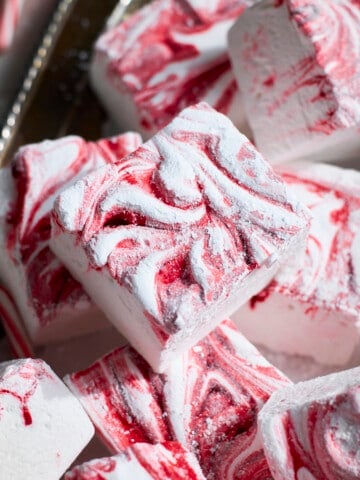
- Try these Candy Cane Marshmallows with a swirl of candy cane flavor, or these Toasted Coconut Marshmallows for a different flavor kick!
How to Make Classic Vanilla Marshmallows
These marshmallows come together in a few easy steps. The keys to success: temperature and time!
- Step 1: Add ⅔ cup cold water to the bowl of a stand mixer. Sprinkle with gelatin and let bloom.
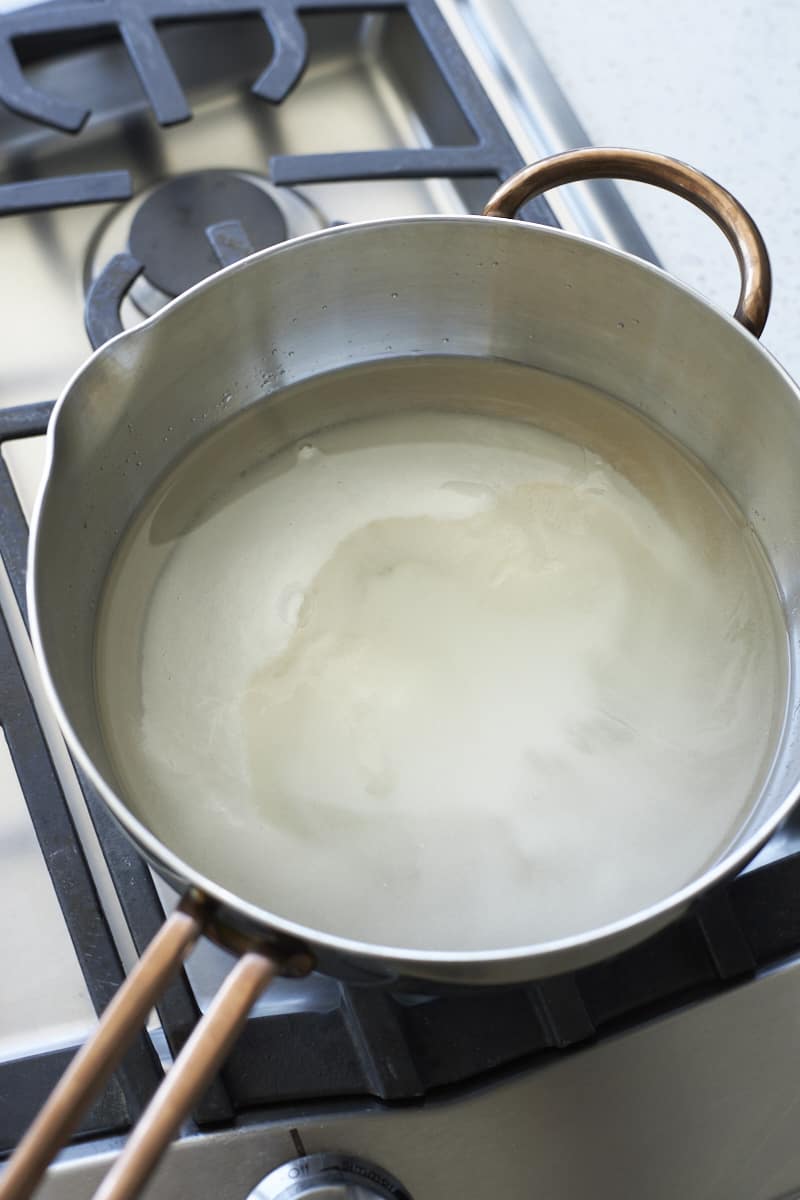
- Step 2: In a medium saucepan, combine granulated sugar, corn syrup, and ⅔ cup water.

- Step 3: Bring the mixture to a boil, swirling the pan occasionally.

- Step 4: Boil until the mixture reaches exactly 240°F on a candy thermometer, about 10 minutes.
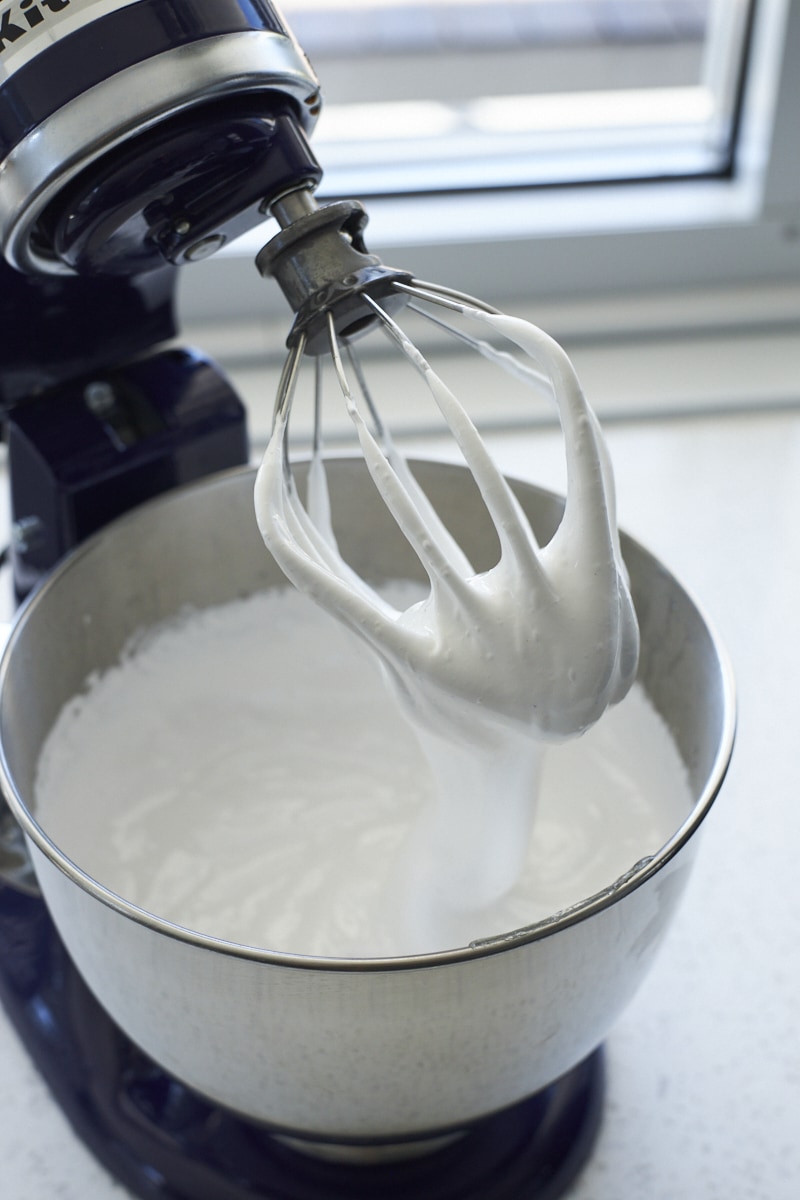
- Step 5: Slowly and carefully pour the melted sugar mixture into the gelatin mixture. Add the vanilla extract, vanilla bean paste (optional) and salt. Increase the speed to high and whip until the mixture is stiff and white, about 10-12 minutes.
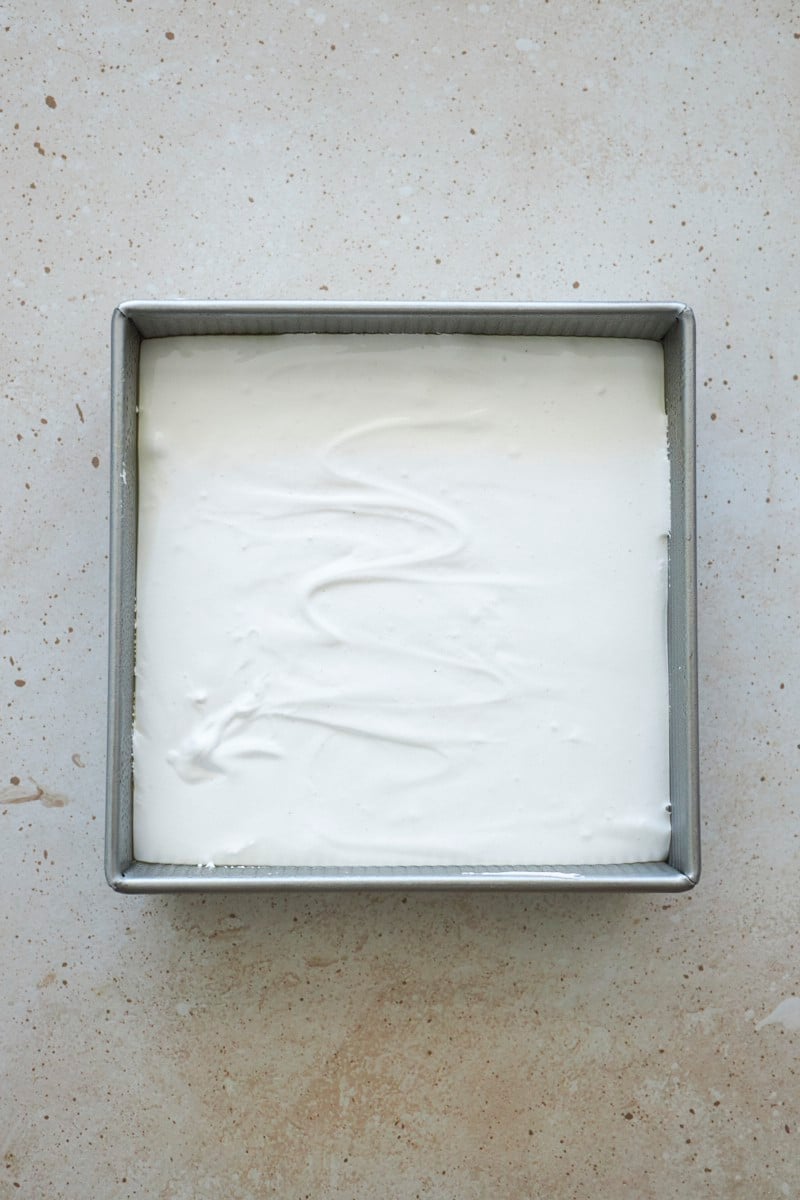
- Step 6: Pour the mixture into the prepared baking pan and use a spatula to help spread evenly. Let the marshmallows set for at least 4 hours at room temperature or 2 hours in the refrigerator.

- Step 7: Turn the marshmallow out onto the work surface and use a sharp knife to cut into 16 pieces.
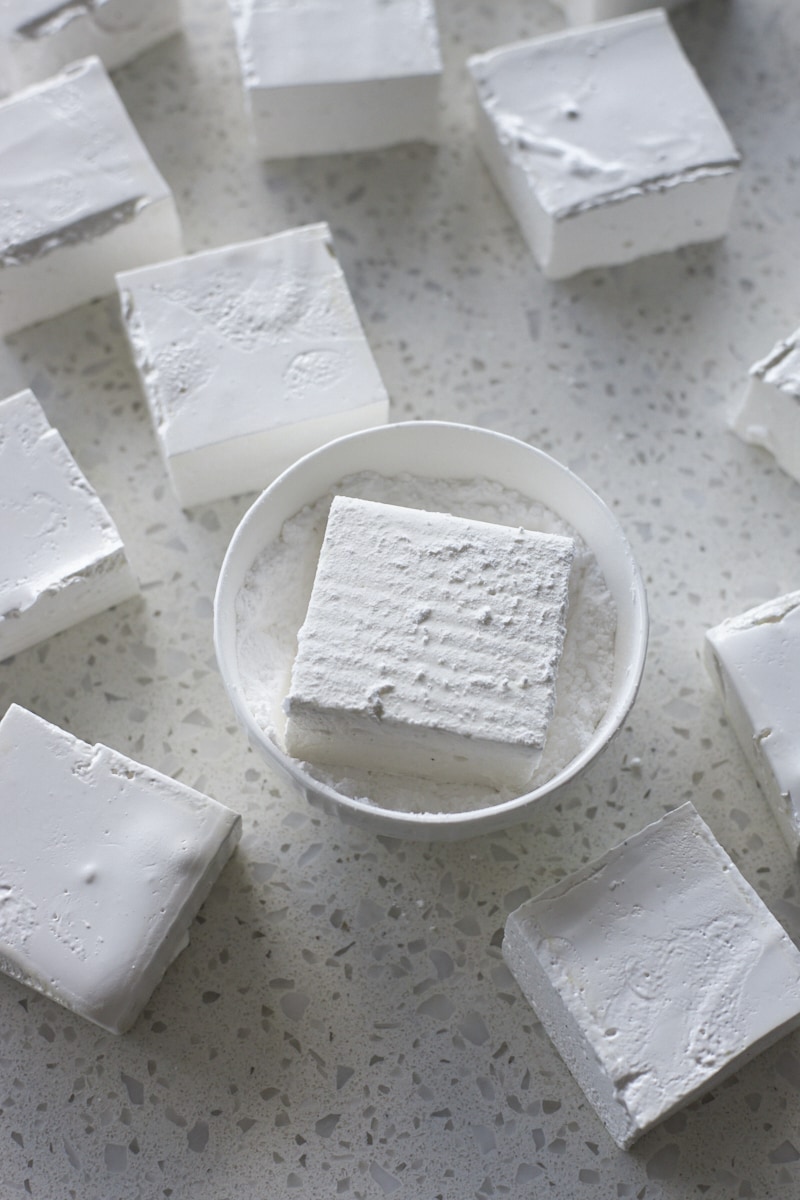
- Step 8: Roll each marshmallow in powdered sugar or cornstarch on each side to prevent sticking, then serve.
Expert Baking Tips
- Use cold water to bloom the gelatin. The temperature is important!
- I highly recommend using a stand mixer and a candy thermometer for this recipe. You can make this with a hand-held mixer, but you will be mixing for a very long time. I don't recommend trying to make this without a candy thermometer.
- Bring the sugar mixture to exactly 240 degrees F. If you miss this by a few degrees in either direction, your marshmallows either won't firm up, or they'll be a rock-hard mess.
- Be careful when pouring the hot sugar mixture. Pour this carefully into the stand mixer, then slowly increase the speed to high. You don't want any splashes!
- Give the marshmallows enough time to whip. This will take 10-12 minutes. If you under-whip the marshmallows, they won't set up correctly.
Common Marshmallow Challenges
Below are a few common marshmallow challenges and how to avoid them.
- Marshmallows are too soft: If your marshmallows are not setting up, there are a few possibilities:
- The sugar did not reach 240 degrees Fahrenheit. If your sugar was under that temperature, the marshmallows will not set correctly. That candy thermometer is crucial!
- The marshmallows need to whip longer. If they did not whip long enough, they will not set correctly.
- The marshmallows need to set longer. Let them sit overnight, if possible, to see if this helps them set up more firmly.
- Marshmallows are too hard: If your marshmallows turned into a rock-hard sugar mess, this is because the sugar mixture was heated to over 240 degrees Fahrenheit and unfortunately isn't recoverable.
- Marshmallows are too sweet: Firstly, be aware that this is a marshmallow recipe and they are going to be sweet. One option, though, is to coat the marshmallows in corn starch rather than powdered sugar. This will keep the marshmallows from sticking to each other without adding any additional sugar.
- The knife is sticking to the marshmallows: An easy fix! Spray your knife with cooking spray to easily cut the marshmallows. You can dab off any excess cooking spray on the marshmallows with a paper towel.
How to Clean Up After Making Marshmallows
Making marshmallows is going to be a bit messy. Melted sugar turns rock hard, and the whipped marshmallow has a tendency to somehow get on everything. Good news, though: remember that sugar dissolves in water. Don't spend time scrubbing your pans, spatulas or stand mixer bowl. Fill them with warm water, let them sit for 10-15 minutes, and the sugar will melt right out so you can easily wash them.
How to Eat Classic Vanilla Marshmallows
There are many ways to eat Classic Vanilla Marshmallows; below are a few of my favorite options!
- Eat them plain: Once they've been rolled in powdered sugar (or cornstarch), they are finished and ready to eat!
- Roast them to make a s'more: These marshmallows roast well for s'mores. The marshmallows will be a bit softer than storebought, so you may have better success using a double-pronged roasting stick for some extra support.
- Floating in hot chocolate: These are great to add to a cup of hot chocolate or your other favorite warm dessert beverage.
- Dipped in chocolate: Add marshmallows to a dessert board to dip into melted chocolate!
- Use for other baking projects: Homemade marshmallows are also great to use for other baking projects like these Molasses Marshmallow Stuffed Cookies.
Storage
Room Temperature Storage: Store homemade marshmallows in an airtight container at room temperature for up to several weeks. Use a piece of wax paper or parchment paper between layers to keep the marshmallows from sticking to each other.
You can also leave them out in the open (not in a container) at room temperature if you like your marshmallows a bit hard or dry. If you've ever left Peeps out on the countertop to let them harden, it's the same idea! They should not be stored in the refrigerator.

Recipe FAQs
Unfortunately, there is not an easy way to make marshmallow fluff with this recipe! It's not as easy as leaving out the gelatin (trust me, I've tried. It makes a big mess!).
Yes, you can, but it will be challenging. Using a hand-held mixer, you will be mixing for a very long time. I highly recommend using a stand mixer if possible!
I do not recommend making marshmallows without a candy thermometer. Getting the sugar mixture to the exact right temperature is very important to this recipe being a success.
More Homemade Marshmallow Recipes
If you tried these Classic Vanilla Marshmallows or any other recipe on my website, please leave a ⭐ star rating and let me know how it went in the comments below. I'd love to hear from you! Happy Baking!

Classic Vanilla Marshmallows
Ingredients
- 1 ⅓ cups water divided
- 3 envelopes unflavored powdered gelatin about 7 ½ teaspoons
- 1 ½ cups granulated sugar
- 1 cup light corn syrup
- 2 teaspoons vanilla extract
- 1 teaspoon vanilla bean paste optional
- ¼ teaspoon kosher salt
- ⅓ cup powdered sugar or cornstarch for rolling
Instructions
- Grease a 9x9-inch baking pan with cooking spray and set aside.
- In the bowl of a stand mixer, add ⅔ cup cold water. Sprinkle gelatin on top and let bloom.
- In a medium saucepan over medium-high heat, combine granulated sugar, corn syrup and ⅔ cup water. Stir until sugar is dissolved. Bring the mixture to a boil, swirling the pan occasionally, until the mixture reaches exactly 240°F on a candy thermometer, about 10-12 minutes. Immediately remove from heat.
- With the stand mixer on low speed, slowly and carefully pour the melted sugar mixture into the gelatin mixture. Add the vanilla extract, vanilla bean paste (optional) and salt.
- Slowly (to avoid splashes) increase the speed to high and whip until the mixture is stiff and white, about 10-12 minutes. When you remove the whisk, stiff peaks should form that take a few seconds until they fall back into the marshmallow mixture. Working quickly, pour the mixture into the prepared baking pan and use a spatula to help spread evenly.
- Let the marshmallows sit and firm for at least 4 hours at room temperature or 2 hours in the refrigerator.
- Lightly spray your work surface with cooking spray. Use a butter knife to slice around the edges of the pan, then turn the marshmallow out onto the work surface. You may need to pry it out at a corner. Use a sharp knife to cut the marshmallow into 16 pieces. If needed, spray the knife with cooking spray to help prevent sticking. If there is excess cooking spray on your marshmallow, dab with a paper towel to remove.
- Roll each marshmallow in powdered sugar or cornstarch on each side to prevent sticking, then serve.
Crystal W says
These marshmallows were easy to make and turn out so good! They're so light and fluffy.
Yasmin Mo says
Hello! Love the recipe, so easy and yummy! I was wanting to sell these for the holidays, how long do they last in a airtight package? Thanks!
Jessica Vogl says
They should keep for several weeks!
Jill says
I'm trying tonight. Thank you for the recipe.
Would love some different flavors.
Thanx again
Jessica Vogl says
I have several different flavors on the blog, too! Strawberry, blackberry, chocolate, and candy cane!
Shannon says
Hi! Could Allulose Powder sugar be substituted with the sugar used in this recipe?
Jessica Vogl says
It's not something I've tried!
Penny says
How would I store these overnight? Or would that not be an option?
Jessica Vogl says
They store well at room temperature! You can store them in an airtight container (or leave them out in the open if you like your marshmallows to dry out a bit more) at room temperature for up to several weeks!
Brandy Harris says
Can you make this recipe with gelatin leaf rather than gelatin powder?
Jessica Vogl says
You can, but you'll need to make the conversion for gelatin leaf vs. powder!
Ashley says
I’m wondering if I use honey instead of corn syrup, do I still need to add the sugar? Would omitting it change the final consistency?
Jessica Vogl says
I would still use the sugar, yes!
Kelly says
These are sooo yummy!