Sourdough Discard Scones are incredibly customizable, and this base recipe is ideal for mixing in your favorite add-ins! They're delicious on their own, drizzled with a little bit of icing, or with add-ins like chocolate chips or blueberries. They're only lightly sweet and make a great afternoon snack or treat to eat with a cup of coffee or tea.

Jump to:
Why you'll love this recipe
- These scones require no rise time, so you'll have a tasty treat in no time! If you're looking for other no-rise recipes, try this Sourdough Discard Pumpkin Bread or this Sourdough Lemon Raspberry Loaf Cake.
- You can modify this recipe to use active sourdough starter instead of sourdough discard, if you prefer.
- Sourdough Discard Scones are very customizable and you can easily add your favorite add-ins like chocolate chips, blueberries, and more.
- Scones freeze well, so you can enjoy some now, and freeze the rest for later!
Ingredients
The secret to this recipe is keeping the ingredients cold, but there are only a few key things you will need.
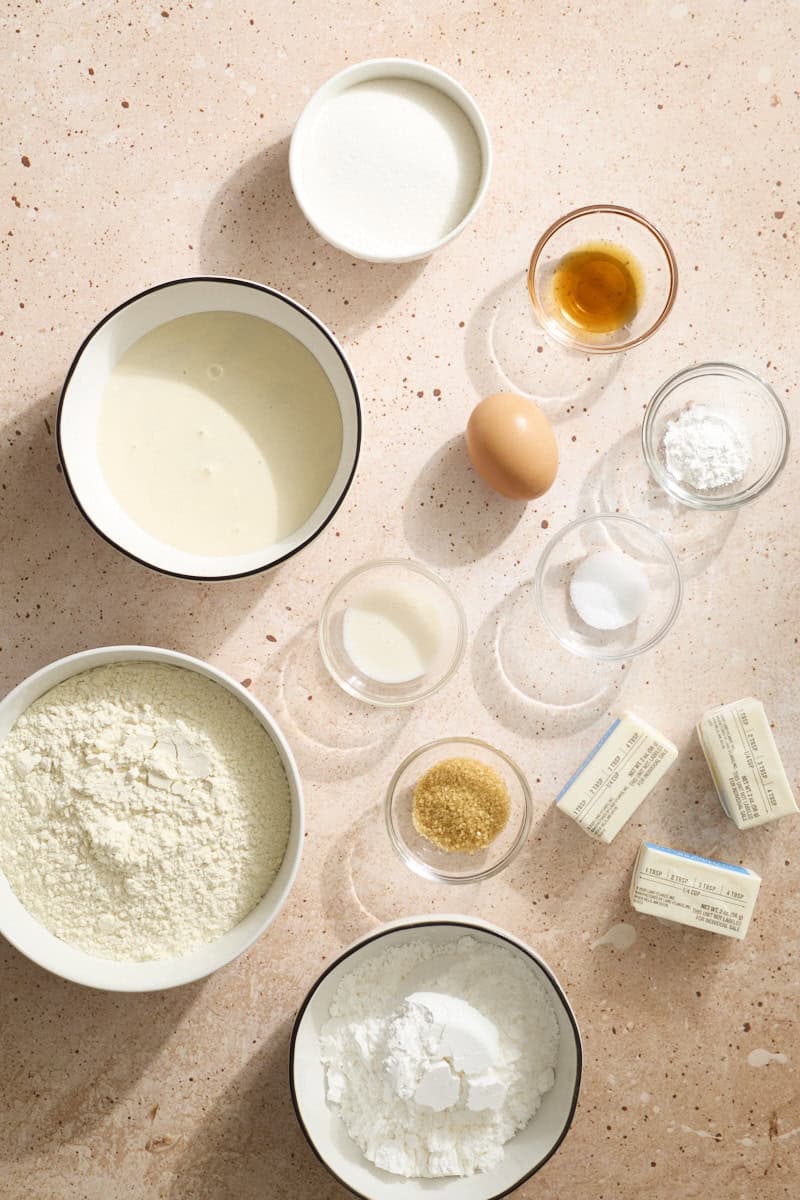
- Sourdough discard: The sourdough discard should be unfed and cold, straight from the refrigerator. This recipe is designed for a sourdough starter that uses a 1:1 ratio (when you feed your starter, it's with 1 part flour and 1 part water). If your starter uses a different ratio, you may need to adjust some of the ingredients in this recipe.
- Learn more about making a homemade sourdough starter.
- Unsalted butter: Likely the most important ingredient in this recipe! The butter should be frozen, and I recommend grating it on a box grater, rather than cubing or using a food processor to grate the butter (which you might do for something like a pie crust).
- Add-ins (optional): Think about any add-ins you might like to incorporate, like chocolate chips, lemon zest, blueberries, cranberries, and more.
See full recipe below for detailed directions.
Substitutions & Variations
This is a very adaptable recipe, and below are a few easy substitutions and variations you can try. I highly encourage you to make these your own and try different add-ins!
- Use active sourdough starter - If you'd like to use active sourdough starter instead of discard, you can! You would not change any of the other ingredients or directions. Replace sourdough discard with active starter in a 1:1 substitute.
- Add chocolate chips - Add ½ cup chocolate chips to the mixture after you mix in the butter (and before the liquid ingredients). Continue with the recipe as written.
- Add blueberries - Add ½ cup fresh or frozen blueberries to the mixture after you mix in the butter (and before the liquid ingredients). Continue with the recipe as written. Keep in mind, fresh blueberries will release a lot of liquid, so your dough may be wetter and potentially a bit sticky after adding the berries. If needed, add a bit more flour (1 Tablespoon at a time) if the dough seems too sticky.
- If you're in a blueberry mood, you might also like these Sourdough Discard Blueberry Bagels!
- Add lemon or orange zest - For a citrus kick, add 1 Tablespoon of fresh lemon or orange zest after you have mixed in the butter. Continue with the recipe as written. You might also like this Sourdough Lemon Loaf Cake!
I have not tested this recipe with other variations, but if you do, let us know how it turns out in the comments! I always love to hear how you're adapting these recipes and use those as ideas for future recipes as well!
How to make Sourdough Discard Scones
There are only a few steps, but working quickly and keeping the ingredients (and dough) as cold as possible is important! The full recipe with ingredients is at the bottom of this post.
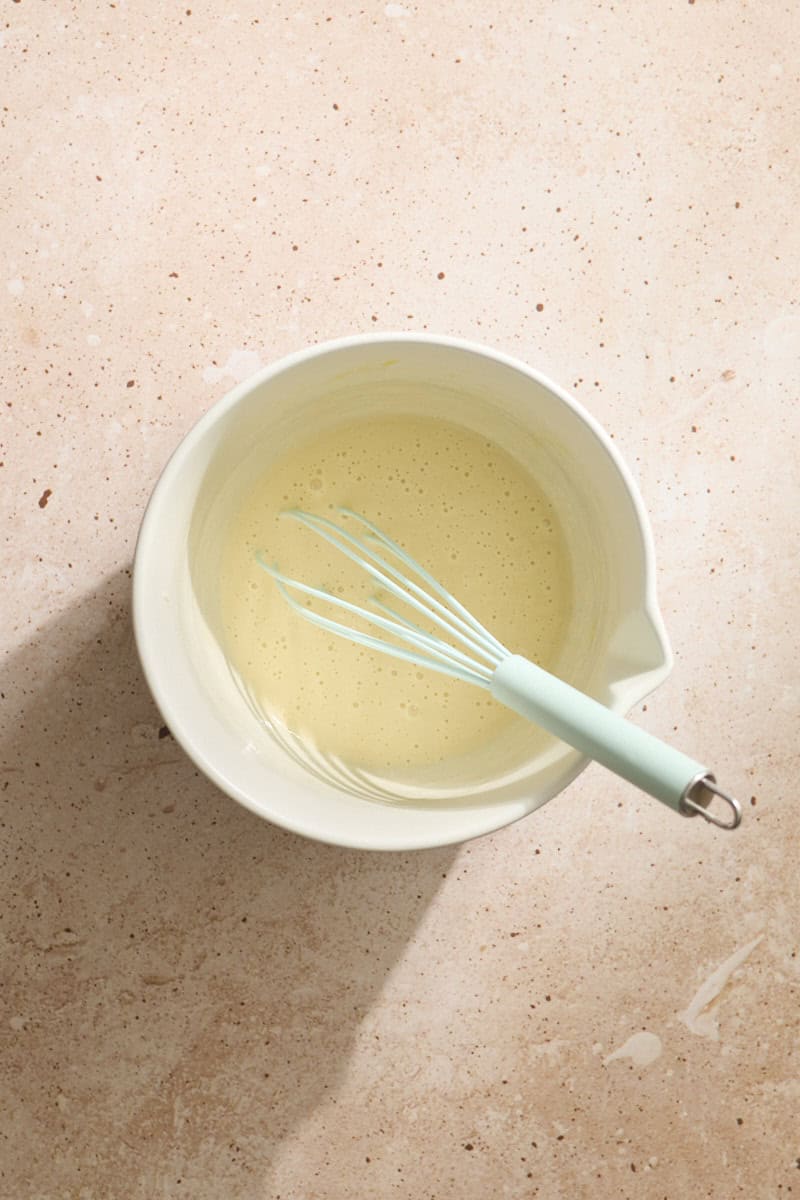
- Step 1: Whisk together the liquid ingredients until smooth, then place the mixture in the refrigerator. We want to keep this as cold as possible!
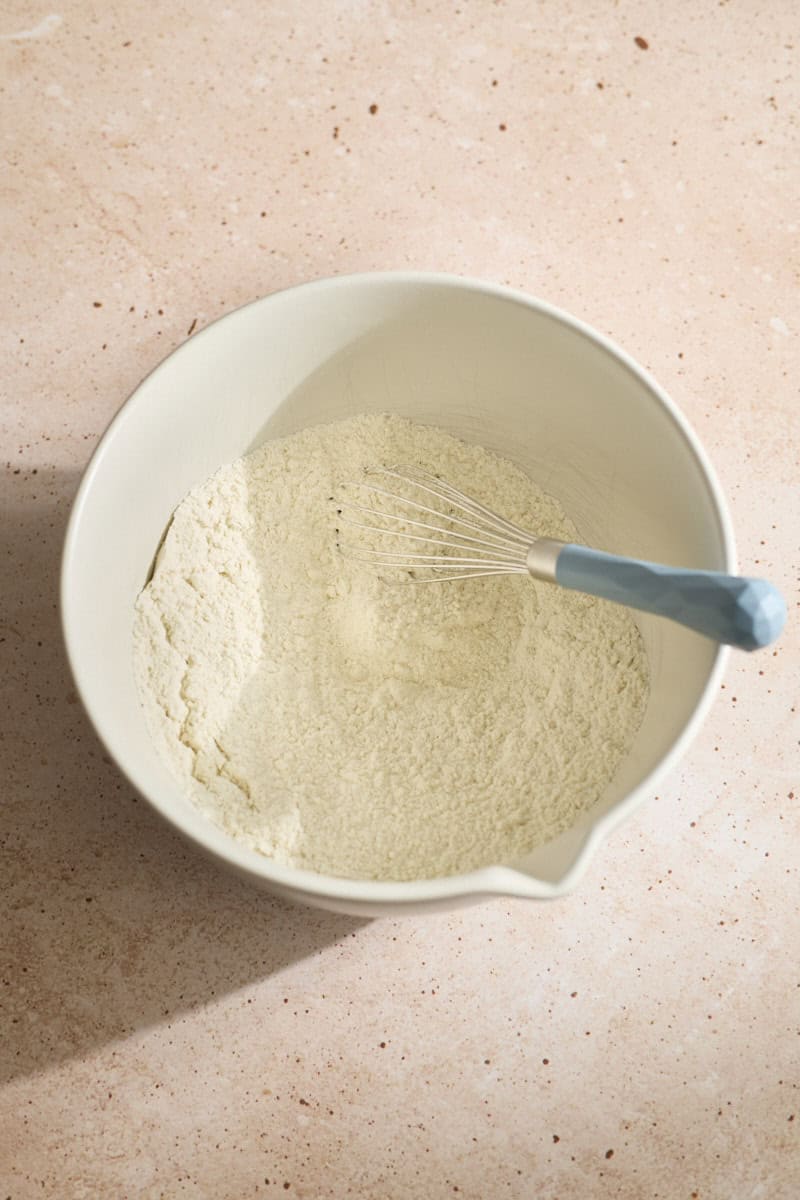
- Step 2: Whisk together the dry ingredients in a large bowl.
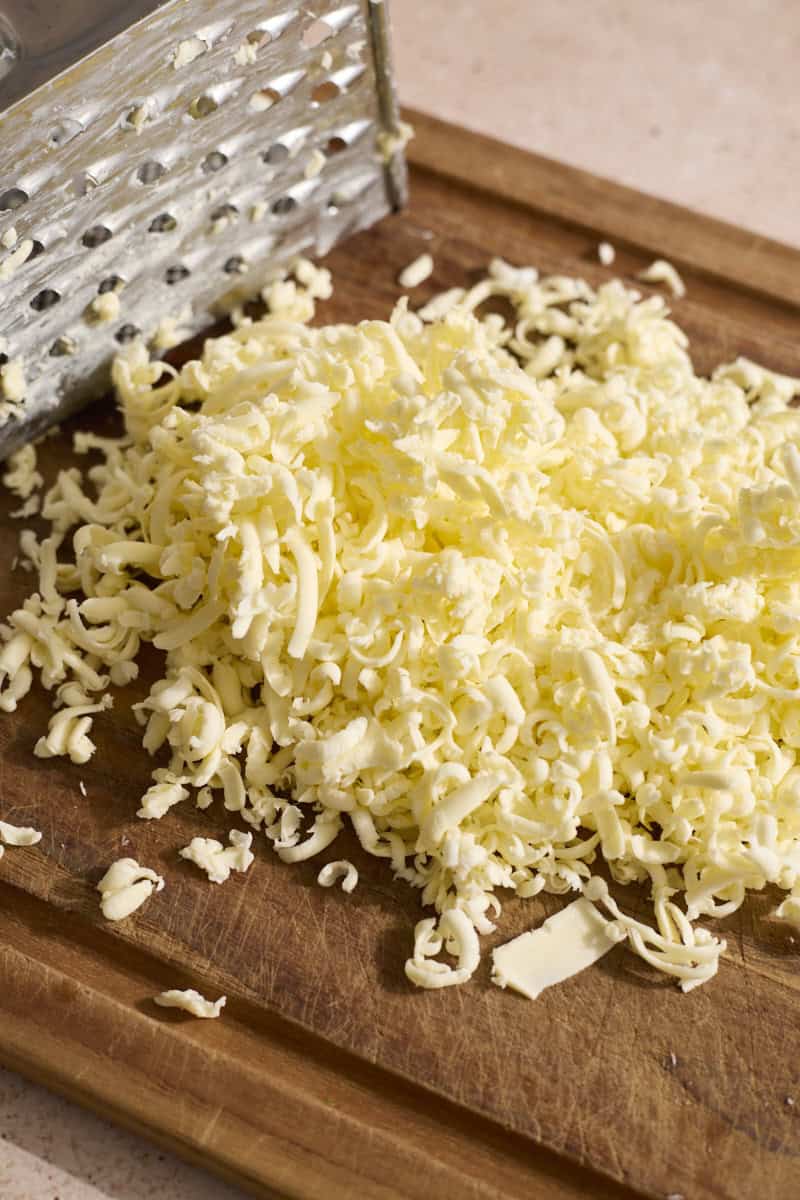
- Step 3: Grate the frozen butter on the large holes of a cheese grater. Be careful! The cheese grater is not forgiving with fingers...
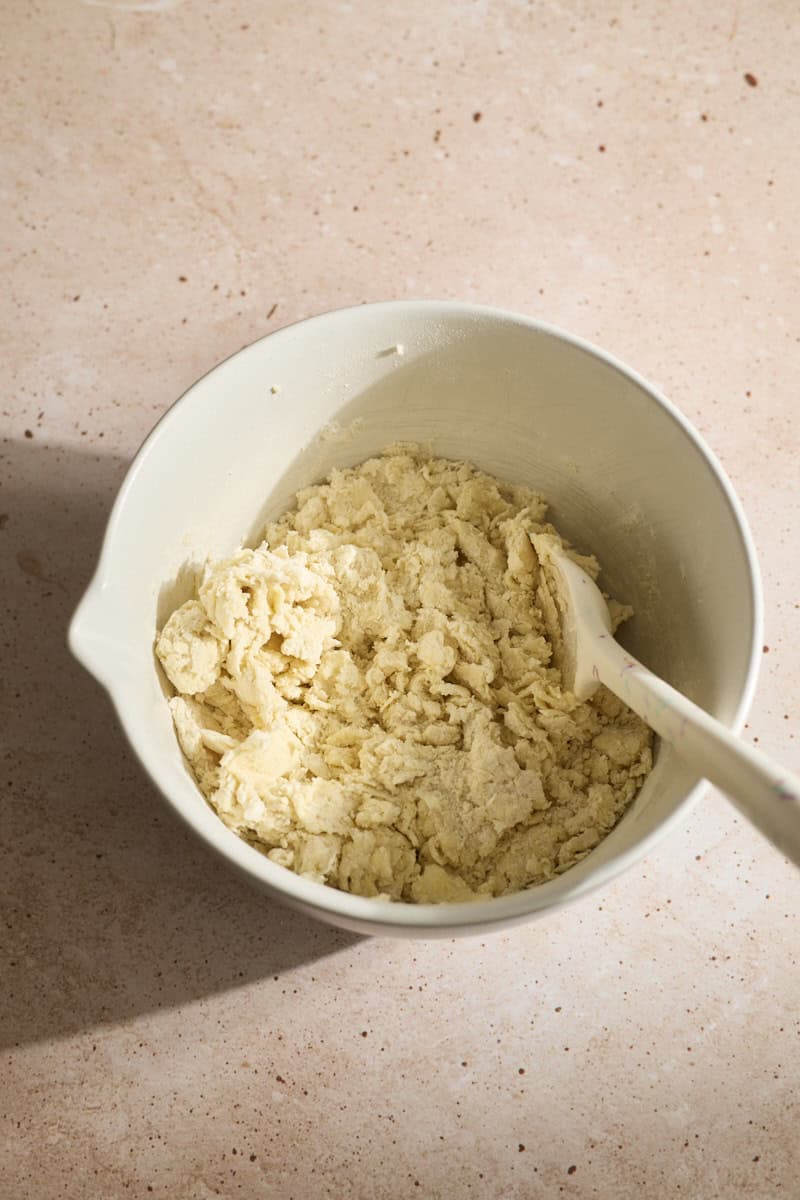
- Step 4: Using your hands, a pastry cutter, or forks, incorporate the butter into the flour mixture. Then add the liquid mixture and use a spatula to stir until a rough dough forms.
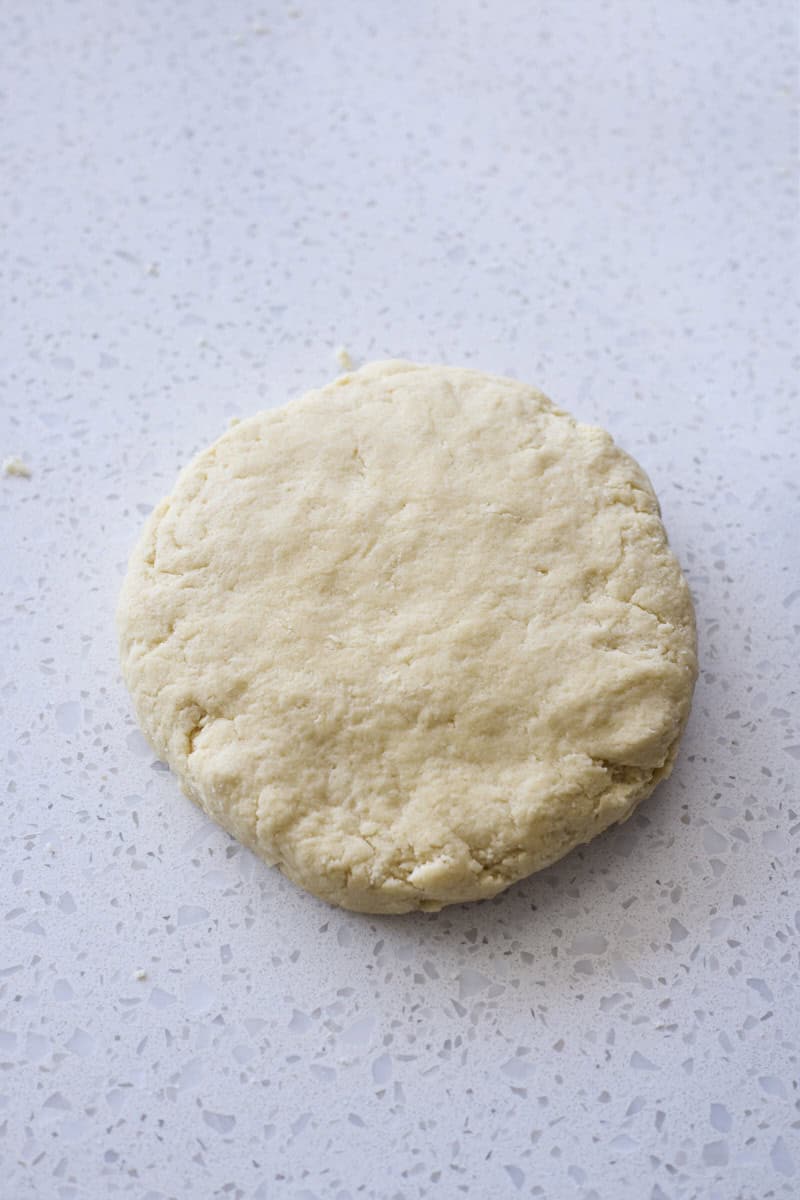
- Step 5: Gather and press the dough, lightly kneading until the dough comes together. Press the dough into an 8-inch disk.
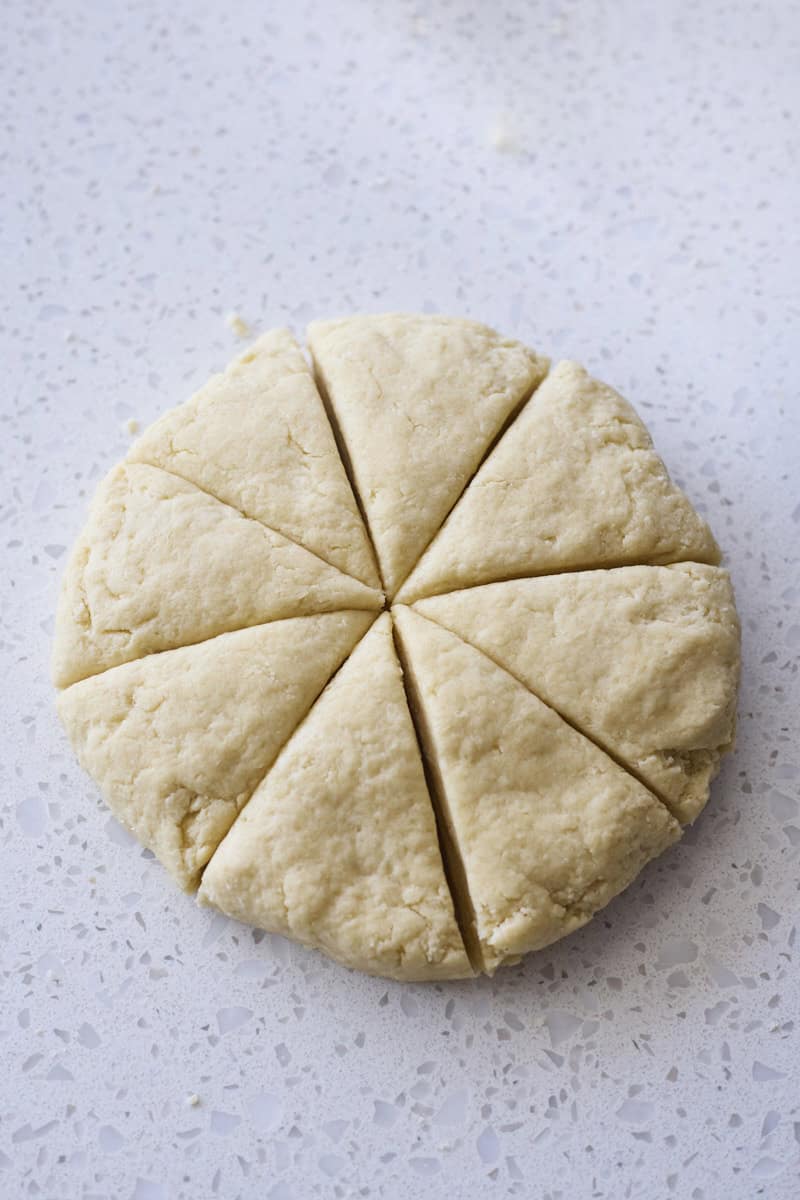
- Step 6: Divide the dough into 8 equal-sized pieces. Making the cuts as straight as possible is important here so the scones don't fall over when baking! Freeze the scones for 20 minutes.
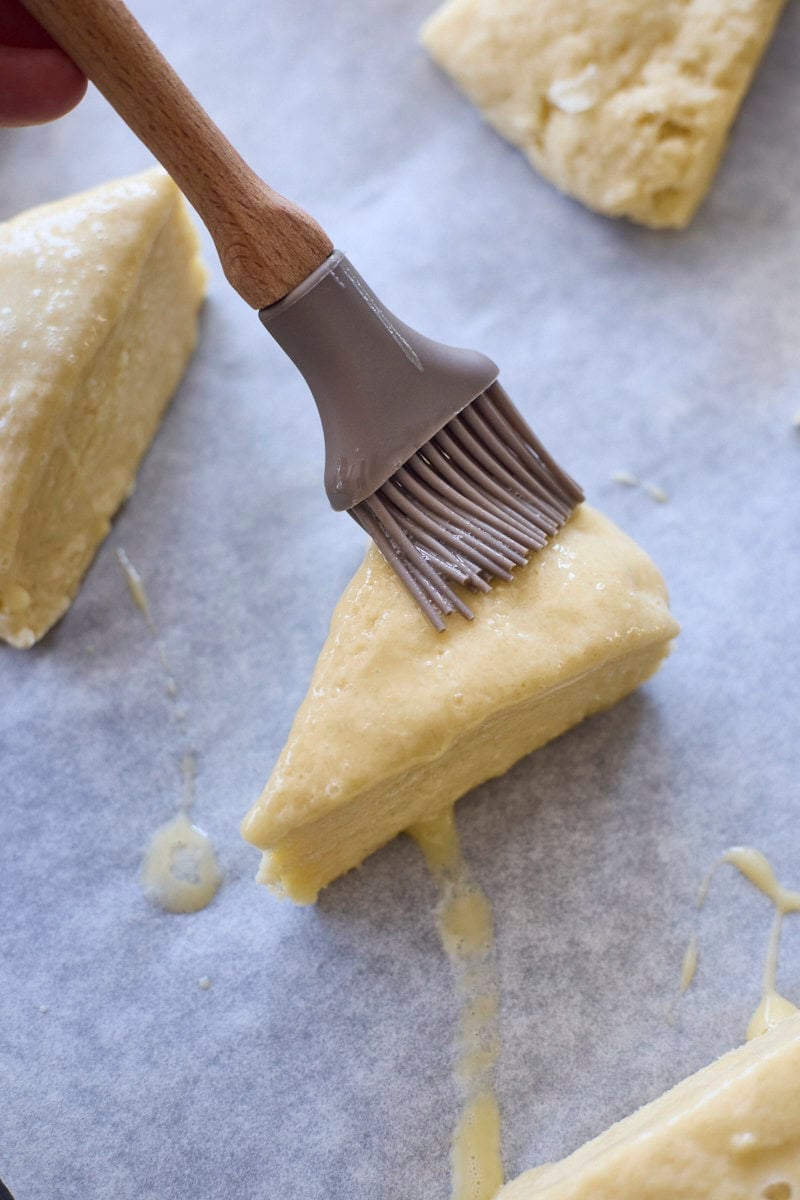
- Step 7: Brush with egg wash and sprinkle with turbinado sugar.
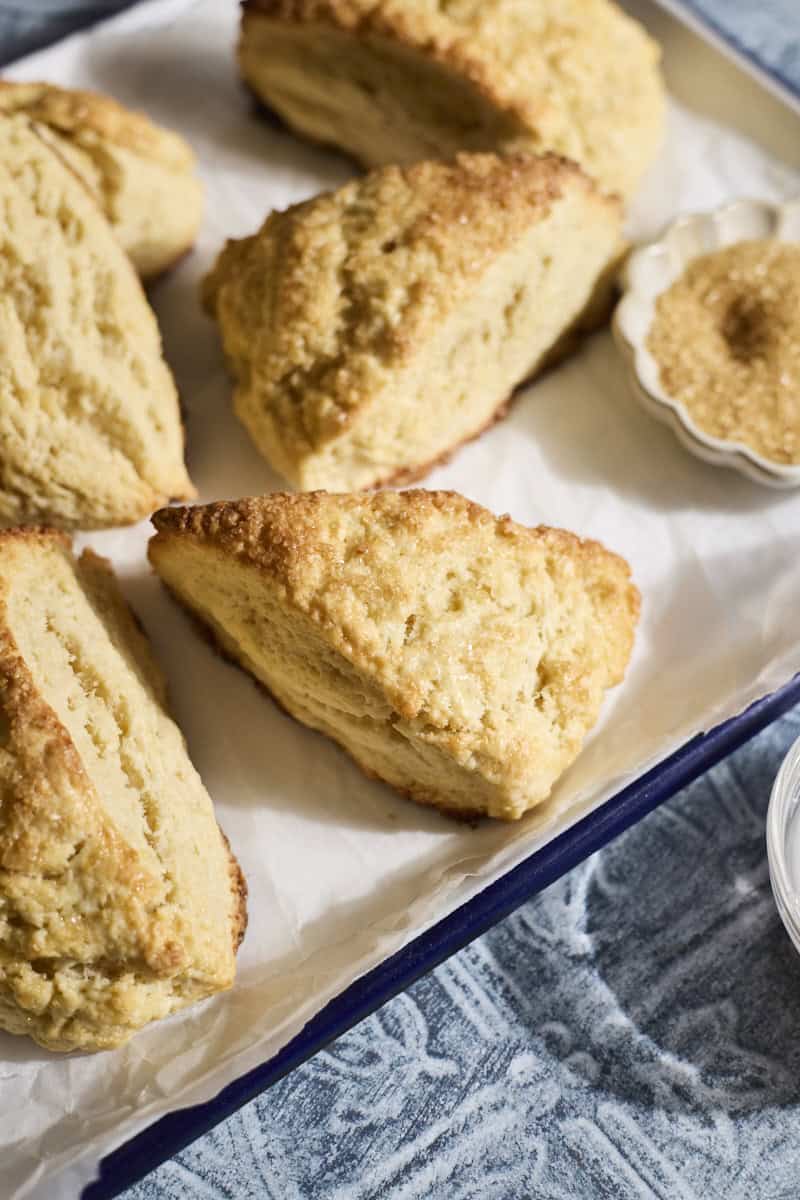
- Step 8: Bake until golden and browning at the edges.
Expert Baking Tips
- Keep the liquid ingredients as cold as possible. Use sourdough discard straight from the refrigerator (instead of room temperature), cold eggs, and cold milk.
- Freeze your butter and use a box grater to grate it. BE CAREFUL. While I find this is the best way to grate butter, it's slippery and the grater is unforgiving for your fingers (speaking from experience on that one!).
- Incorporate the butter into the flour mixture using a pastry cutter, forks, or your hands. It's more than just tossing the butter with the flour mixture. You want to end up with fairly uniform pea-size (or smaller) pieces of butter throughout.
- This is a similar technique to making Sourdough Discard Pie Crust.
- When cutting the scones, make your cuts as straight as possible and avoid twisting motions with your knife. This will help the scones stay upright (rather than falling over) while baking.
- Freeze the scones for 20 minutes before baking to help prevent spreading too much in the oven.
Common Scone Challenges
There are a few common challenges that can come up with scones. Below are a few ways to help work through those:
- Scones are falling over: If your scones are rising, but then falling over in the oven, make sure the cuts you're making are as straight as possible. If you're making any twisting motions with your knife, or cutting unevenly, that can cause your scone to be uneven and fall over. They'll still be delicious, though!
- Scones are spreading too much: If your scones are spreading too much while baking, make sure your ingredients are as cold as possible, and your butter is frozen. Also, don't skip the freezer step for 20 minutes before baking!
Are you having other challenges with your scones? Let us know in the comments and we can help work through it together!
Storage
Room Temperature Storage: Once cooled, store the scones in an airtight container at room temperature for up to 2-3 days. You can reheat the scones in the microwave for about 30 seconds to make them warm and soft again.
Freezer Storage: You can freeze the scones before or after baking.
- Freezing after baking: Once cooled, transfer the scones to a freezer-safe bag or container and freeze for up to 3 months. Reheat in the microwave for about 60 seconds to make warm and soft again.
- Freezing before baking: If you want to bake the scones later, you can freeze the dough. After cutting the scones to shape, place them on a parchment paper-lined baking sheet and let them freeze until firm. Then transfer the frozen dough into a freezer-safe container and freeze for up to 3 weeks. When you're ready to bake, place the frozen scones on a baking sheet and bake as directed, adding 5-10 minutes to the baking time.
Recipe FAQs
Sourdough discard is what is leftover after you feed your sourdough starter. You can either literally discard it (in the trash or compost), or you can use it to make sourdough discard recipes like this one!
If you're new to working with sourdough starter, check out these in-depth posts on how to feed sourdough starter, how to use sourdough discard, and tips for struggling sourdough starter.
Yes, you can make this recipe with either discard or active starter.
Yes, and I encourage you to do so! This is a great base recipe that you can easily add to. Try chocolate chips, blueberries, lemon zest, and more!
Yes. If you want to store the scones to bake later, you can freeze the dough. After cutting the scones to shape, place them on a parchment paper-lined baking sheet and let them freeze until firm. Then transfer the frozen dough into a freezer-safe container and freeze for up to 3 weeks. When you're ready to bake, place the frozen scones on a baking sheet and bake as directed, adding 5-10 minutes to the baking time.

Sourdough Discard Scones (Base Recipe)
Ingredients
For the Dough
- 200 grams (about ¾ cup) sourdough discard cold, straight from the refrigerator
- 1 egg
- 1 ½ teaspoons vanilla extract
- 1 teaspoon non-dairy or regular dairy milk
- 2 ¼ cups all-purpose flour
- ½ cup granulated sugar
- 2 teaspoons baking powder
- ¼ teaspoon kosher salt
- ½ cup unsalted butter frozen
- ½ cup add-ins (such as chocolate chips) optional
For Topping
- 1 egg whisked with 1 Tablespoon water for egg wash
- 2 teaspoons turbinado sugar
For the Glaze
- 1 cup confectioner's sugar
- 2 Tablespoons non-dairy or regular dairy milk
Instructions
- Line a baking sheet with parchment paper and set aside.
- In a medium bowl, whisk together the cold sourdough discard, egg, vanilla extract, and milk until smooth. Place the bowl in the refrigerator (we want to keep ingredients as cold as possible!).
- In a large bowl, whisk together the flour, sugar, baking powder, and salt.
- Grate the frozen butter on the large holes of a box grater. Be careful with your fingers as you're doing this!Add the grated butter to the flour mixture, and incorporate using a pastry cutter, forks, or your hands. Press the butter into the flour until you have a coarse mixture with approximately pea-sized butter pieces. Stir in any add-ins (such as chocolate chips), if using.
- Pour the cold liquid mixture into the flour mixture and use a large spatula to stir until a rough dough forms. It will seem really dry, but resist adding more liquid at this point. Transfer the dough to a work surface, then gather and press it together, lightly kneading until the dough comes together and no dry spots remain. The dough should not feel sticky. If the dough seems too dry and is not coming together, add more milk 1 teaspoon at a time until you reach your desired consistency.
- Flatten the dough into a disk about 8 inches in diameter. Use a sharp knife to cut the dough into 8 roughly equal-size pieces. Transfer to the prepared baking sheet. Place the baking sheet with the dough in the freezer for 20 minutes while you preheat the oven.
- Preheat the oven to 400℉.
- After freezing, brush the scones with egg wash, then sprinkle with turbinado sugar. Bake for 18-22 minutes, or until set and browning at the edges (the internal temperature of the baked scones should be 200℉).
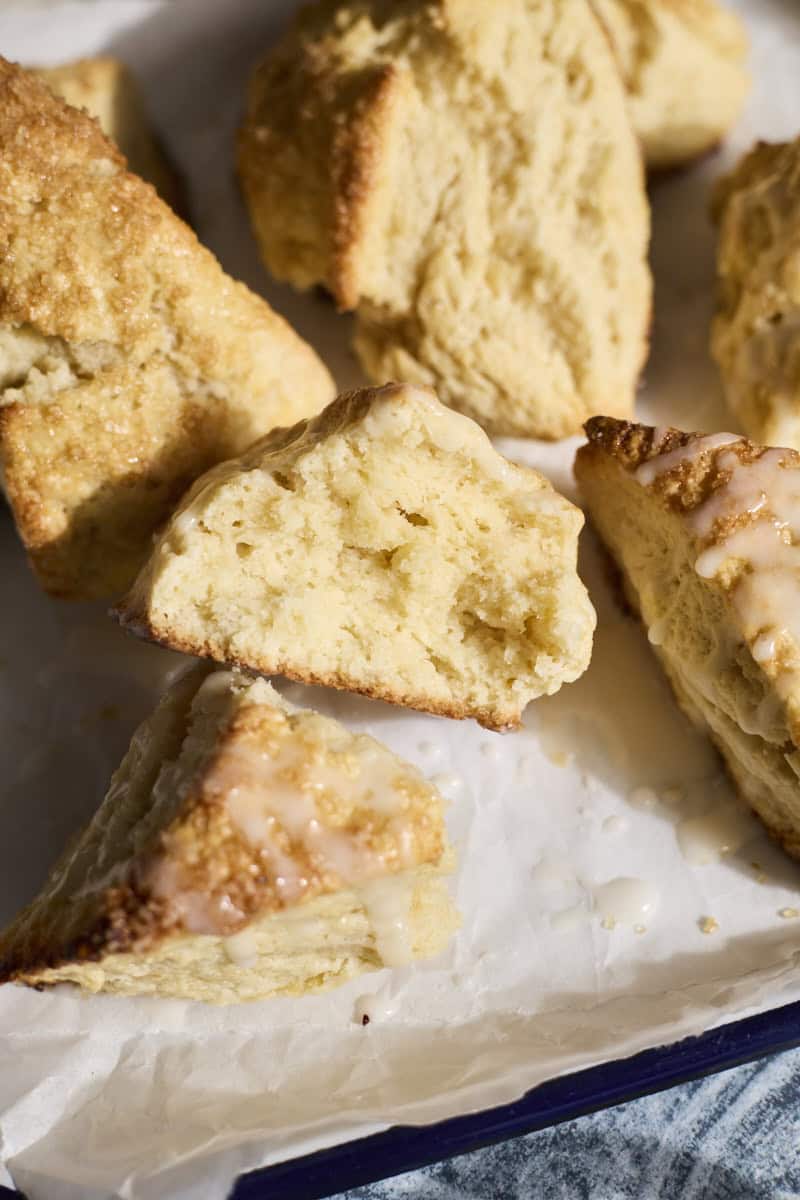
- While the scones cool, make the glaze. In a small bowl, whisk together the confectioner's sugar and milk. Drizzle over the cooled scones and serve.



Ruth says
I have made many scones but this was my first time making them using sourdough starter discard. I just loved them - they came out moist without being sticky. My add-in was golden raisins. I know this will become a favorite. Thank you!
Sara J says
I wish this recipe was converted in grams of weight.
Jessica Vogl says
It is! Click "metric" next to the list of ingredients in the recipe card. You can see the recipe in either metric measurements or US customary (cups) measurements.
Ashley J. says
My go-to recipe! I use this recipe for small scones by cutting the dough in half and making 16 scones—just perfect for portion control. I usually add chocolate chips. Do you think I can add oats next time?
Jessica Vogl says
Love to hear that! And yes, I think you could. You may need a touch more liquid in the dough if it isn't holding together, but if you've made these several times before, you'll be familiar with the texture that you're going for!
Patti says
How long can you keep discard in the fridge? I used some for these scones which had been in my fridge about a month. The scones look nice and fluffy (I added raisins) but the texture seems off a bit; a little bit heavy. Just wondering if you have any idea what I could have done wrong?
Thanks so much!
Jessica Vogl says
Interesting! That should be a fine amount of time to keep the discard, so you shouldn't have any issues there. Did you still use the baking powder? My only other idea is that the dough might've been a bit overworked ("do less" is really the name of the game when it comes to handling scone dough.
Chelsea Ball says
I’ve used this recipe many times! I’ve done raspberry, butterscotch chips, chocolate chips and green onion cheddar! They always turn out great!
Jessica Vogl says
Those all sound so great!!
Aggie says
Hi. When do I add fruit? While I’m molding?
Jessica Vogl says
You'd add any add-ins during step 4 (you've already pressed the butter and flour mixture together, and you're about to add the liquid ingredients next).
Karen says
My starter is a 1:2:2 ratio. What ingredients should I adjust? and by how much?
Jessica Vogl says
Since your flour to water ratio is still 1:1 (equal amounts), you can use the recipe as written.
Ana B says
Absolutely loved this recipe! It came out exactly like the pictures, & so delicious 🙂
Jessica Vogl says
So glad it worked well for you! Thanks for sharing!
Nancy Acuna says
If I was adding ham & cheese would I eliminate the sugar?
Jessica Vogl says
That's a tough one. I wouldn't eliminate the sugar completely (you need about 1 Tbsp to feed the yeast in the recipe), but that's a lot of sugar to leave out while still hoping for the same balance and end results. It's not something I've tested, so unfortunately I don't know here! I suspect this is something that would need testing / a few versions to really get right. A savory scone recipe might need to be added to my to-do list!
Ane says
I love this scone recipe! It always comes out perfect! Now how can add pumpkin purée to this recipe?
Jessica Vogl says
So glad to hear it! The pumpkin purée isn't something I have tried, and I think it would be a bit difficult as there isn't a lot of liquid to reduce in this recipe (to replace with pumpkin purée). I'd have to test it out as it would likely be a completely different recipe!
Ane says
Thank you for your reply! Your recipes are amazing and I’m looking forward to hear about it if you decide to give it a try!
Anna says
First time making scones and these were absolutely amazing! I used blueberries and cream cheese morsels. So good!! Thank you for this recipe!
Lynn Riley says
Holy moly these are fabulous!! I wasn’t sure I’d make them right (have never eaten one before) but they are great!! Grating that frozen butter was for the birds but wasn’t bad enough for me to make a second batch! First batch I mixed in blueberries and lemon zest into the flour mixture. Second batch is going in the oven now and I put dried cranberries, walnuts and orange zest.
Thanks for sharing this recipe, it’s a keeper!
Lynn
Jessica Vogl says
Grating butter is truly the worst! But it's worth it! So glad you loved them.
May says
Hi,
Do you have measurements in grams?
And also, can I use bread flour instead.
Thank you very much
Jessica Vogl says
The measurements are available in grams in the recipe card! At the right of the list of ingredients you can toggle between US Customary and Metric measurements. I wouldn't recommend using bread flour - AP flour will really give you the better texture here.