

Fresh-baked bread is a beautiful thing. But even better? Fresh, homemade bread with literally minimal effort and no kneading. If that sounds like your idea of a great loaf, then this No-Knead Walnut Raisin Bread is for you! It's a "set it and forget it" recipe that takes 10 minutes to pull together. You then let it rise overnight, pop it in the oven when you get around to it, and voilà, a gorgeous, fresh loaf!
Jump to:
Why you'll love this recipe
- There is literally no kneading in this recipe. You'll mix together the dough ingredients, then let it sit overnight and bake the next day! It doesn't get easier!
- There is only about 15 minutes of hands-on time to bring this dough together.
- The walnut and raisin flavor pairing is a winning combination that everyone will love.
- This is a great loaf for sandwiches or toast and perfect for breakfast or lunch!
- Looking for other easy bread recipes? Try my Sourdough Discard Sandwich Bread, Sourdough Discard Rolls, and Sourdough Discard Focaccia. You might also like these Homemade Everything Bagels (no sourdough needed)!
Ingredients
There are only a few ingredients you'll need to bring this No-Knead Walnut Raisin Bread together.
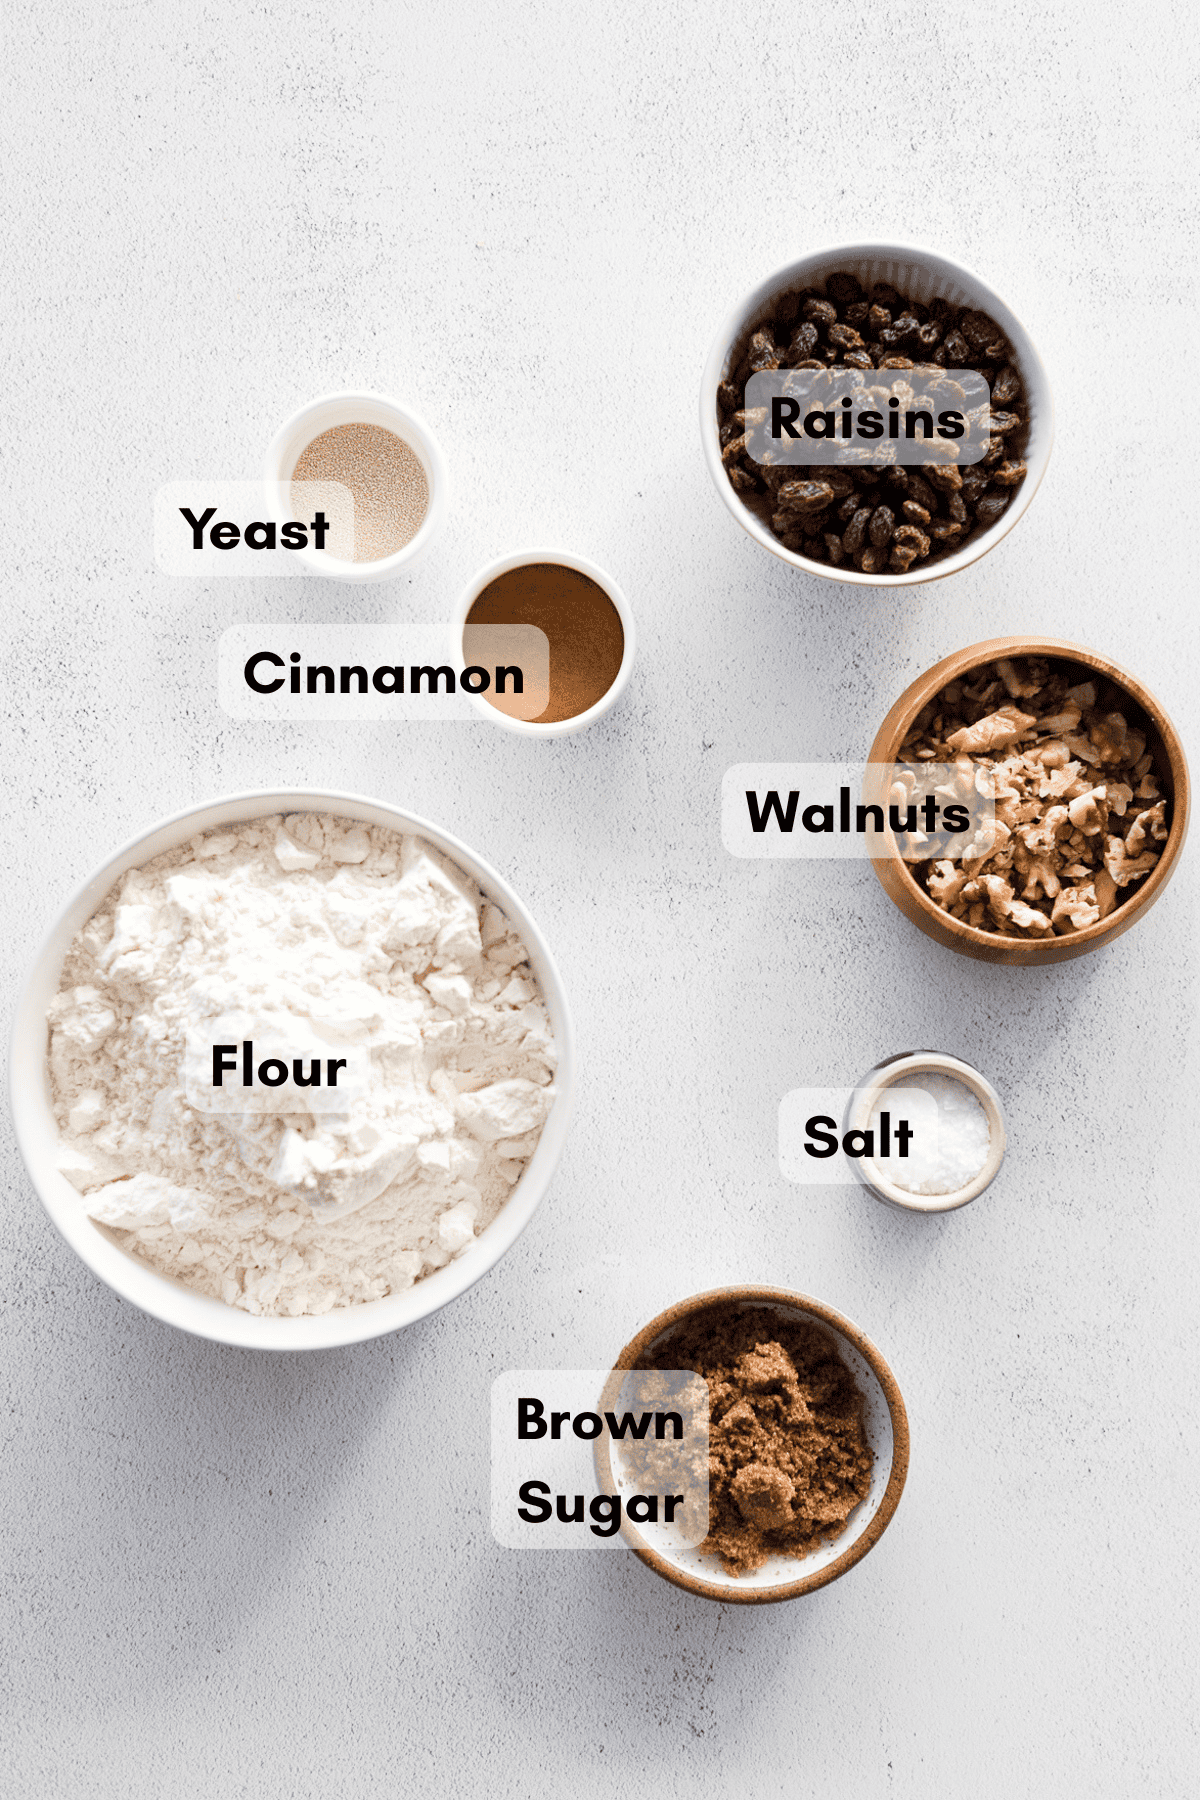
- Raisins: The star of the show! You'll want to make sure to separate the raisins so there are no clumps, and remove any remaining bits of stem. If you wanted to modify this recipe, you could use dried cranberries or another dried berry here.
- Walnuts: You'll want to coarsely chop the walnuts. You could also replace this with another nut, if you prefer, or omit completely.
See full recipe below for detailed directions.
Substitutions & Variations
This is a very adaptable recipe and below are a few easy substitutions and variations you can try.
- Use a different dried fruit: Cranberries would be an easy substitution for the raisins, but this recipe would also work with other dried fruits!
- Use a different nut: You could easily use pecans or another nut if you prefer!
- Ready for a few other raisin bread recipes? Try these Sourdough Discard Cinnamon Raisin Bagels and this Sourdough Discard Cinnamon Raisin Bread.
How to Make No-Knead Walnut Raisin Bread
There are only a few simple steps to making this No-Knead Walnut Raisin Bread! The full recipe with detailed directions is at the bottom of this post.
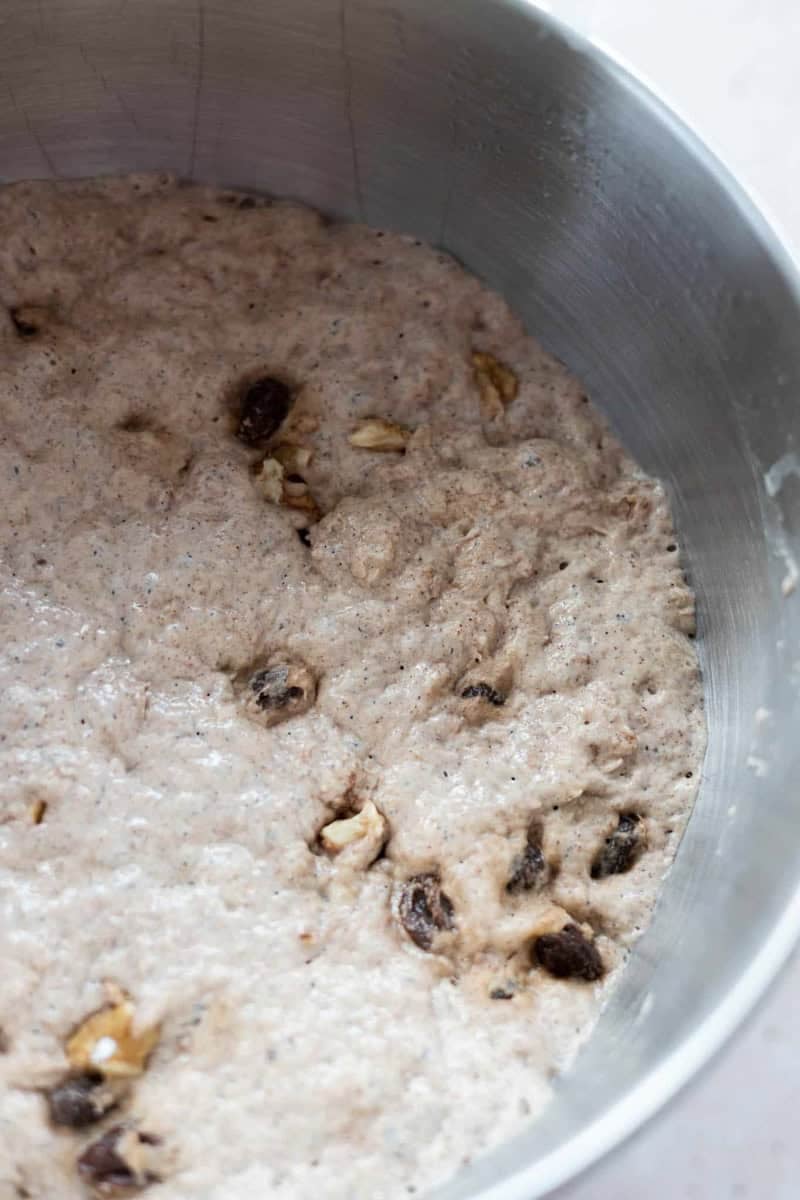
- Step 1: Combine all dough ingredients. Cover with plastic wrap and let sit 8-24 hours at room temperature. The dough will rise significantly and look puffy when ready to bake.
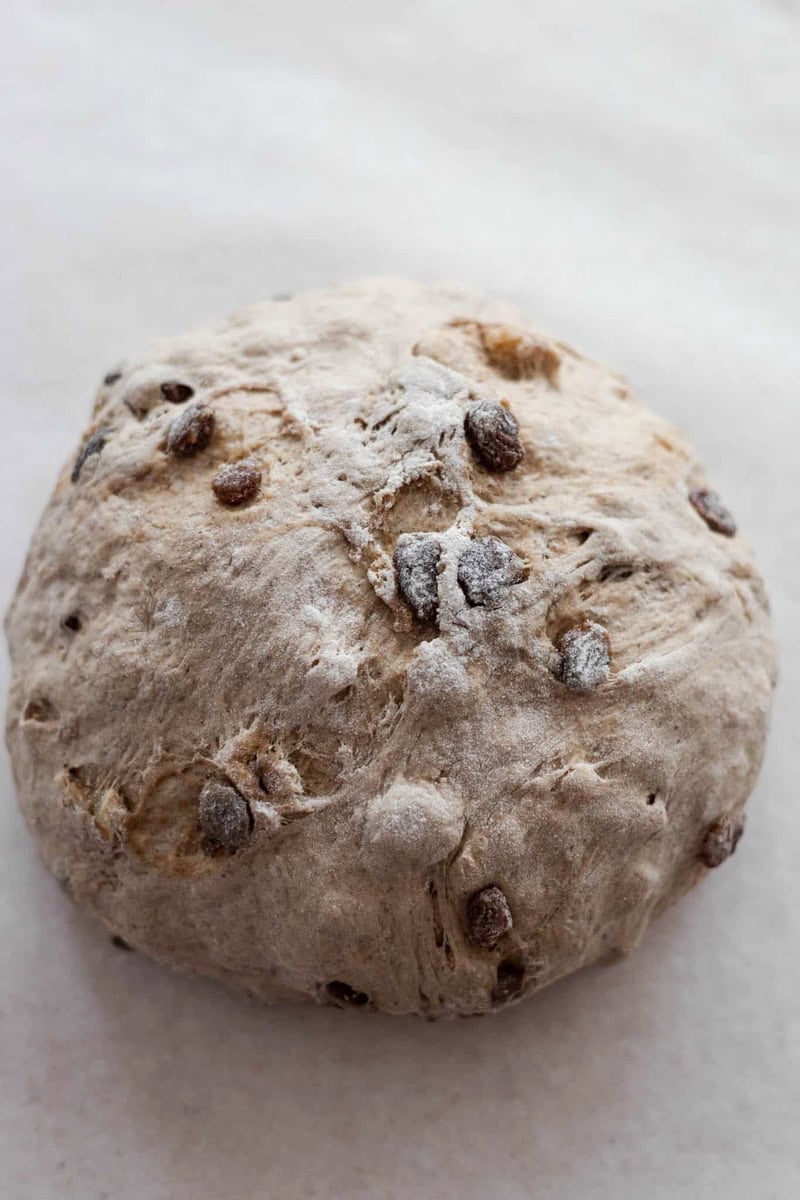
- Step 2: Gently shape the dough until a ball is formed, dusting with more flour if necessary. Transfer the dough to a piece of parchment paper and let it sit until the oven is ready.
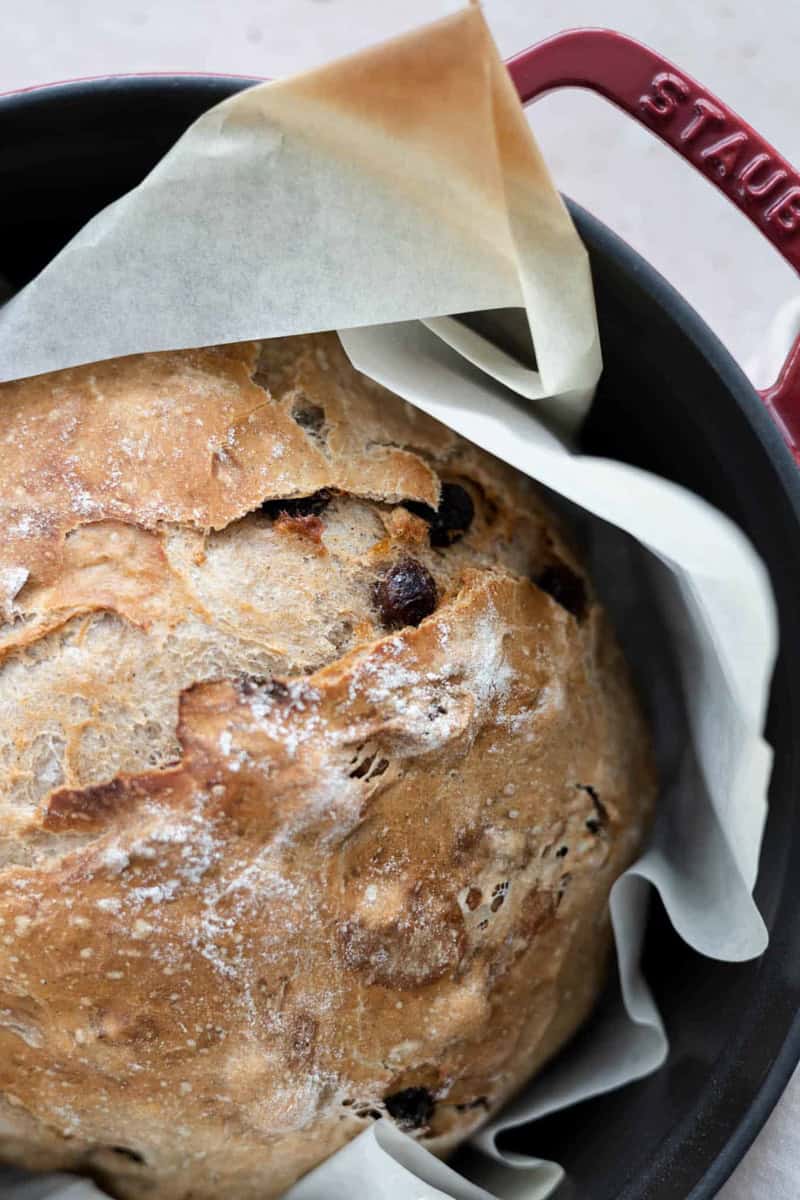
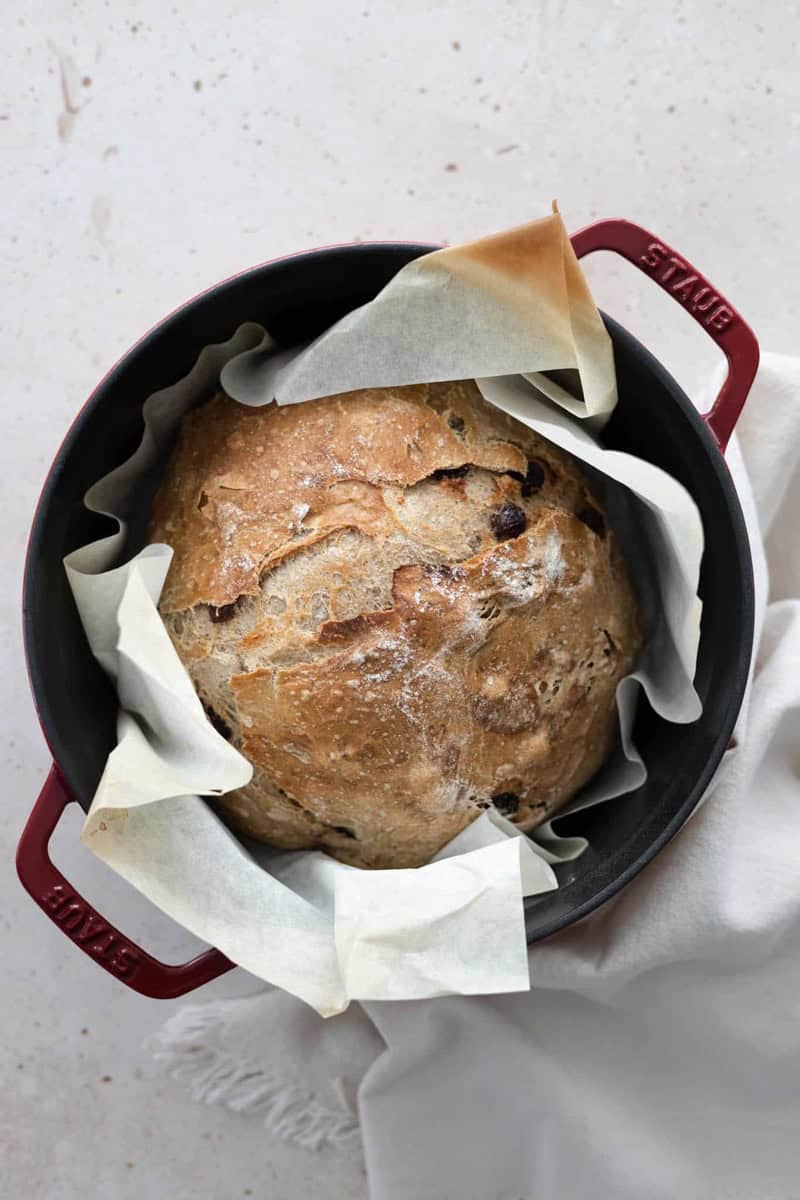
- Step 3: Bake until browned, crusty, and the loaf sounds hollow when tapped. A thermometer inserted in the center of the loaf will read 190°F.
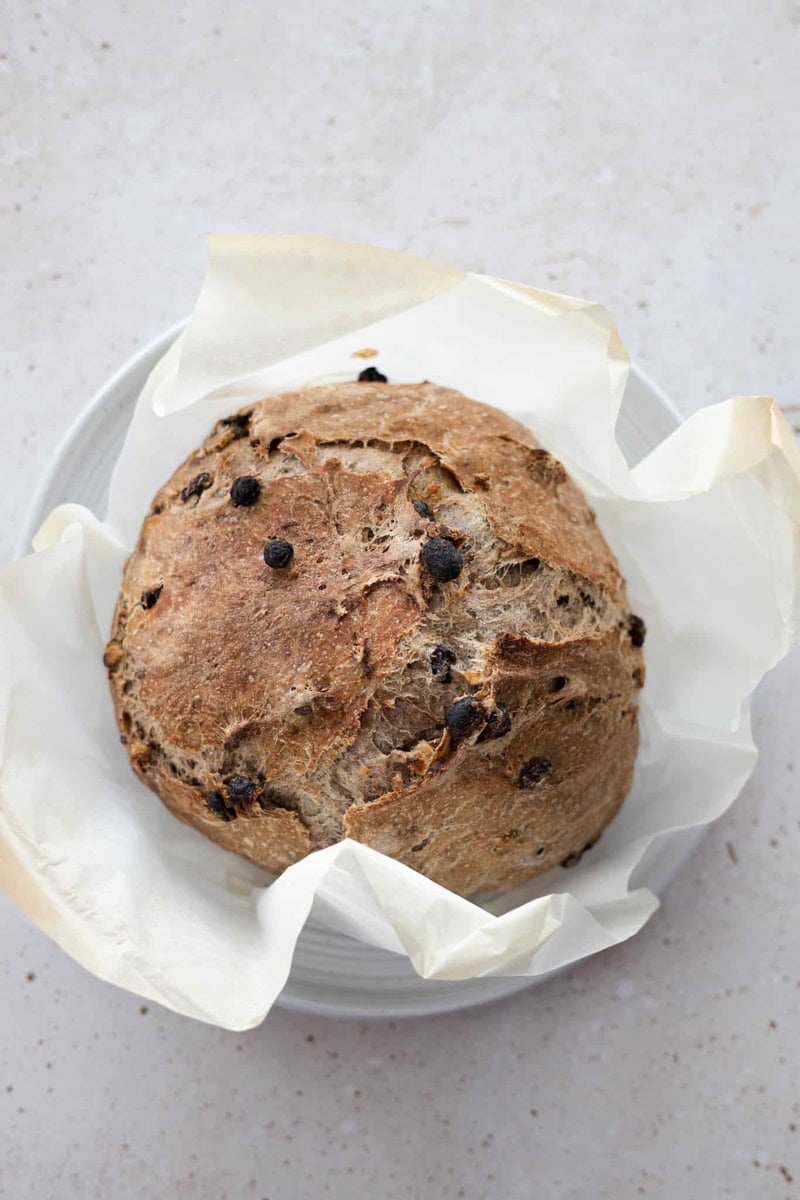
- Step 4: Immediately remove the bread from the dish and the parchment paper to cool completely on a cooling rack. Cool fully before slicing.
Expert Baking Tips
- The dough will feel very soft and that's ok! Use a bench scraper or your hands to gently shape it into a nice circle. You literally don't need to knead it at all.
- When you transfer the dough to the Dutch oven, use a wooden spoon to push the parchment paper away from the dough around the edges. This will give your loaf a bit more room to expand into a nice round shape.
- Cooling is important! After baking, take the loaf out of the pan, remove it from the parchment paper, and let it cool completely on a wire rack. This air circulation helps the loaf cool while maintaining its crispy exterior.
- Let the loaf cool fully before slicing to get those perfectly clean slices!
Storage
Room Temperature Storage: Once the loaf has cooled completely, store in an airtight bag or container at room temperature for up to 3 days.
Freezer Storage: Once the loaf has cooled completely, place it in a freezer-safe plastic bag or container and remove as much air as possible. Freeze for up to 3 months. This will work for either the whole loaf, or with individual slices.
- Thawing the whole loaf: When you're ready, let the bread thaw at room temperature until no longer cold. You can refresh the bread by reheating it in an oven at 350 degrees F until it's warmed through. Slice and serve.
- Thawing individual slices: You can let the slices thaw at room temperature until no longer cold, or you can pop them in the toaster to warm them up.
Then, refresh the loaf and return it to near-fresh quality by reheating it in an oven preheated to 350°F; take it out when it is warmed through.
Recipe FAQs
Yes, you could! As long as they're dried berries (like dried cranberries), they will work well. The nuts can also be omitted if you'd prefer not to have any.
Yes. I recommend letting the dough rise 8-24 hours. I realize that's a huge time window, but it will be good if you bake it at any point after that. The longer you let the dough rise, the more airy your loaf will be. I like to make the dough in the evening, then bake it roughly midday the next day (or whenever I get around to it!).
The rise takes time, and there are many factors that can affect this. Make sure you're using fresh yeast that gets foamy on the warm water. If it doesn't foam, your yeast is dead and you'll need to start over with fresh yeast.
Room temperature also greatly affects rise time. Dough rises slower in a colder room and faster in a warmer room, so try to place your dough in a slightly warm spot. If you can, keep the bowl of dough off your countertops with a trivet or kitchen towel (stone countertops are often several degrees cooler than the air temperature).
More Easy Bread Recipes


If you tried this No-Knead Walnut Raisin Bread or any other recipe on my website, please leave a ⭐ star rating and let me know how it went in the comments below. I'd love to hear from you! Happy Baking!

No-Knead Walnut Raisin Bread
Ingredients
- 1 ½ cups warm water
- 1 teaspoon active dry yeast
- 3 cups + 2 Tablespoons bread flour
- ¾ cup raisins seperated, stems removed
- ½ cup walnuts coarsely chopped
- 2 Tablespoons unsalted butter melted
- 3 Tablespoons dark brown sugar
- 1 Tablespoon cinnamon
- 1 teaspoon salt
Instructions
- Combine yeast and warm water in a small bowl and let sit for 10 minutes until foamy. Melt butter in a small saucepan over low heat, set aside to cool.
- In the bowl of a stand mixer fitted with a dough hook*, combine flour, raisins, walnuts, brown sugar, cinnamon, and salt. Pour the water and yeast mixture and the melted butter into the bowl and stir until just combined. The dough will be sticky and wet; you do not need to knead it. Cover with plastic wrap and let sit at room temperature for 8-24 hours. The dough will rise significantly and look puffy when it's ready to bake.
- To bake, place a Dutch oven with lid in the oven and preheat to 450°F. This allows your Dutch oven to preheat as well.
- While the oven heats, transfer the dough to a lightly floured surface. Using a bench scraper and your hands, gently shape until a ball is formed, dusting with more flour if necessary. The dough will still be very soft. Transfer the dough to a piece of parchment paper and let sit until the oven is heated.
- Carefully remove the Dutch oven from the oven and transfer the dough (still on the parchment paper) into the Dutch oven (remember, this will be hot!). Cover with the lid and bake for 35 minutes. Remove the lid and bake an additional 10-15 minutes. Lightly tent with aluminum foil if you feel your loaf is browning too quickly. When finished, the bread should be browned, crusty, and sound hollow when tapped. A thermometer inserted in the center of the loaf will read 190°F.
- Immediately remove the bread from the Dutch oven and the parchment paper to cool completely on a cooling rack. Allow the loaf to cool fully before slicing.
TraciM says
This recipe was very easy and worked well for me despite realizing I was short on flour and having to replace one cup with whole wheat. We are at 6000 feet and it came out very well.