

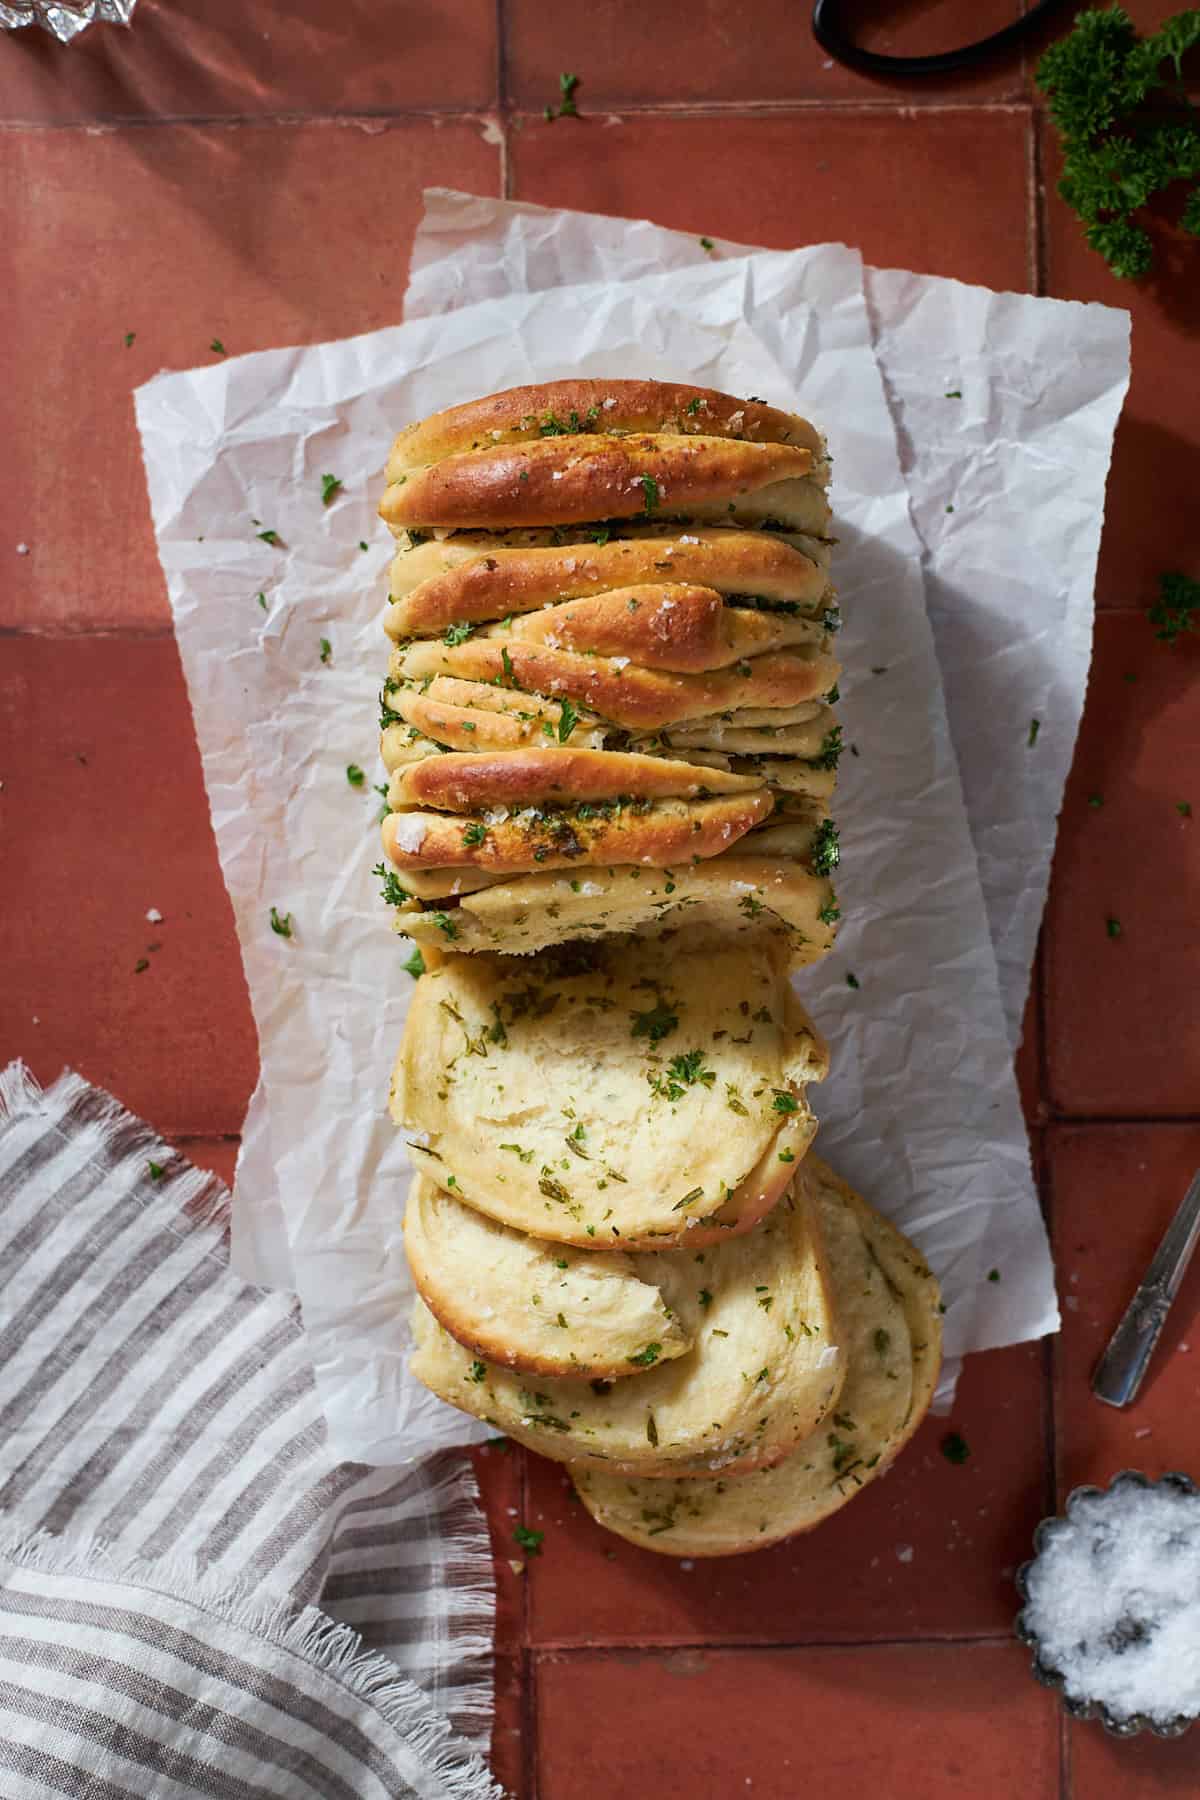
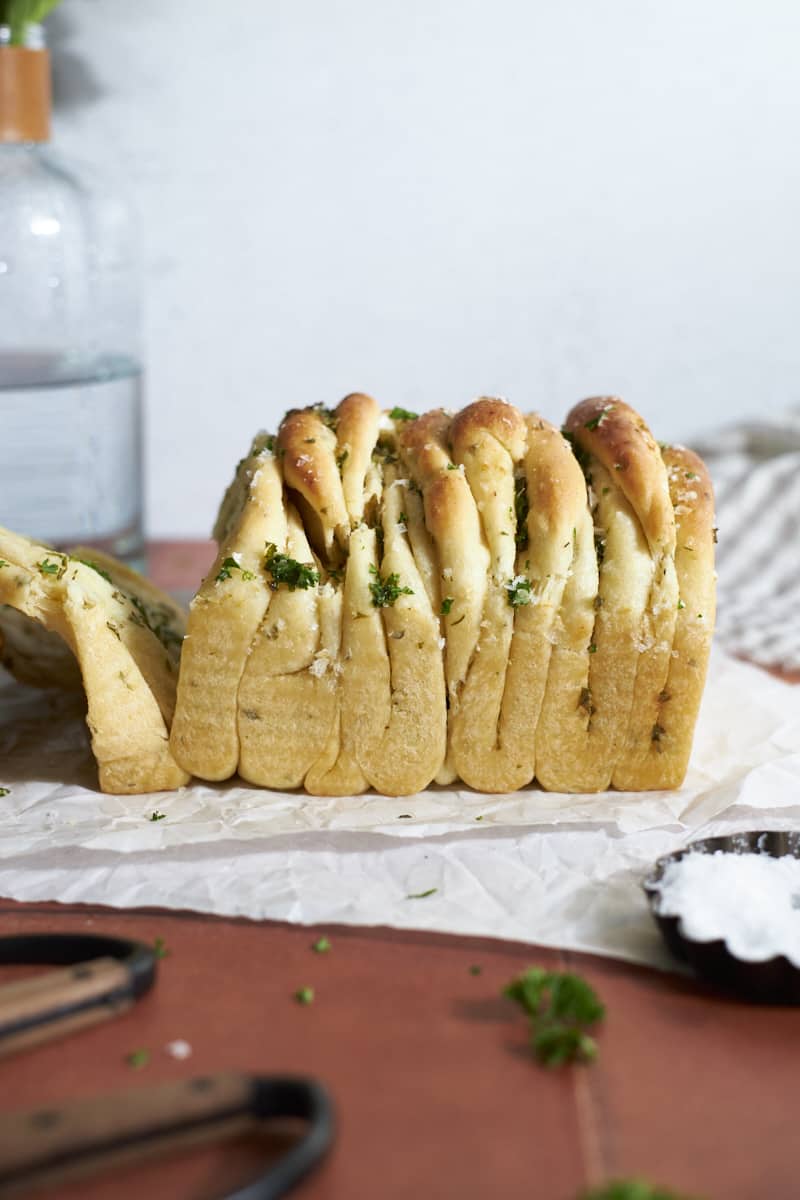
This Sourdough Discard Garlic Pull Apart Bread is delicious and fun to eat (and make!). Peel off a buttery, garlicky layer to enjoy on its own, as an appetizer, or as a side dish with a meal. It's a fun twist on classic garlic bread that you can make with sourdough discard or active sourdough starter, if you prefer!
And if you're really in the mood for a sweet pull-apart bread, try my Sourdough Discard Cinnamon Roll Pull Apart Bread, or my Sourdough Discard Apple Pull Apart Bread!
This was so good and fun to make - came out perfect. Thank you for the recipe!
- Mary
Why you'll love this recipe
- The irregularity is part of the charm of this recipe, so you don't need to worry about dividing the dough perfectly, or shaping the pieces into perfect shapes!
- It also makes this a great recipe to make with young or inexperienced bread bakers - it's very forgiving!
- The garlic bread layers are buttery, garlicky, and delicious - and very fun to peel and eat! And if you're in a garlic mood, try these Sourdough Discard Garlic Rolls!
- This recipe is best served warm, while the layers are still soft and fragrant!
- You can easily modify this recipe to use active sourdough starter instead of sourdough discard, if you prefer.
- You can change up the herbs to suit your tastes. Only rosemary? Only parsley? A mix? Something else entirely? Go for it!
- Looking for other side dishes or appetizer recipes? Try these Sourdough Discard Potato Dinner Rolls and these Sourdough Discard Miniature Pizzas.
Jump to:
Ingredients
There are only a few key ingredients you'll need to make this pull-apart bread.
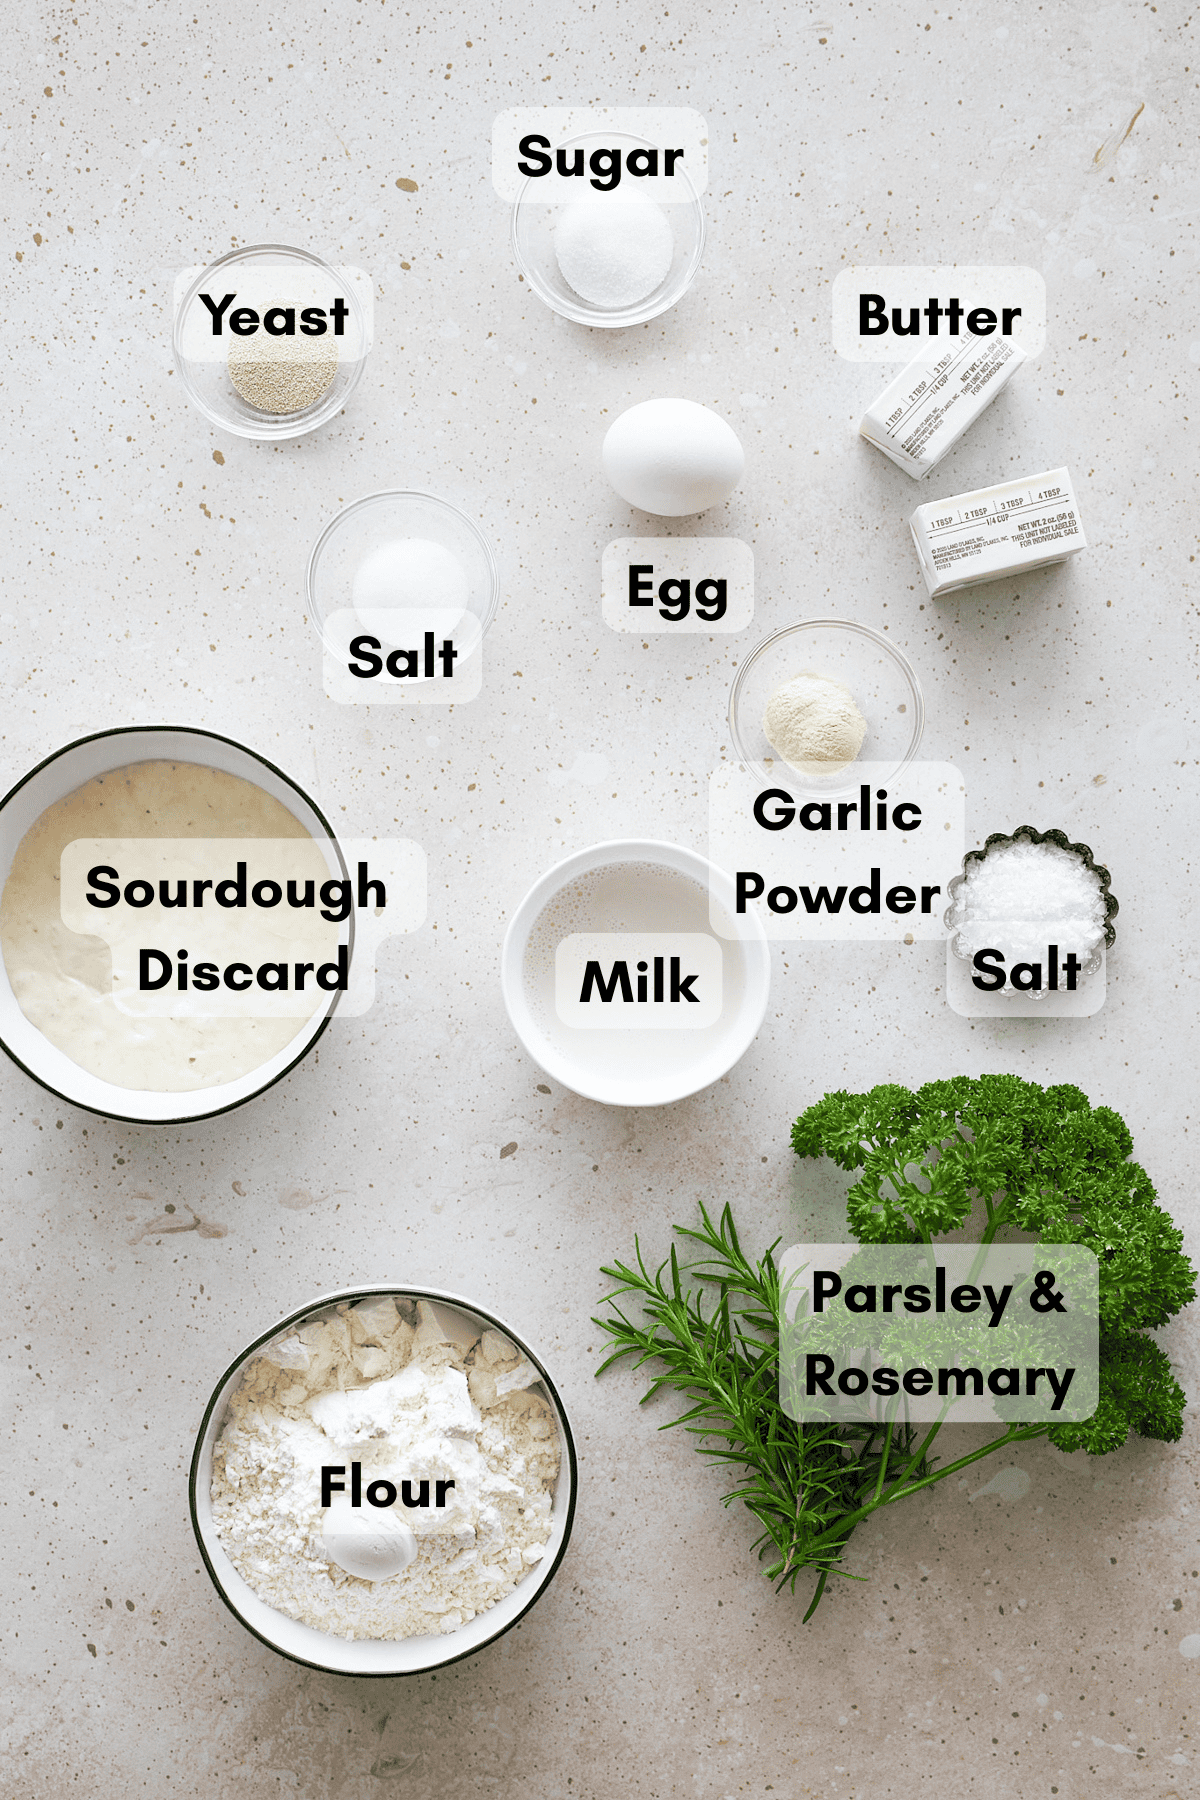
- Sourdough discard: The sourdough discard should be unfed and at room temperature for this recipe. This recipe is designed for a sourdough starter with a 1:1 ratio (when you feed your starter, it's with 1 part water and 1 part flour). If your starter uses a different ratio, you may need to adjust some of the ingredients in this recipe.
- Learn more about how to make a sourdough starter.
- Garlic powder: Make sure you're using garlic powder and not garlic salt! This helps give that great garlicky taste.
- Fresh parsley or rosemary: You can use either fresh parsley or rosemary (or a combination of both!) for this recipe. I highly recommend using fresh rather than dried herbs.
- If you're in a rosemary mood, try these Sourdough Discard Rosemary Salt Bagels and this Sourdough Discard Tomato Focaccia!
- Flaky sea salt: Finishing the bread with flaky sea salt gives it a perfect flavor kick. I like to use Maldon Sea Salt.
See full recipe below for detailed directions.
Substitutions & Variations
This is a very adaptable recipe and below are a few easy substitutions and variations you can try.
- Use active sourdough starter - If you'd like to make this recipe with active sourdough starter instead of discard, you can. Omit the yeast, and you'll also need to adjust the rising times (I have not tried this with active starter, so do not have those rise times currently).
- Use different herbs - You can use either parsley or rosemary for this recipe (or a combination of both!). If you like, you can also mix up the herbs and use something else - sage would be wonderful here!
- Add cheese - If you're interested, you can sprinkle ¼ cup of shredded parmesan cheese in between the dough layers as you're building the bread. Spread each piece with the butter mixture, then sprinkle with cheese and fold as directed.
- Use fresh garlic - If you'd like to use fresh garlic instead of garlic powder, you can! One clove of garlic is equal to ¼ teaspoon of garlic powder.
- Looking for a different garlic bread option? Try these Sourdough Discard Garlic Knots!
How to Make Sourdough Discard Garlic Pull Apart Bread
There are just a few steps and the most involved part (but also the most fun part!) is the assembly. The full recipe with detailed directions is at the bottom of this post.
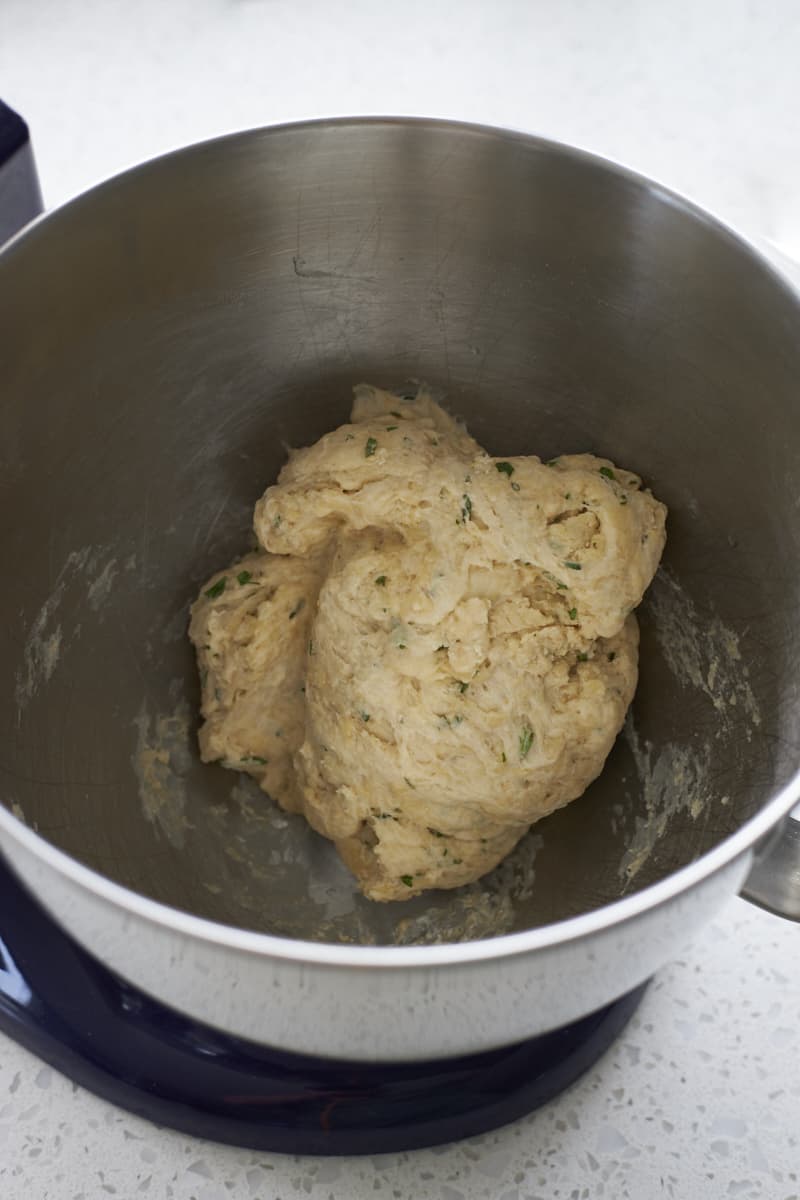
- Step 1: Combine all ingredients except butter in the bowl of a stand mixer. With the mixer on low, slowly pour in the melted butter until a shaggy dough forms.
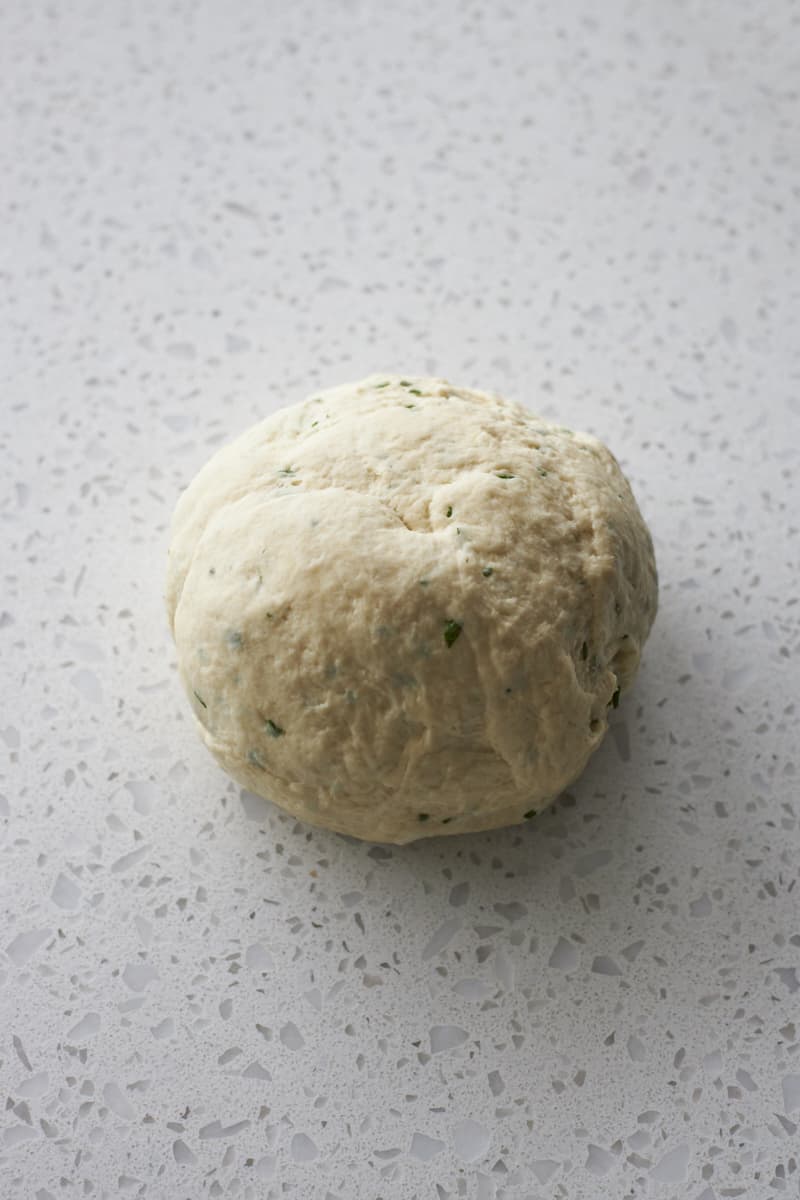
- Step 2: Knead the dough on a work surface for 3-4 minutes until smooth. The dough should be soft, smooth, and not sticky. If needed, add more flour or milk (1 Tablespoon at a time) to reach your desired consistency.
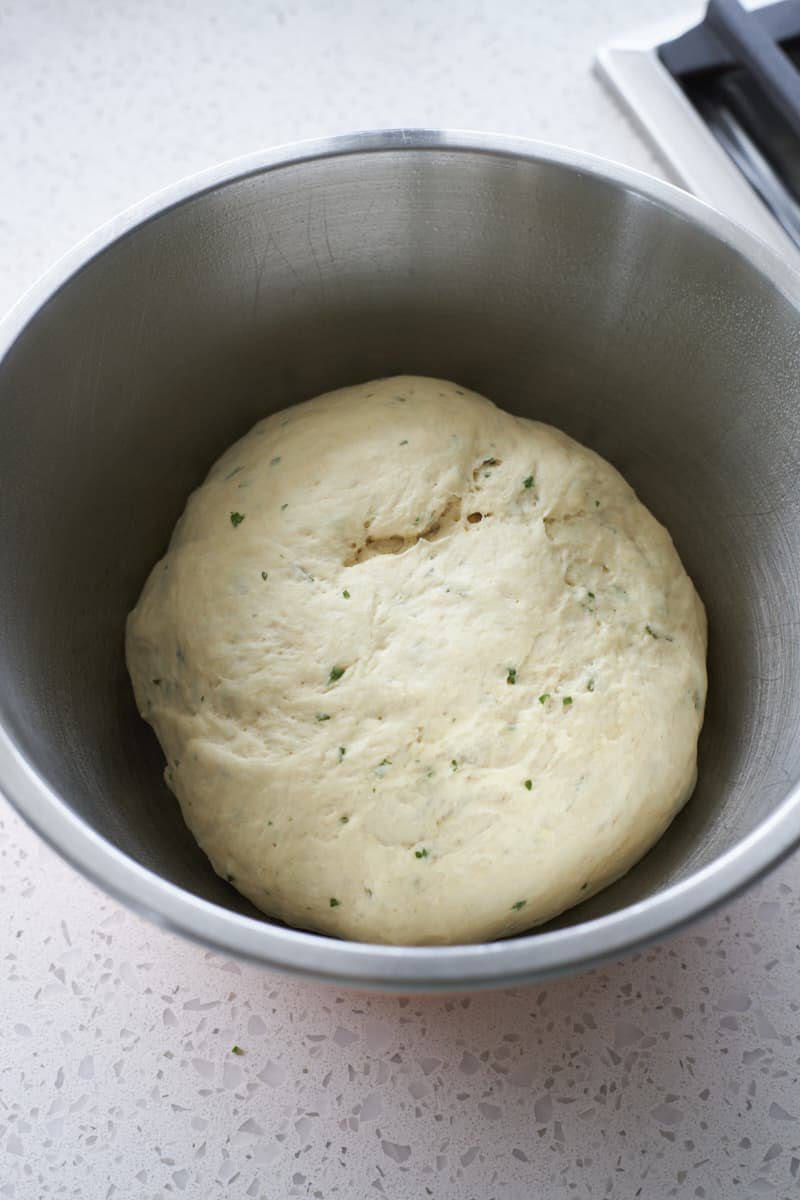
- Step 3: Transfer the dough to a large, oiled bowl. Cover with plastic wrap and let rise for 60-90 minutes until doubled in size.
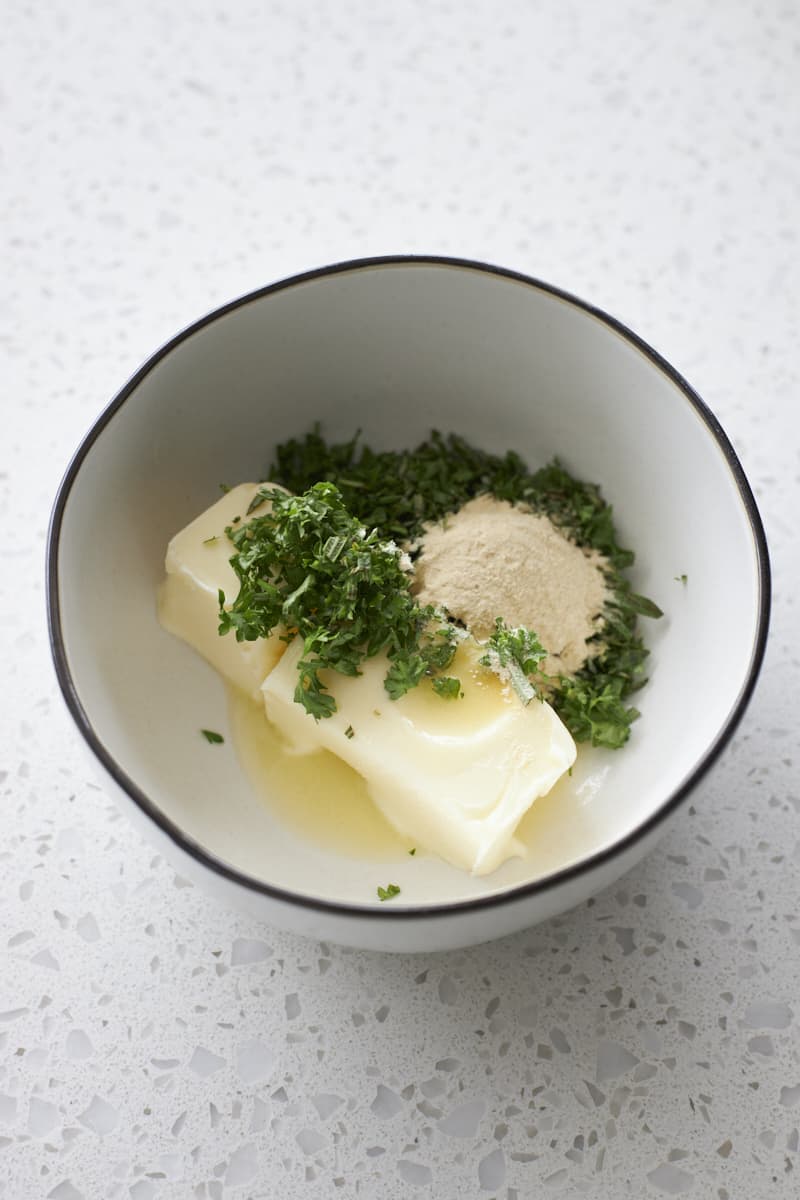
- Step 4: In a small bowl, mix together the softened butter, chopped herbs, garlic powder and salt for the topping. Make sure the butter is very soft to make for easier mixing.
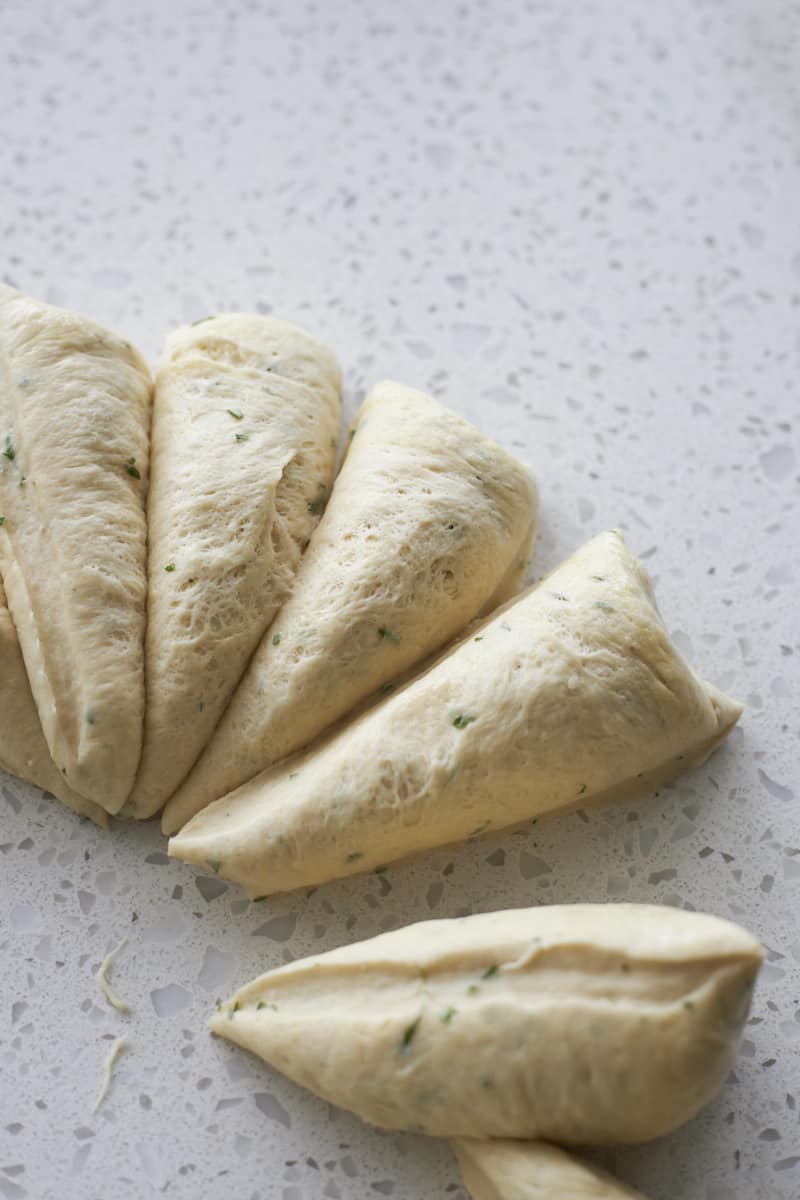
- Step 5: Transfer the dough to a work surface and divide into 12 equal-sized pieces. I recommend using a kitchen scale to measure perfectly even pieces.
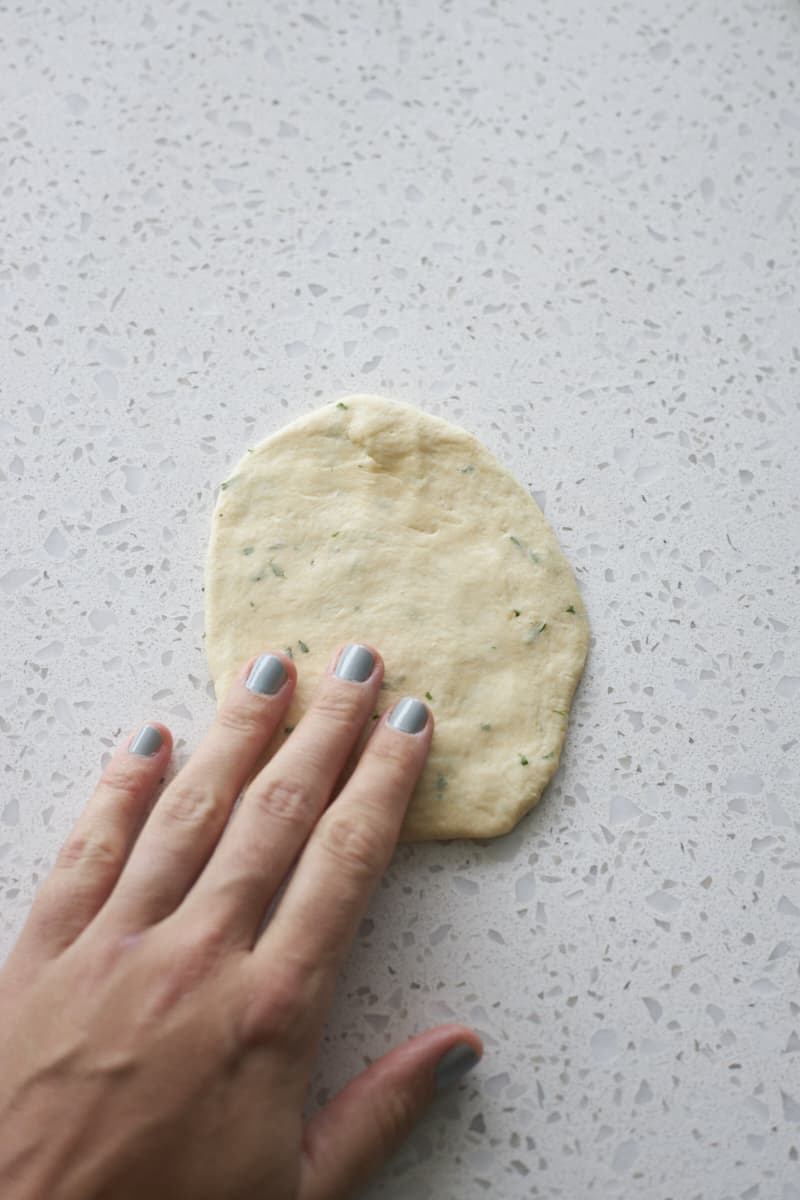
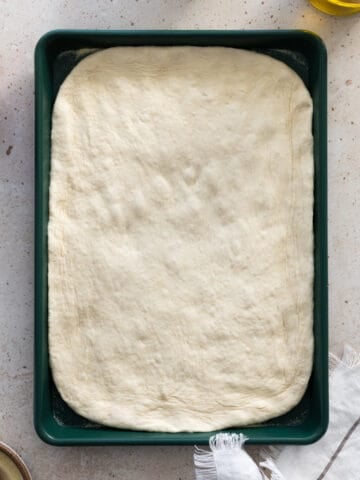
- Step 6: Press and flatten the dough with your hand (you can use a rolling pin if you prefer) into an oval about 4 inches wide (this is the about the width of your pan). This doesn't need to be exact; the irregularity is part of this recipe!
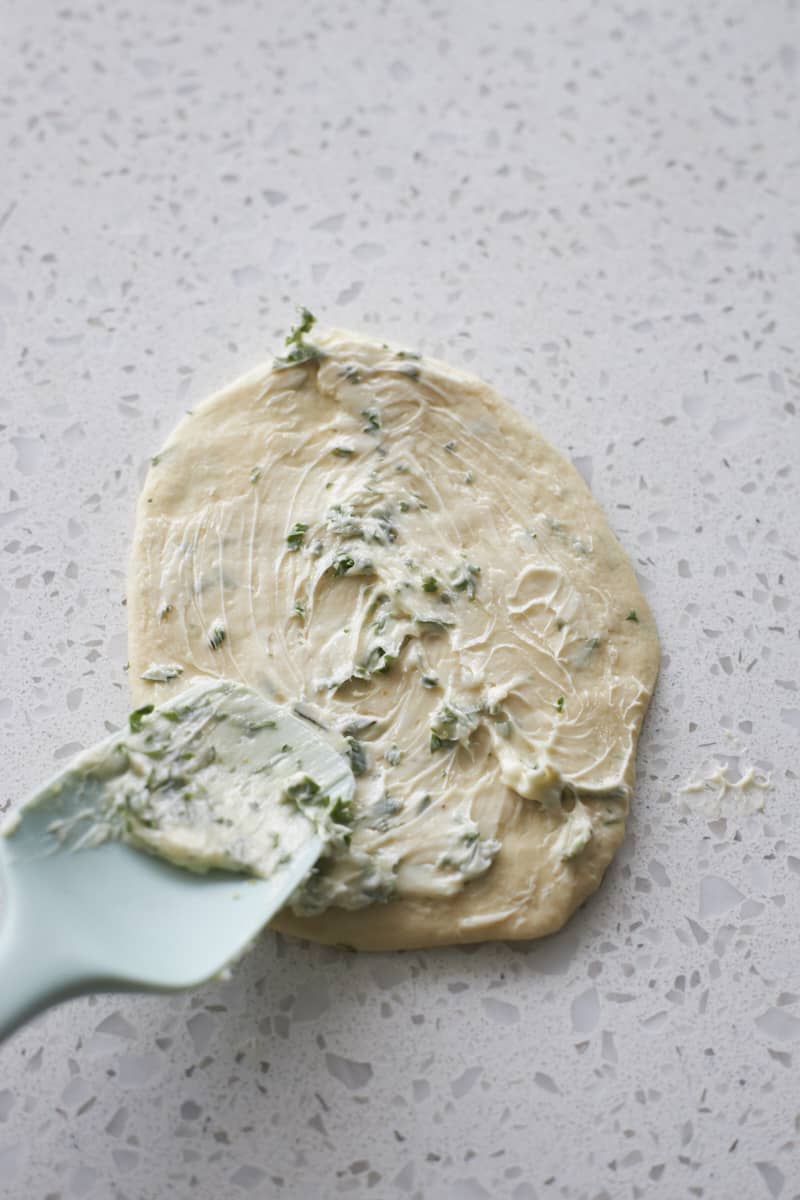
- Step 7: Generously spread each flattened piece with the butter mixture. You'll use about 1-2 teaspoons of the butter mixture on each piece.
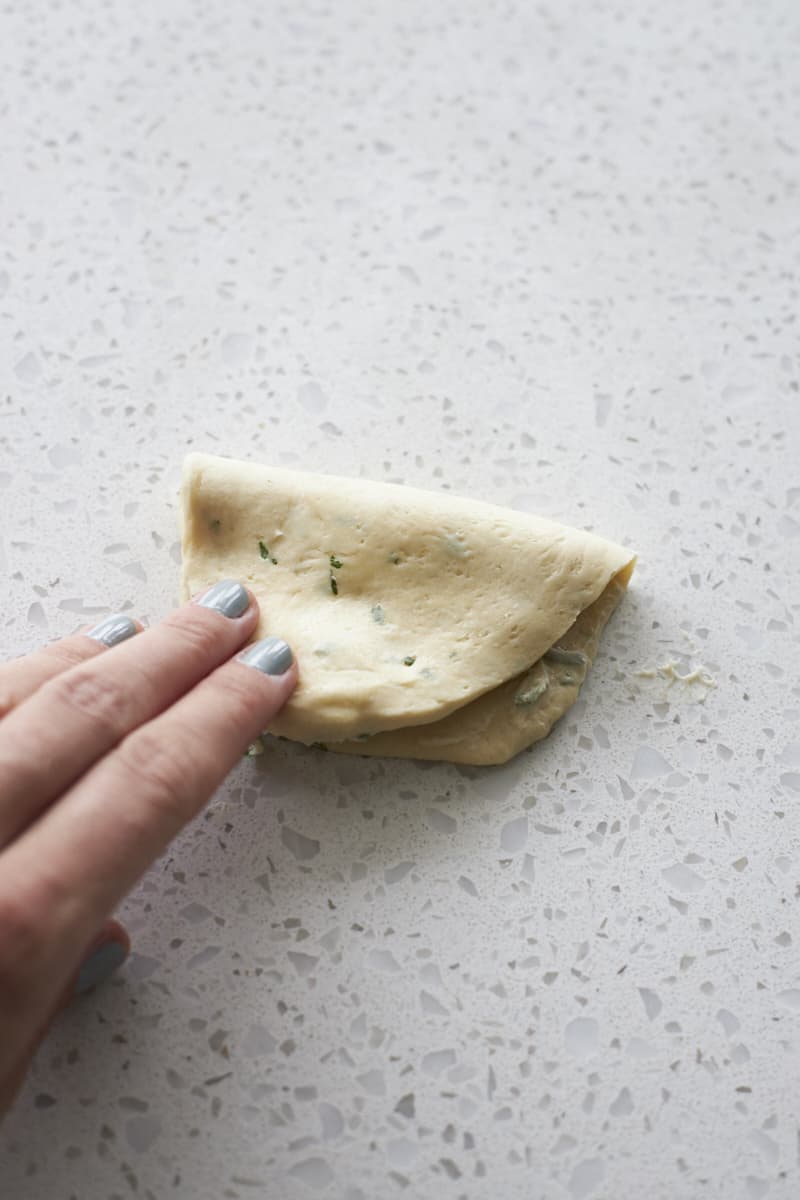
- Step 8: Fold the buttered piece in half like a taco.
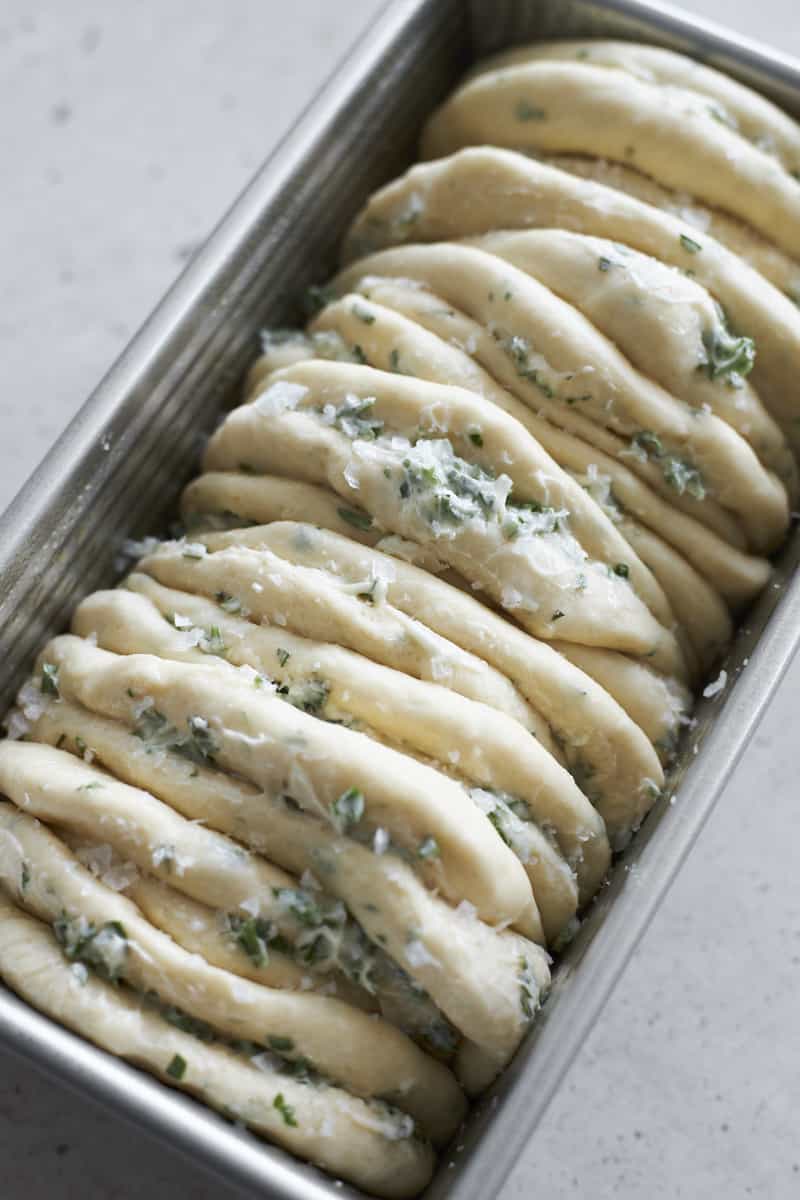
- Step 9: Place the piece fold-side-down in a greased 9x5-inch loaf pan. Repeat with the remaining pieces until the bread pan is full.
- Step 10: Cover with plastic wrap and let rise 30-45 minutes until puffed. The dough should not rise above the top of the bread pan.
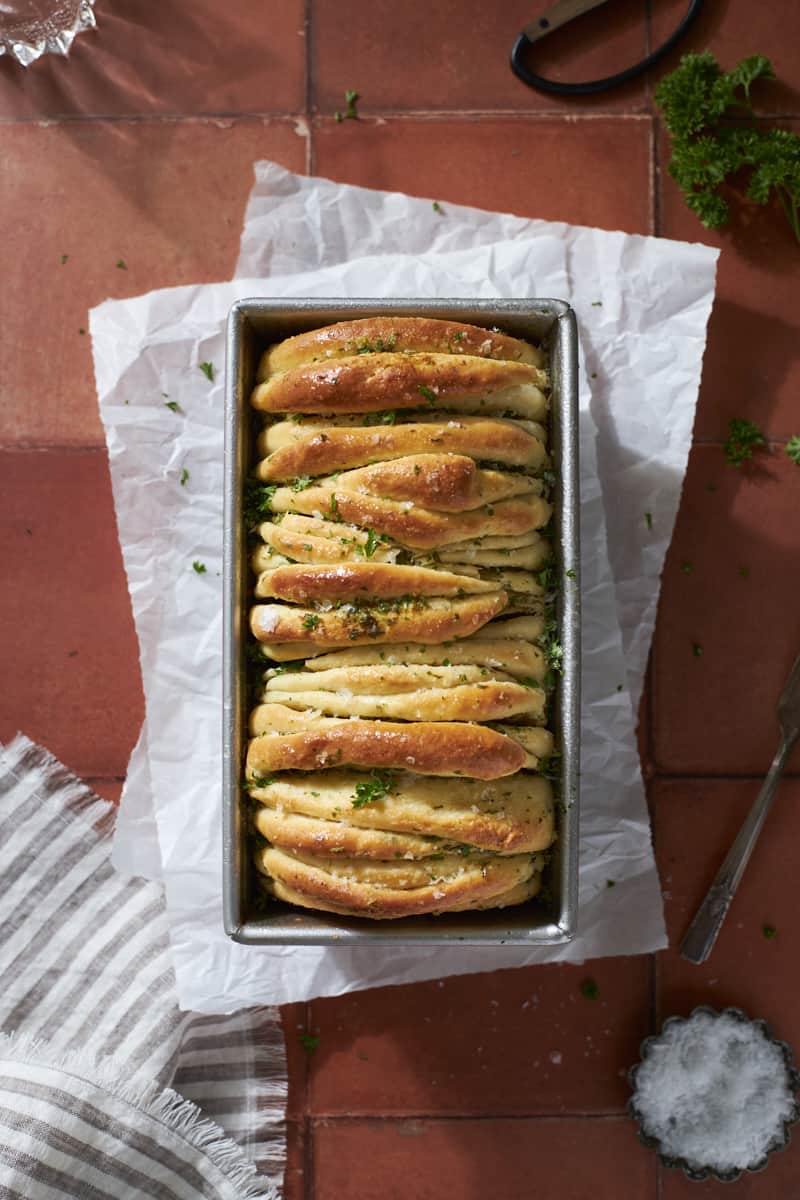
- Step 11: Bake until golden brown and the internal temperature reaches 200 degrees (F) on a kitchen thermometer. While warm, brush with any remaining butter mixture and sprinkle with flaky sea salt. Let cool slightly, then serve while still warm.
Expert Baking Tips
- Make sure to knead the dough long enough. The dough should be smooth and not sticky. If needed, add more flour or non-dairy milk (1 Tablespoon / 10 grams at a time) to reach your desired consistency.
- Shaping the dough does not have to be perfect. Part of the fun of this recipe (and others like my Sourdough Discard Pretzel Bites) is the irregularity of the garlic bread layers. Embrace it and shape the dough pieces by hand, let them be irregular shapes, and don't worry about them being the same size.
- Be generous with the butter mixture on each piece of dough. You'll also want to keep a little bit of the butter mixture to brush on the warm bread when it comes out of the oven!
- Do not let the dough rise past the top of the bread pan during the second rise. If it does, it will still be delicious, but you'll run the risk of the dough folding and falling over the edge of the pan as it bakes.
- Use a kitchen thermometer to make sure the loaf is fully baked. When finished, the loaf will reach an internal temperature of 200 degrees (F).
- Try a sweet version of this recipe with this Sourdough Discard Pumpkin Pull Apart Bread.
Can you add cheese to this recipe?
Yes! If you want to add cheese to this recipe, spread each piece of dough with the butter mixture, then sprinkle with shredded Parmesan. You'll need about ¼ cup of shredded Parmesan for the full loaf.
Storage
Room Temperature Storage: This Sourdough Discard Garlic Pull Apart Bread is best eaten fresh, while it's still slightly warm. You can store the bread in a sealed plastic bag or airtight container for up to 3 days. If needed, reheat in the microwave for about 30 seconds to make the bread soft and warm again.
Freezer Storage: If you want to store this bread to enjoy later, let it cool fully, then transfer to an airtight, freezer-safe container or bag. Freeze for up to 3 months. To reheat, let the bread thaw in the refrigerator overnight, then warm in the microwave for 30-60 seconds. You can also reheat the full loaf in the oven at 350 degrees F for about 10 minutes.
Recipe FAQs
Yes. You can sprinkle shredded parmesan cheese on each dough piece after you spread it with the butter mixture. You'll use about ¼ cup of shredded cheese for the full loaf.
I highly recommend using fresh herbs, but if you're in a pinch, dried herbs will work, too. Use 1 teaspoon of dried herbs in place of 1 Tablespoon of fresh herbs. And if you prefer using dried herbs, check out these Sourdough Discard Breadsticks, too!
Yes! Keep in mind that 1 garlic clove is equal to ¼ teaspoon of garlic powder as you're making the conversion.
There are times and visual cues listed in the recipe below, but the foolproof way is to measure the internal temperature of the loaf with a kitchen thermometer. When it's fully baked, the loaf will reach an internal temperature of 200 degrees (F).
More Sourdough Discard Recipes


If you tried this Sourdough Discard Garlic Pull Apart Bread or any other recipe on my website, please leave a star rating and let me know how it went in the comments below. I'd love to hear from you! Happy Baking!

Sourdough Discard Garlic Pull Apart Bread
Equipment
- Kitchen thermometer optional
Ingredients
For the bread
- ¼ cup non-dairy or regular dairy milk warmed to 110℉
- 1 ½ teaspoons instant yeast
- 2 teaspoons granulated sugar
- 2 cups + 1 Tablespoon all-purpose flour
- 200 grams (about ¾ cup) sourdough discard unfed, at room temperature
- 1 egg lightly beaten
- 1 Tablespoon fresh parsley or rosemary chopped
- 1 teaspoon kosher salt
- 1 teaspoon garlic powder
- 2 Tablespoons unsalted butter melted
For the topping
- 7 Tablespoons unsalted butter softened
- 1 Tablespoon fresh parsley or rosemary chopped
- 1 Tablespoon garlic powder
- ½ teaspoon kosher salt
- flaky sea salt for topping
Instructions
- Combine the warmed milk, instant yeast, and sugar in the bowl of a stand mixer fitted with a dough hook*. Add the flour, sourdough discard, beaten egg, chopped herbs, salt, and garlic powder. With the mixer on low speed, slowly add 2 Tablespoons of melted butter. Increase speed to medium and mix until a shaggy dough forms.
- Transfer the dough to a smooth work surface and knead until a smooth dough forms, about 3-4 minutes. The dough should be smooth and slightly tacky (but not sticky). If needed, add more flour or milk (1 Tablespoon / 10 grams at a time) to reach your desired consistency.
- Transfer the dough to a large greased bowl and cover with plastic wrap. Let rise for 60-90 minutes, or until doubled in size.
- While the dough rises, make the topping. In a small bowl, combine the softened butter, chopped herbs, garlic powder, and ½ teaspoon salt. Mix until combined. Set aside 1 Tablespoon of this mixture to brush on the loaf when it comes out of the oven. Grease a 9x5-inch loaf pan and set aside**.
- After the rise, turn the dough onto a smooth work surface and divide into 12 equal-sized pieces. I recommend using a kitchen scale to divide the dough evenly (for me, each piece was about 55 grams).Flatten each piece with the palm of your hand into a rough circle about 4 inches in diameter, then spread with 1-2 teaspoons of the butter mixture. Fold the piece in half like a taco, then transfer to the prepared baking pan with the fold-side down on the bottom of the pan. Repeat with the remaining pieces of dough, using all but the 1 Tablespoon of the butter mixture you've kept for brushing on the loaf when it comes out of the oven.
- Cover the pan with plastic wrap or a clean kitchen towel and let rise 30-45 minutes until the dough is puffed. The dough should not rise above the edges of the loaf pan.
- Preheat the oven to 350℉.
- Bake for 30 minutes, then cover with aluminum foil and bake an additional 5-10 minutes. The final loaf will be golden brown, and if you use a kitchen thermometer, the internal temperature will reach about 200℉. While the loaf is still warm, brush with the remaining butter mixture and sprinkle with flaky sea salt. Let the loaf cool in the pan for 10 minutes, then serve.
Lauryl says
Followed this recipe to the T the dough was soooo dry I had to add so much milk. Honestly I thought it was a lot of work for mediocre product. It just seemed very dry and lacking. Perhaps if it had some cheese or something else. Wouldn’t recommend.
Cara Gil says
Used this recipe a handful of times we love it!
I was wondering if I can replace the egg or omit it? We have an egg allergy now
Jessica Vogl says
You could use a liquid egg substitute (like JustEgg), but I haven't tried it with other egg substitute options.
Mae Sanchez says
Can I use bread flour or self rising in this?
Jessica Vogl says
Honestly, I wouldn't recommend either as I haven't tried them. Subbing for self-rising flour in a yeasted recipe isn't something I'd recommend. And the bread flour will make this a bit more crusty, and I think with this recipe it may be a bit too crusty.
Christy Gallenberger says
I made this twice and find the dough easy to work with when following the recipe.
I added cheese to the pockets each time, once using a bread pan, second time using a pie pan to create the pull apart bread.
It's saved as a favorite! Try it!
Ruth Beaulieu says
I haven't made this yet but I plan to for a dinner party tomorrow. Could I make and bake it today and reheat it for dinner tomorrow? If so, how do you recommend reheating?
Jessica Vogl says
I'd recommend doing the first rise in the fridge overnight, then shape / second rise / bake the next day. Not sure if that works with your timing, but that will buy you some time while still giving a great result!
Ruth Beaulieu says
Thanks for such a quick response!!
Mark says
would it possible to refrigerate after step 5, and then next day leave it at room temperature 60–90 minutes until the dough is puffed and below the rim?
Jessica Vogl says
I'd recommend doing the first rise in the fridge overnight, then shape / second rise / bake the next day. If you already assemble and then do an overnight rise, I'm worried it will be too long and it may overproof / fall flat.
Christine J Marks says
Took a risk and made this for a dinner party last night--big win! Followed the directions, used fresh garlic in bread and spread and added extra garlic powder to the spread. So easy to make and delicious. Glad I found your recipe!
Laura Aarsen says
Made this twice, and both times the bread came out really dense and tough.
I did let the dough rise until doubled on the first rise, and until puffed on the second rise.
The garlic taste was nice, but I won't make this a third time.
Jessica Vogl says
Appreciate the feedback!
Rhia says
Can I let this sit overnight before baking?
Jessica Vogl says
You could do the first rise in the fridge overnight! Then shape / second rise / bake the next day.
Amanda says
Made this tonight, and it turned out amazing. One thing is I may have been a little light on the butter, next time I’ll do more rather than less.
Jessica A. says
I have to say, I just prepped my dough using active starter instead of discard. It already smells amazing! I used Italian seasoning instead of the rosemary or parsley, but it smells fantastic and I will keep you updated on how it turns out!
Janine says
how did it turn out?
Emily Ernst says
You say “You can also reheat the full loaf in the oven at 350 degrees F for about 10 minutes.” Does this mean directly from frozen or thawed out?
Aggie says
Amazing- I made this and used real garlic for the spread and it was delicious! Would love to try it with Spinach and Fetta filling, yum!
Louri White says
Gave it a try . Perfect but would like it with abit more garlic !
Allie says
This was just fine - would have much rather used real garlic than garlic powder for a brighter taste. It had very little flavor and the texture was blah. Used only parsley to go with what I was cooking.
Anna says
I made this recipe and I ate the entire loaf in one sitting it was insanely good!! Next time I make it, it’ll have to be to share with friends otherwise I will eat the whole loaf again!
Daisy says
What adjustments to the recipe would you recommend for a discard ratio of 2:1 flour water?
Jessica Vogl says
Your starter has more flour than water, compared to the starter I used to make this recipe. For mine, 200g of starter = 100g flour and 100g water. For you, 200g starter = roughly 133 flour and 66g water. When you make the recipe, you'll want to increase the water in the recipe by about 34grams and decrease the flour by about 33grams. Of course, adjust as necessary when you're kneading, but that's where I would start!
Amber says
Made this bread today and it was amazing. My family loved it so much! We were wondering if we could use this same recipe but for a sweet bread? Maybe with Nutella or honey or something? Any ideas if this could work? Obviously omit the savory seasonings and garlic butter. lol!
Jessica Vogl says
Hi Amber! So glad you loved it! I have a few versions of this recipe that are sweeter that you should check out: Sourdough Discard Apple Pull Apart Bread and Sourdough Discard Cinnamon Roll Pull Apart Bread. I haven't tried the Nutella idea but it sounds deliciuos!
Sharon says
I gave this recipe 3 stars, but only based on personal preferences. The next time I make it (and I will definitely make it again), I will omit the rosemary in the bread. I used rosemary freshly harvested from our garden and between the bread and the topping, the amount of rosemary was overwhelming for our personal preferences. I'm a scientist by trade and very diligent about measuring or weighing, so I'm comfortable that I followed the recipe suggested amounts. Again, it was just too much rosemary for our tastes, but tastes are personal. The same with the amount of butter. Next time, I will cut the amount of topping in half - just too much butter for the amount of bread.
Jessica Vogl says
Appreciate the feedback!
Abbie Smith says
Very good! My fiance loved it, and gave me the idea to put pepperoni in with it next time! Pizza bread
Lauren says
I haven't made this yet, but plan to because it looks amazing! Question for you though - do you think I could prep the dough ahead of time and if so, how long could I let it rest in the fridge? (24-48 hrs, etc)
Jessica Vogl says
Yes, you could prep this ahead of time and put it in the fridge for a few hours or even overnight. I'd aim for a few hours (or even overnight), but I'd hesitate to go much longer than that.
Nancy says
Can replace garlic powder to fresh garlic?
Jessica Vogl says
For the topping, yes. I would not recommend putting fresh garlic in the dough (fresh garlic can hinder the dough's rise).
Whit Chavez says
Made this recepie and it was so good everyone is requesting for thanksgiving! I’m wanting to prepare my dough the night before so that way it’s easier in the morning. At what point of the recepie would I stop and put in the fridge? The first rise? Thanks so much!!
Jessica Vogl says
I would do the first rise in the frigde and then shape / second rise / bake the next day!
Whit chavez says
Thanks for the speedy response! Happy Thanksgiving
Jessica Vogl says
Happy Thanksgiving!!