

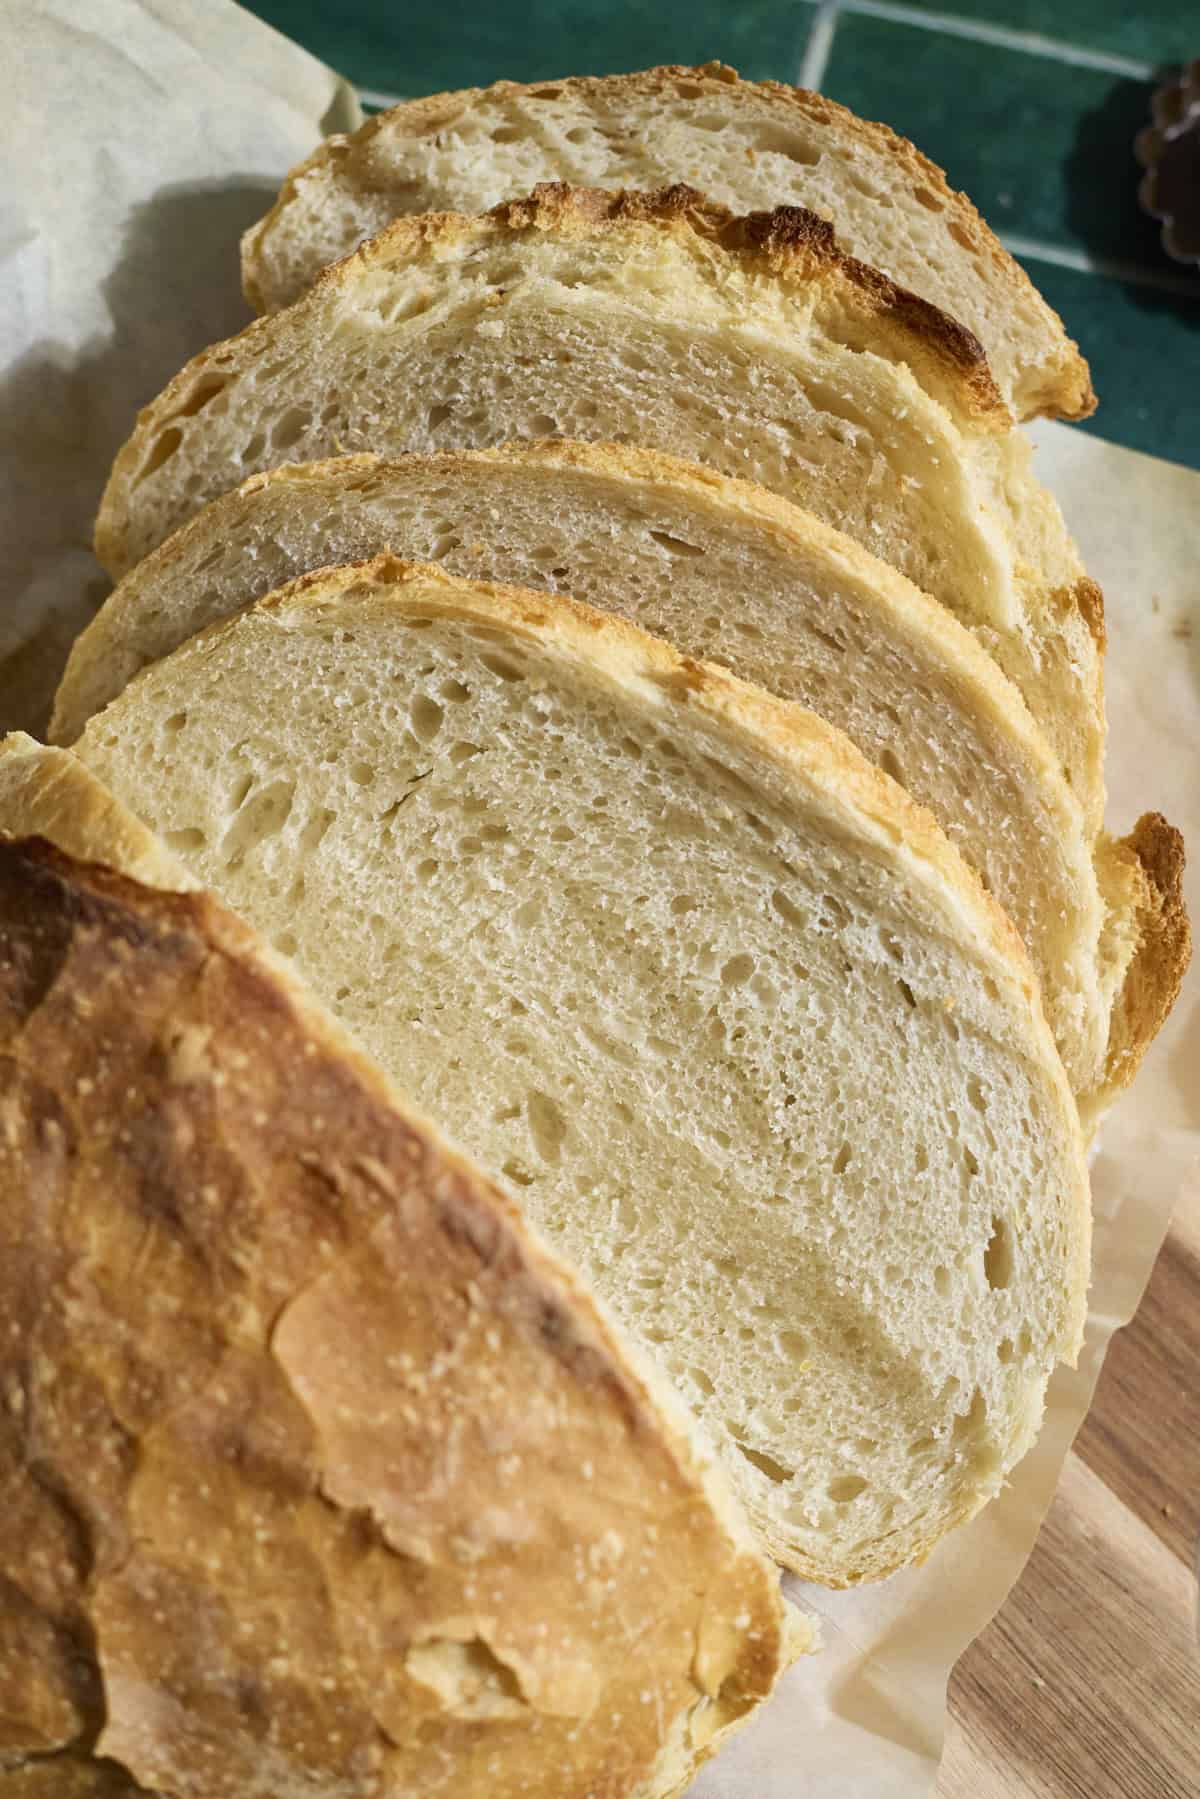
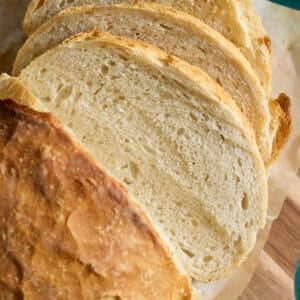
Whether you're new to the sourdough world, or a sourdough veteran, this Sourdough Discard Bread is an easy recipe so that you can make a same-day loaf of bread with your sourdough discard.
There is no special equipment needed, and you'll have a beautiful loaf with a crusty exterior and a light and fluffy interior that is perfect for toast or sandwiches in just a few hours. This is a great beginner recipe, and also a great way to use up your sourdough discard, even if your starter isn't fully active yet!
Why you'll love this recipe
- If you're new to the world of sourdough, this is a great first recipe to make your first loaf of bread, even if your sourdough starter isn't fully established yet!
- This recipe doesn't use any special equipment, so you don't need a bench scraper, a dough whisk, a proofing basket, or any other "specialty" bread item.
- There is minimal hands-on time with this same-day recipe. The majority of the time is spent with the dough rising.
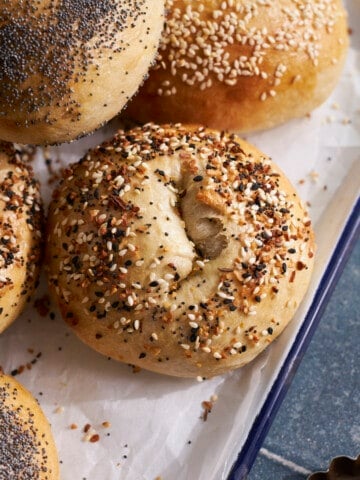
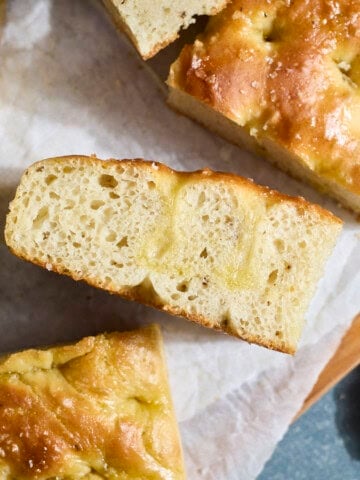
- If you're looking for other easy, hands-off recipes, try this Sourdough Discard Focaccia.
- This recipe uses sourdough discard, and is a great way to put that discard to use. If you would like to make this recipe with active sourdough starter, you can easily make that modification.
Jump to:
Ingredients
There are only a few key ingredients needed to pull this recipe together.
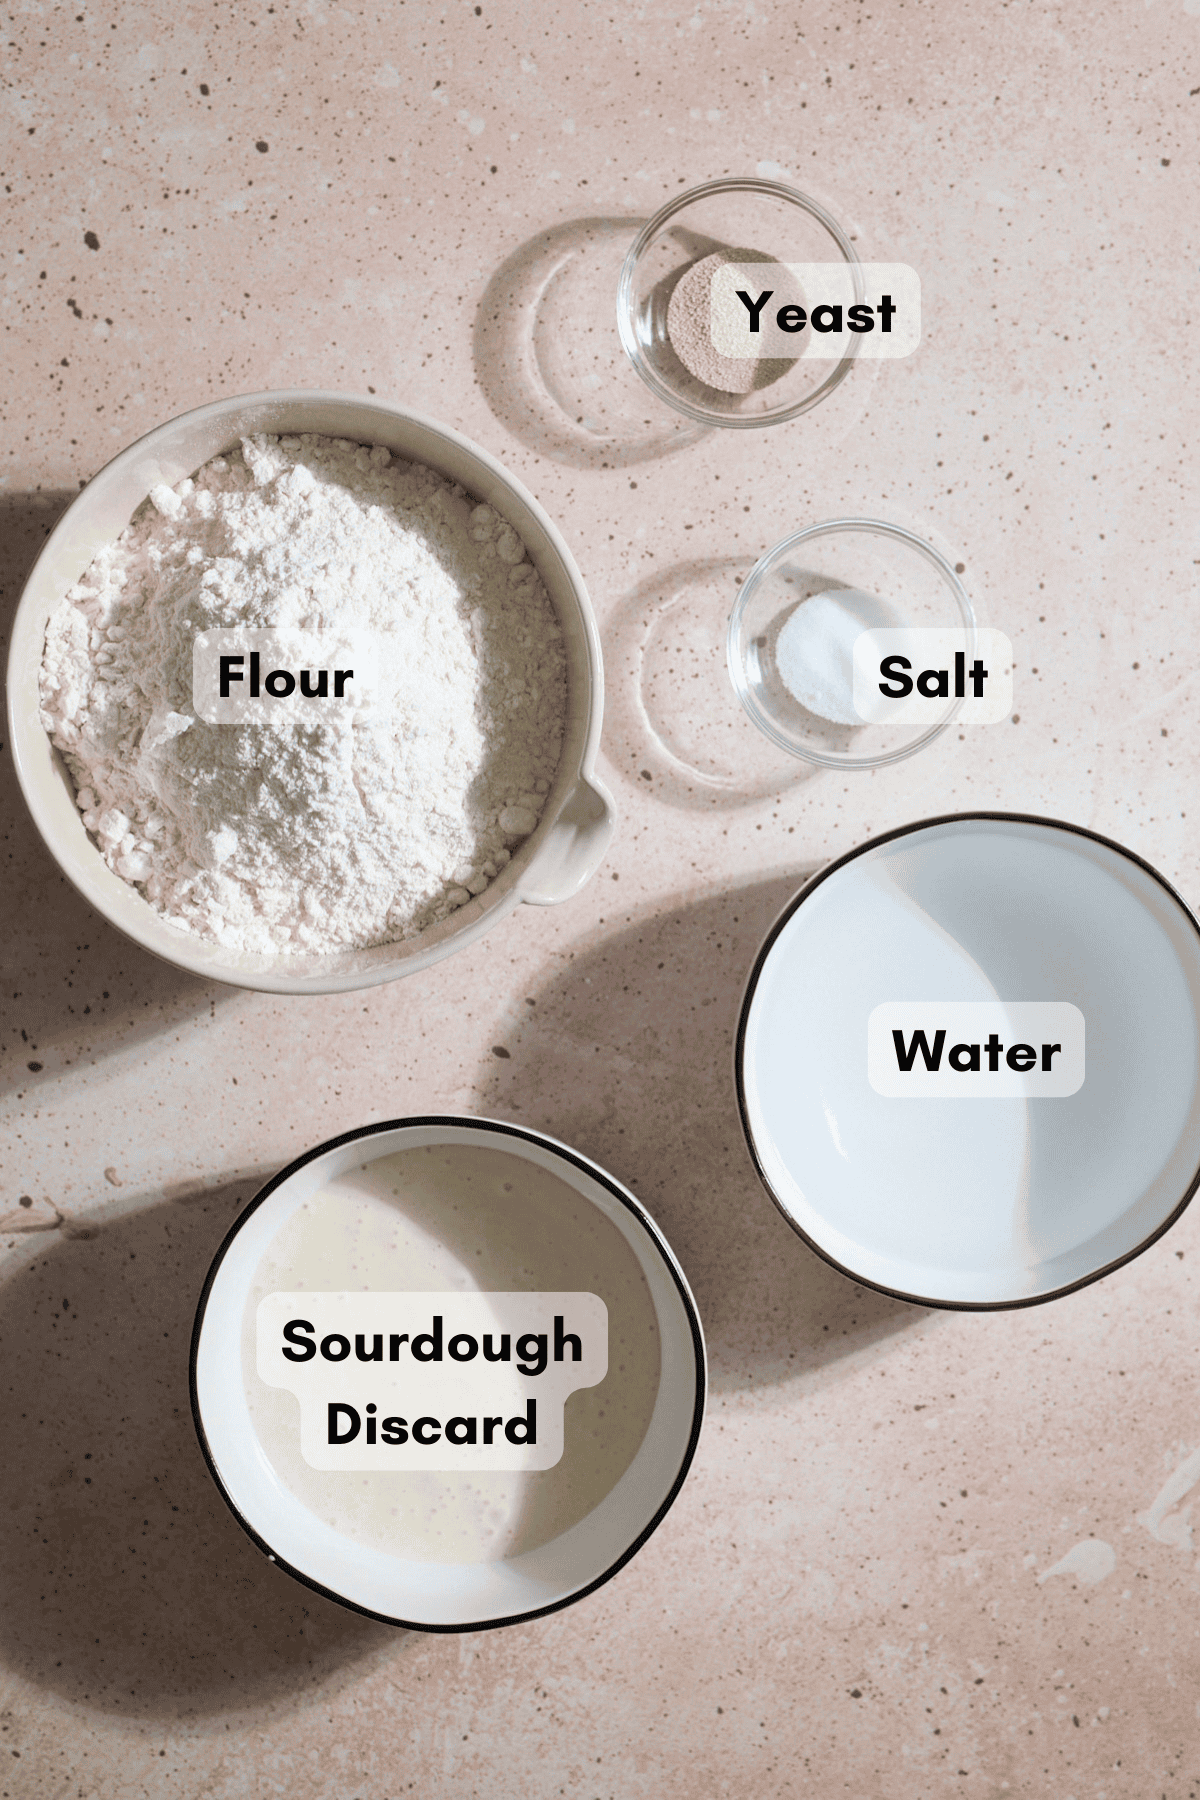
- Sourdough discard: The sourdough discard should be unfed and room temperature. This recipe is designed for a sourdough starter with a 1:1 ratio (when you feed your starter, it's with 1 part flour and 1 part water). If your starter uses a different ratio, you may need to adjust some of the ingredients in this recipe.
- Learn more about how to make a sourdough starter.
- If you're making this recipe with sourdough discard from a starter that is not yet fully established, that's ok! Just remember that you should not use the discard until after at least day 8 of making a new starter. In those early days, that discard should be literally discarded.
See full recipe below for detailed directions.
Substitutions & Variations
This is a very adaptable recipe and below are a few easy substitutions and variations you can try.
- Use active sourdough starter - If you'd like to make this recipe with active sourdough starter, you can! To do so, omit the yeast and replace the sourdough discard with active starter (200g). You'll also need to increase the rise times.
- I do plan on making a full sourdough version of this recipe in the future, but just not yet! Stay tuned for that one!
- Use different flours - This is a great base recipe to experiment using different flours. Just remember that different flours will behave differently and may need more or less water to fully hydrate. This is something that is great to experiment with once you have a bit of experience baking breads (not on your first loaves!).
- You might also like this Sourdough Discard Cinnamon Raisin Bread!
- Add inclusions - This is also a great base recipe for inclusions. Again, this is something to experiment with as you have a little more experience baking breads (not on your first loaves!). I will be doing some experimenting here as well, so stay tuned for more recipes with inclusions!
- If you're interested in more sourdough discard recipes, try these Sourdough Discard Bagels and Sourdough Discard Pizza Dough!
How to Make Sourdough Discard Bread
Making bread can feel like magic because there are so few steps, but somehow you end up with an excellent loaf! The full recipe with detailed directions is at the bottom of this post.
- Step 1: Sprinkle the yeast on top of the warm water in a large mixing bowl. Let sit for 5 minutes, until foamy.
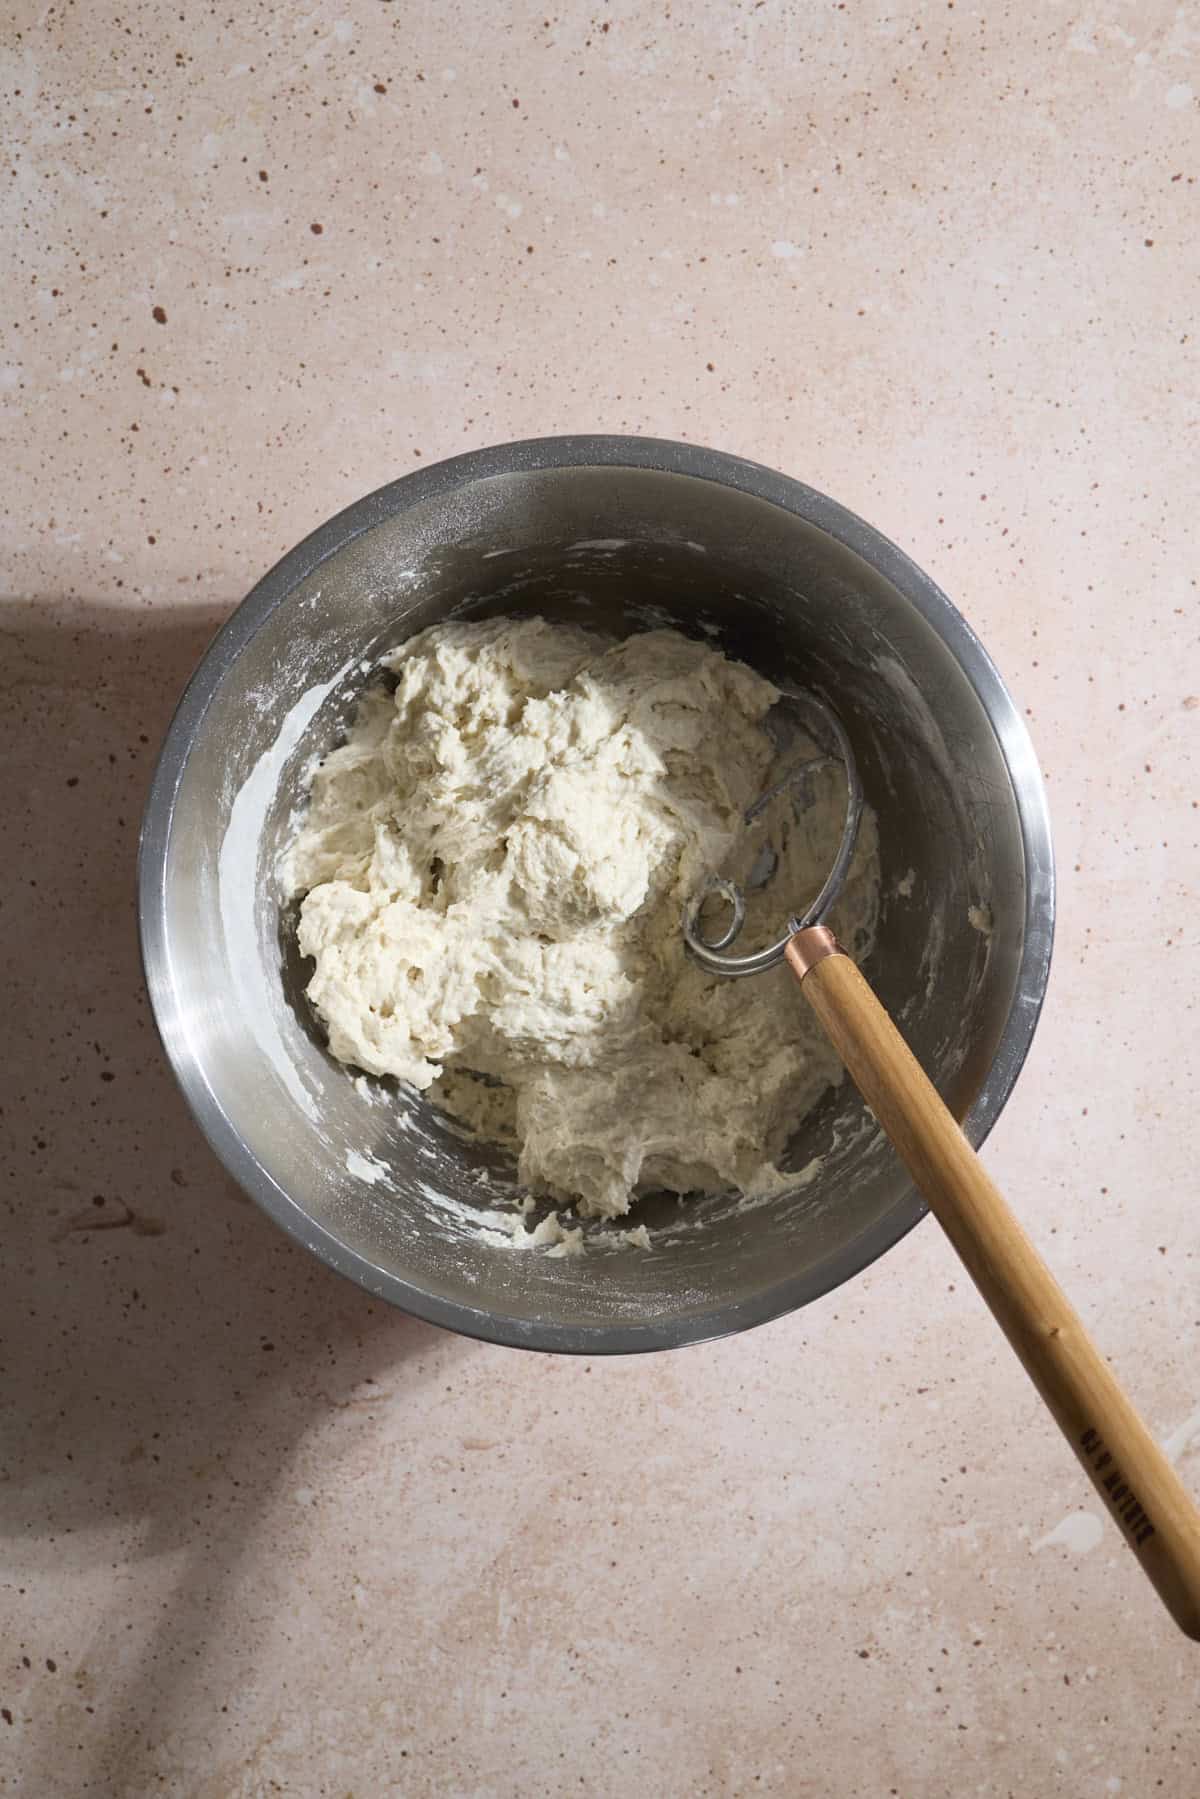
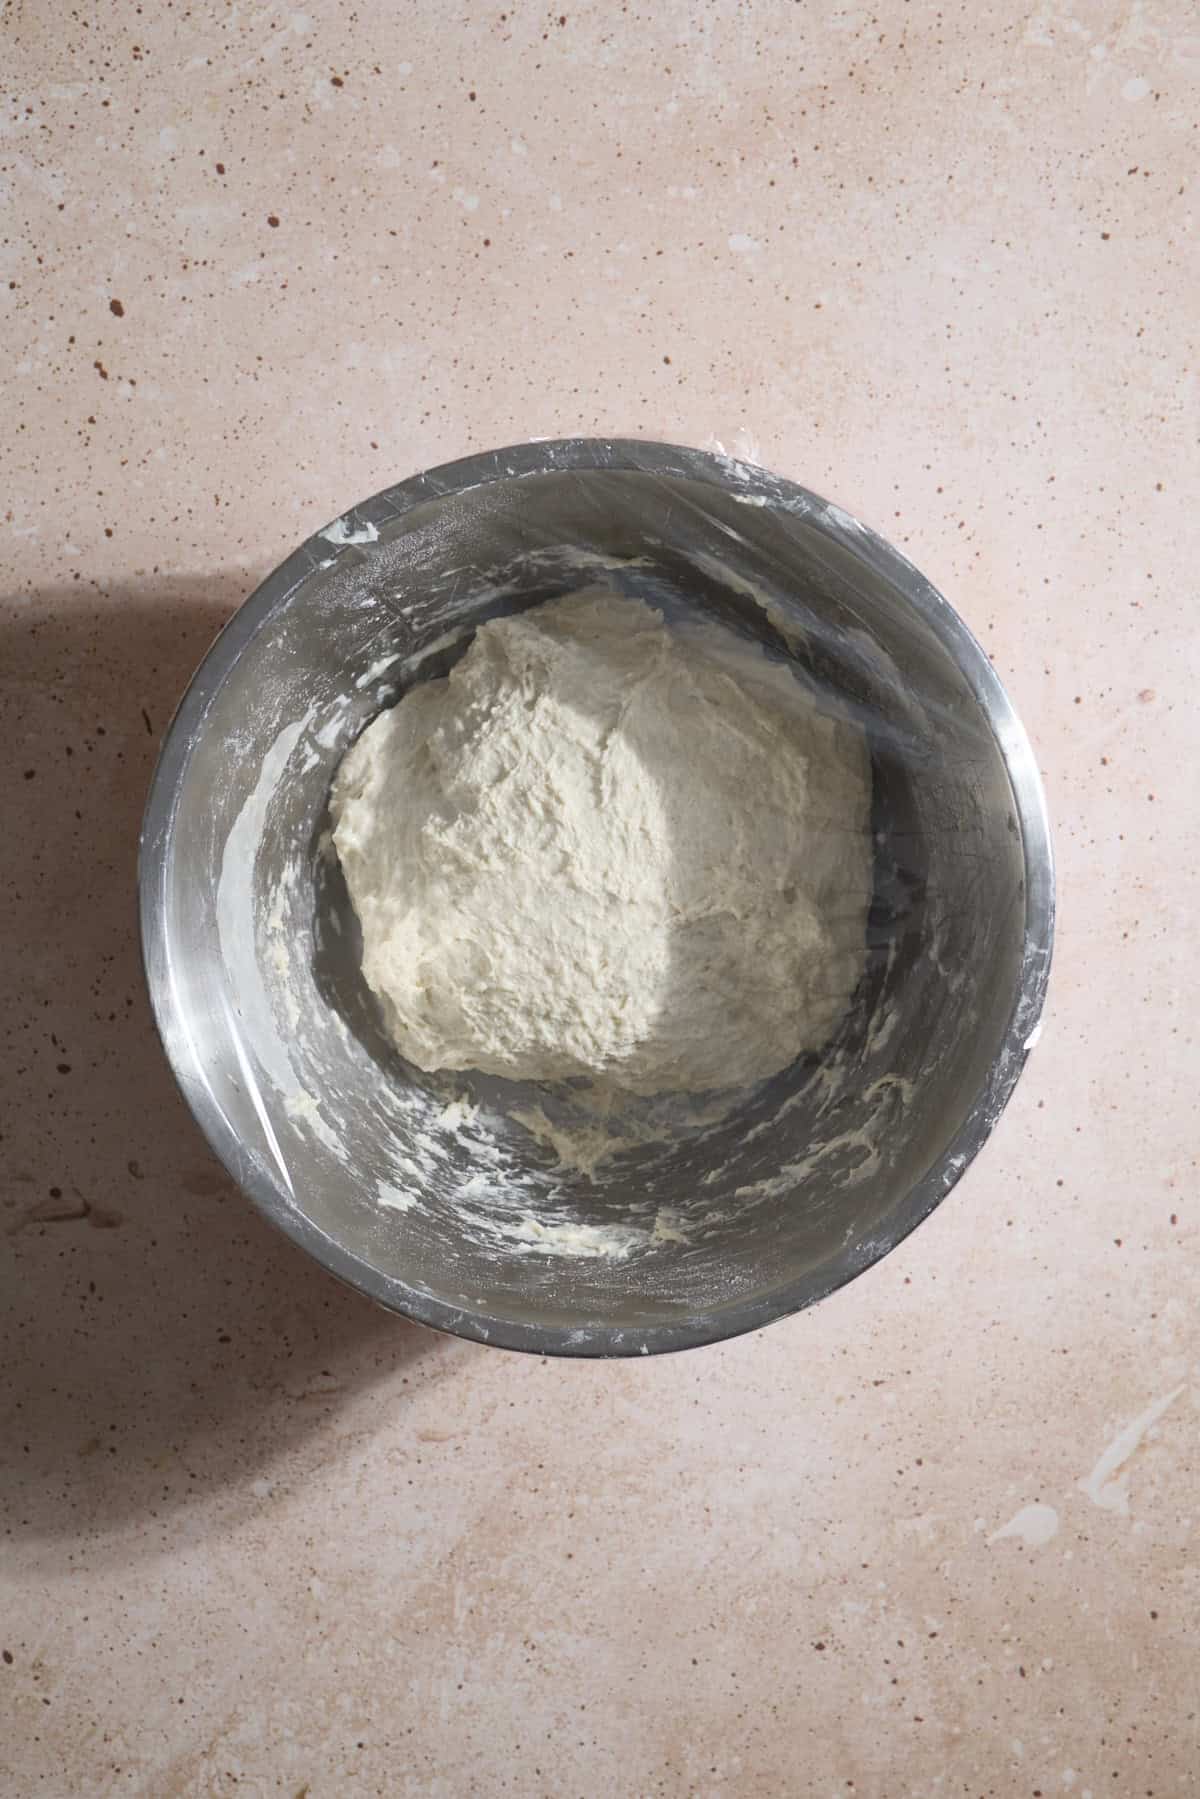
- Step 2: Add the remaining ingredients and mix with a large wooden spoon, a dough whisk, or your hands until no dry spots remain. The dough whisk is very optional, but it is useful here!
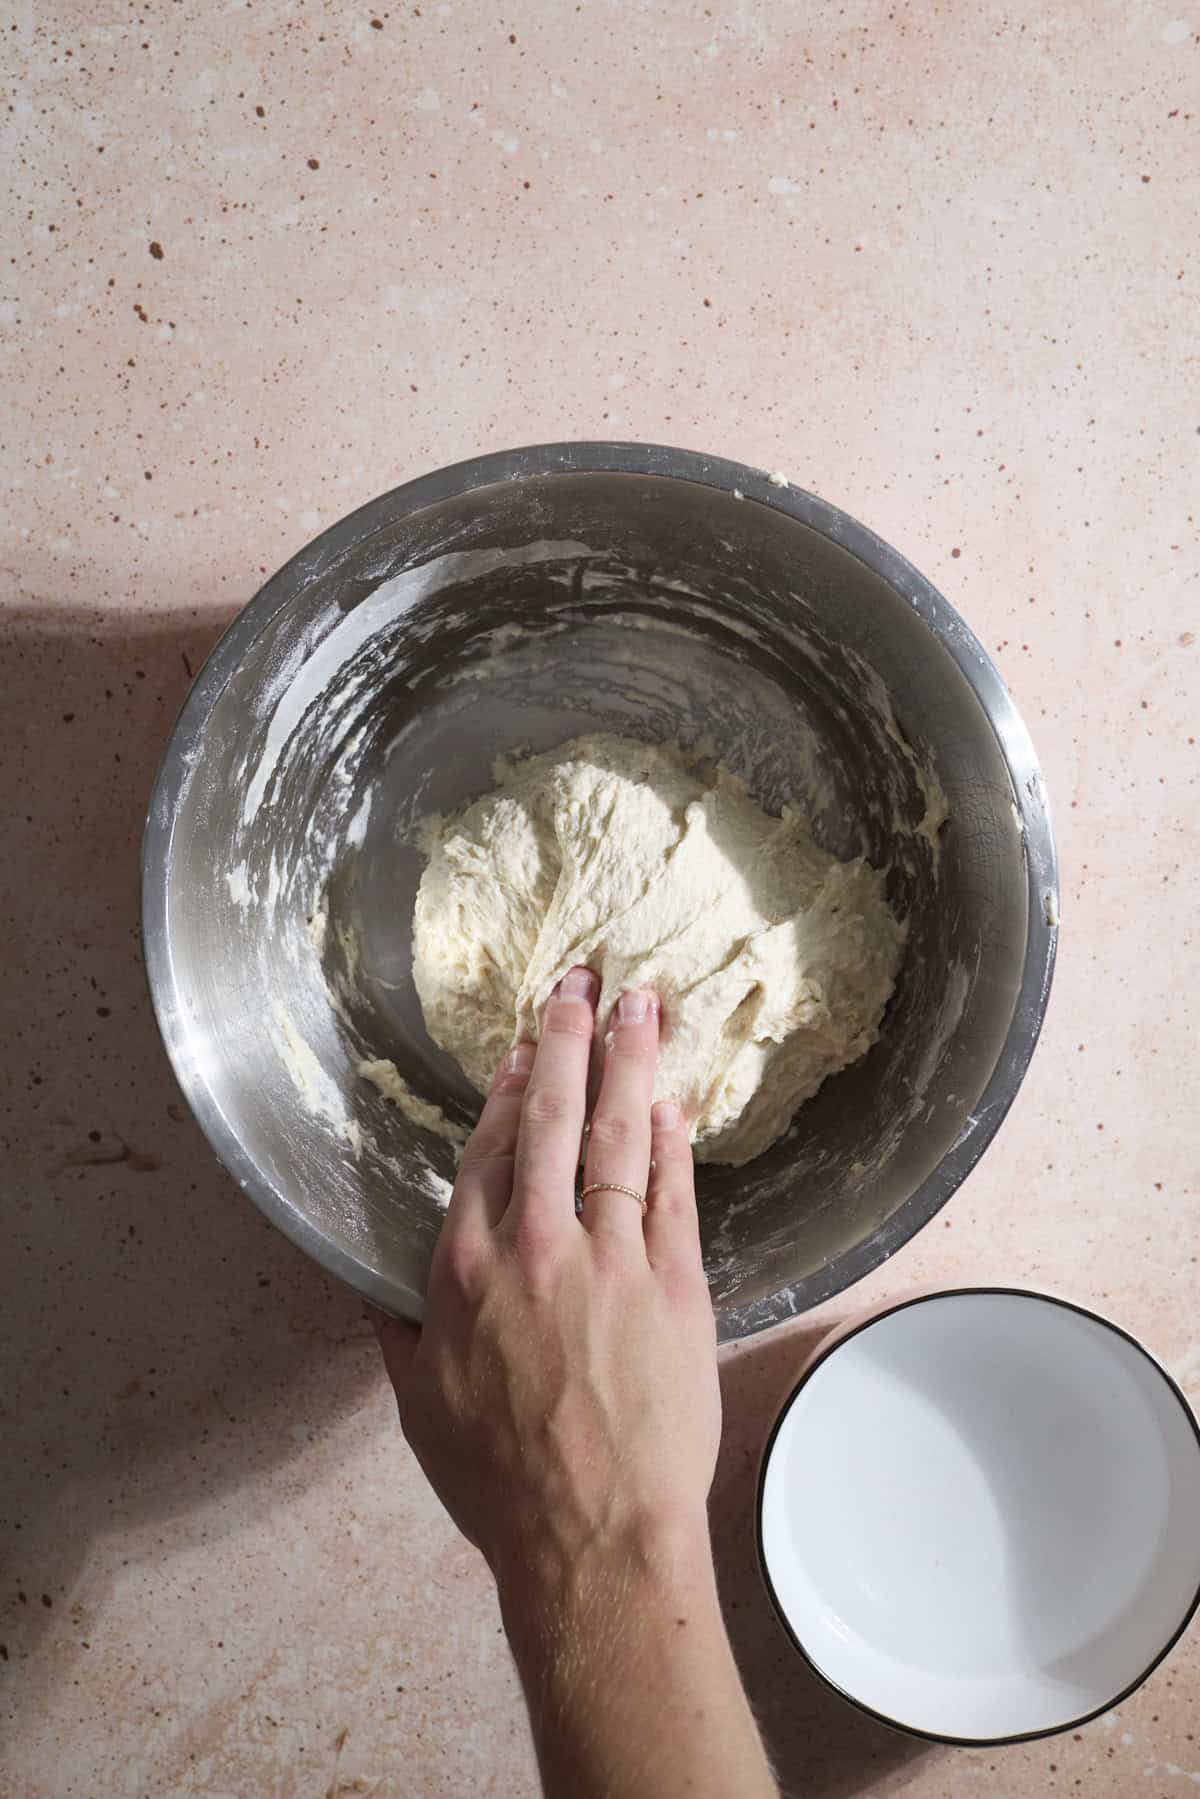
- Step 3: Slightly wet your hands (so the dough doesn't stick to you), then stretch and fold the dough over onto itself in the bowl. Do 12-14 folds until the dough feels like it's a bit sturdier. Turn the dough over so it's seam-side down.
- Step 4: Cover the bowl with plastic wrap and let sit for 2 hours, or until doubled in size.
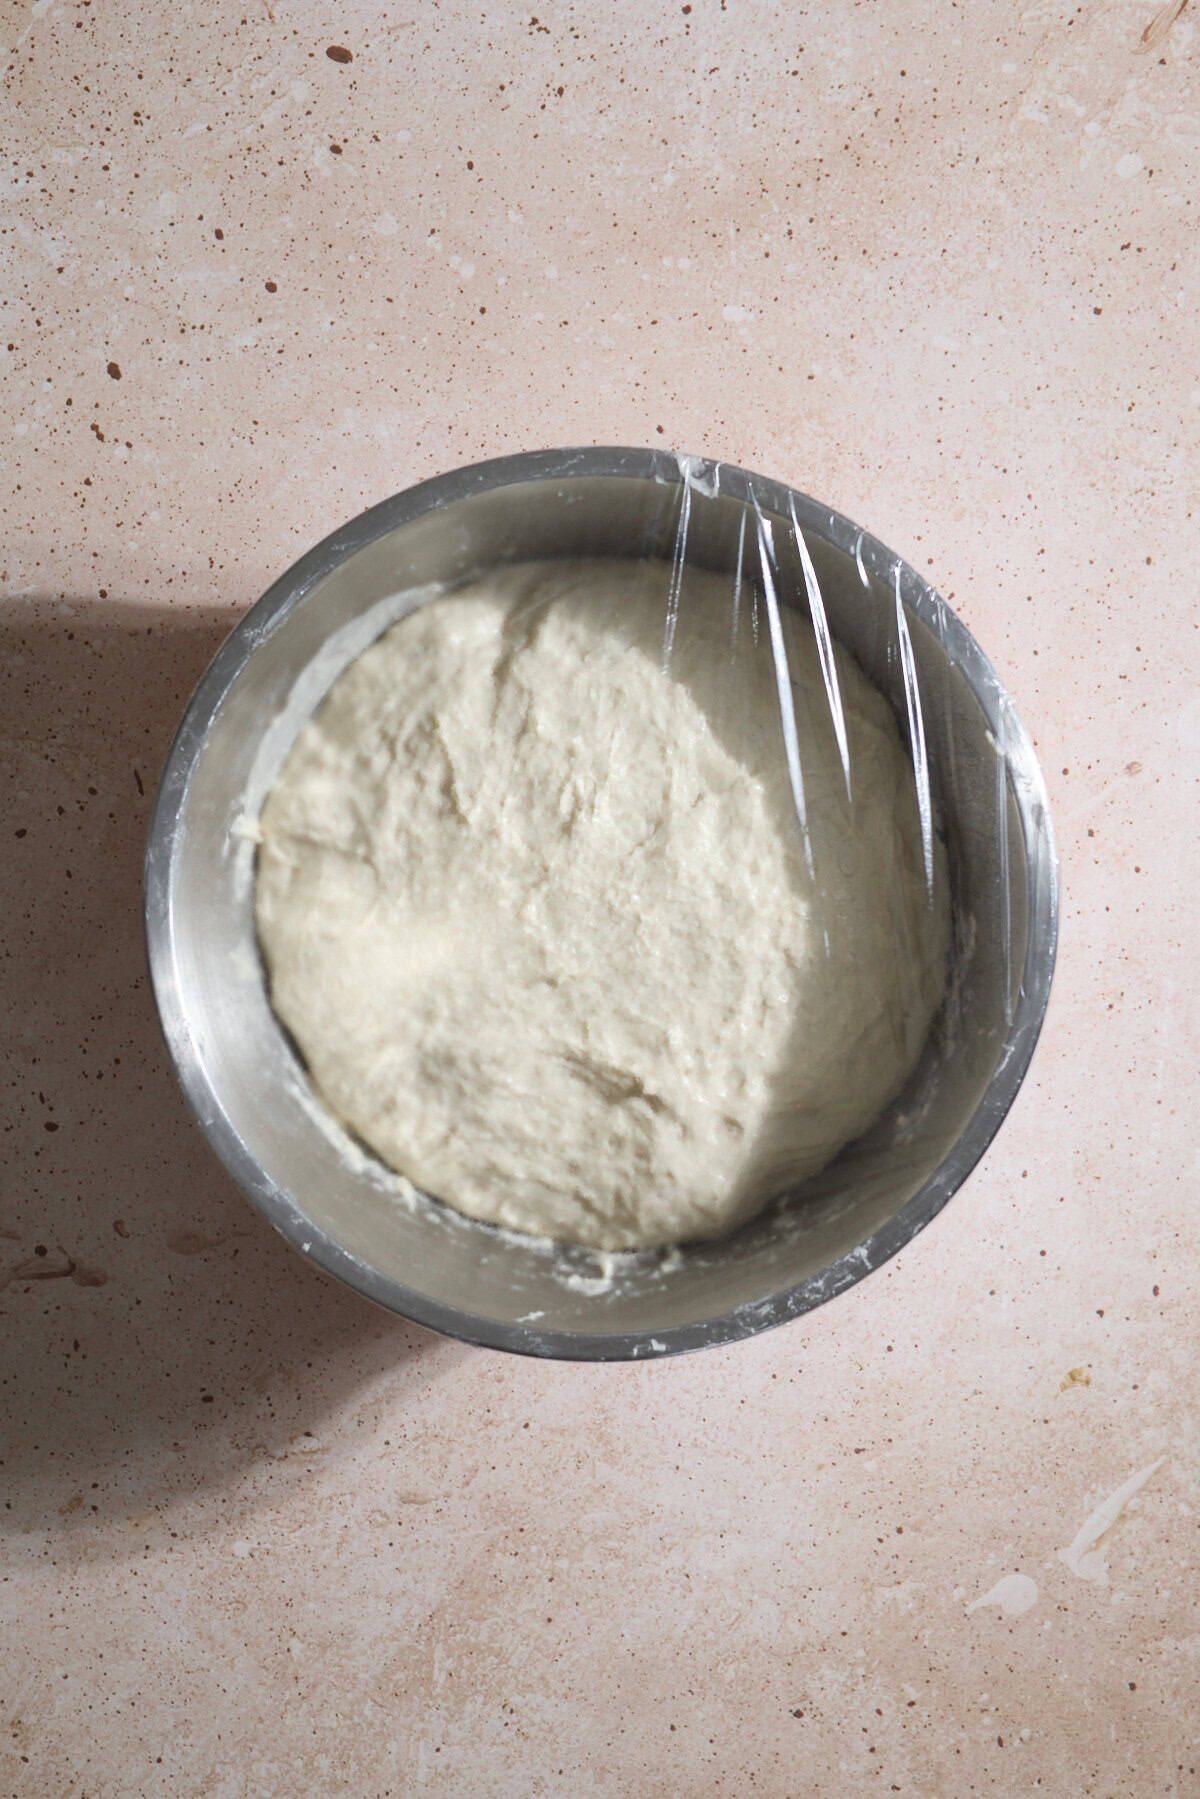
- Step 5: After the rise, the dough will be doubled in size, and look smoother and shiny.
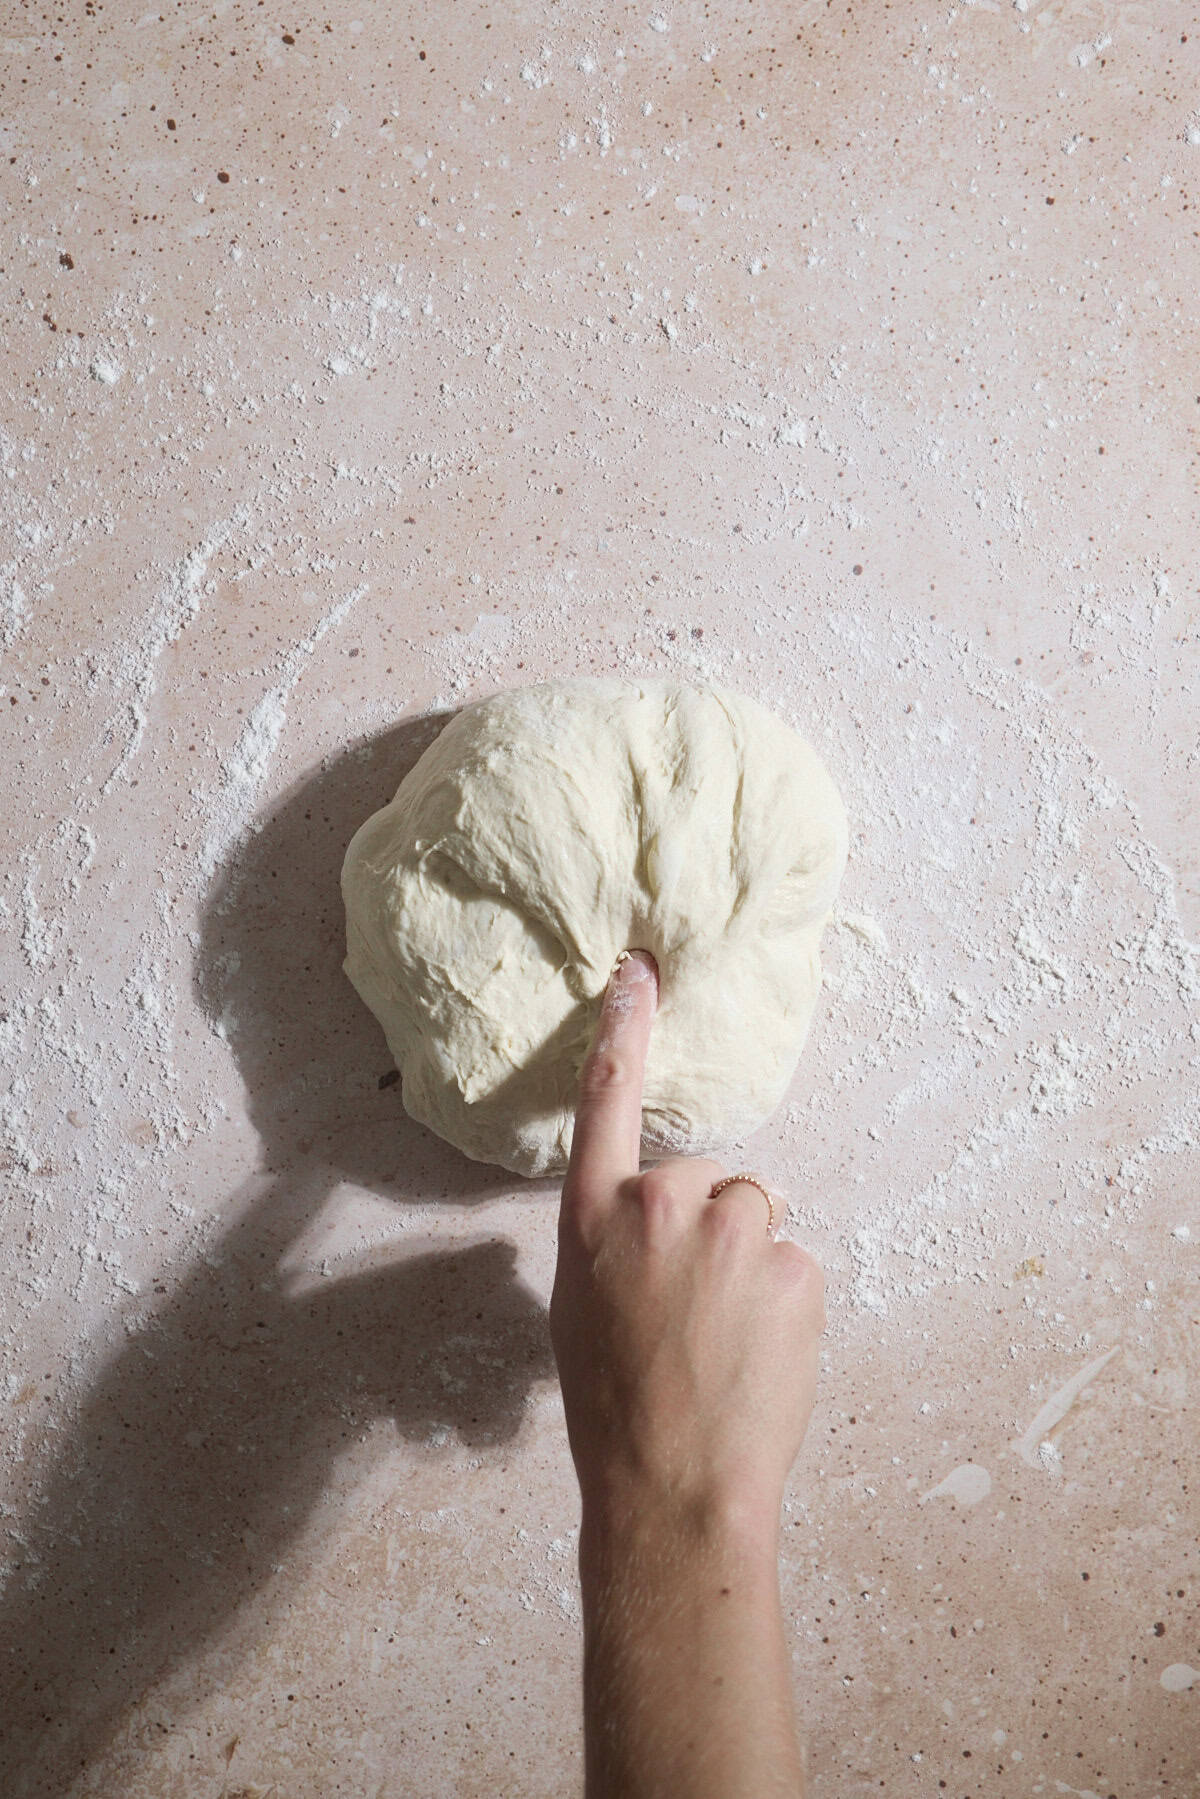
- Step 6: Transfer the dough to a very lightly floured surface. Stretch and fold the dough again, completing 10-15 folds until the dough feels sturdier.
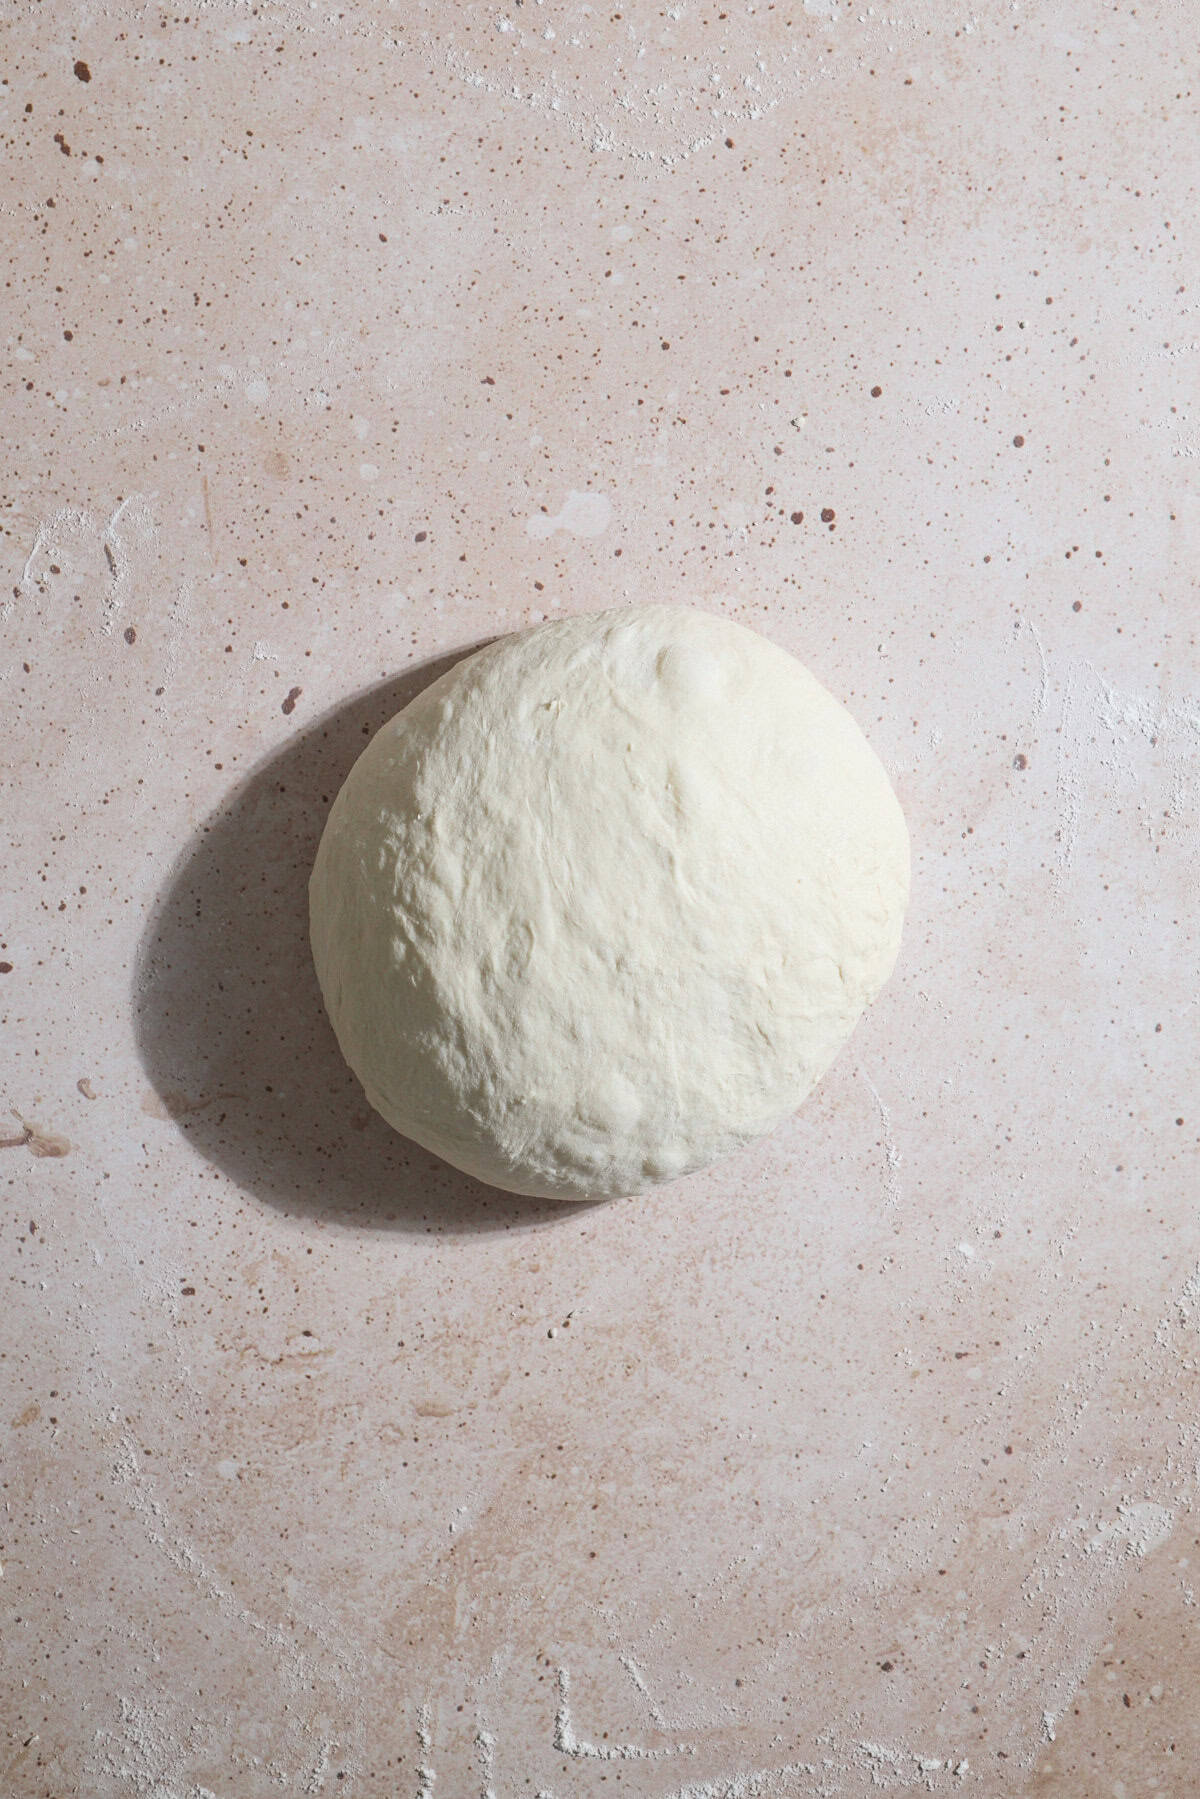
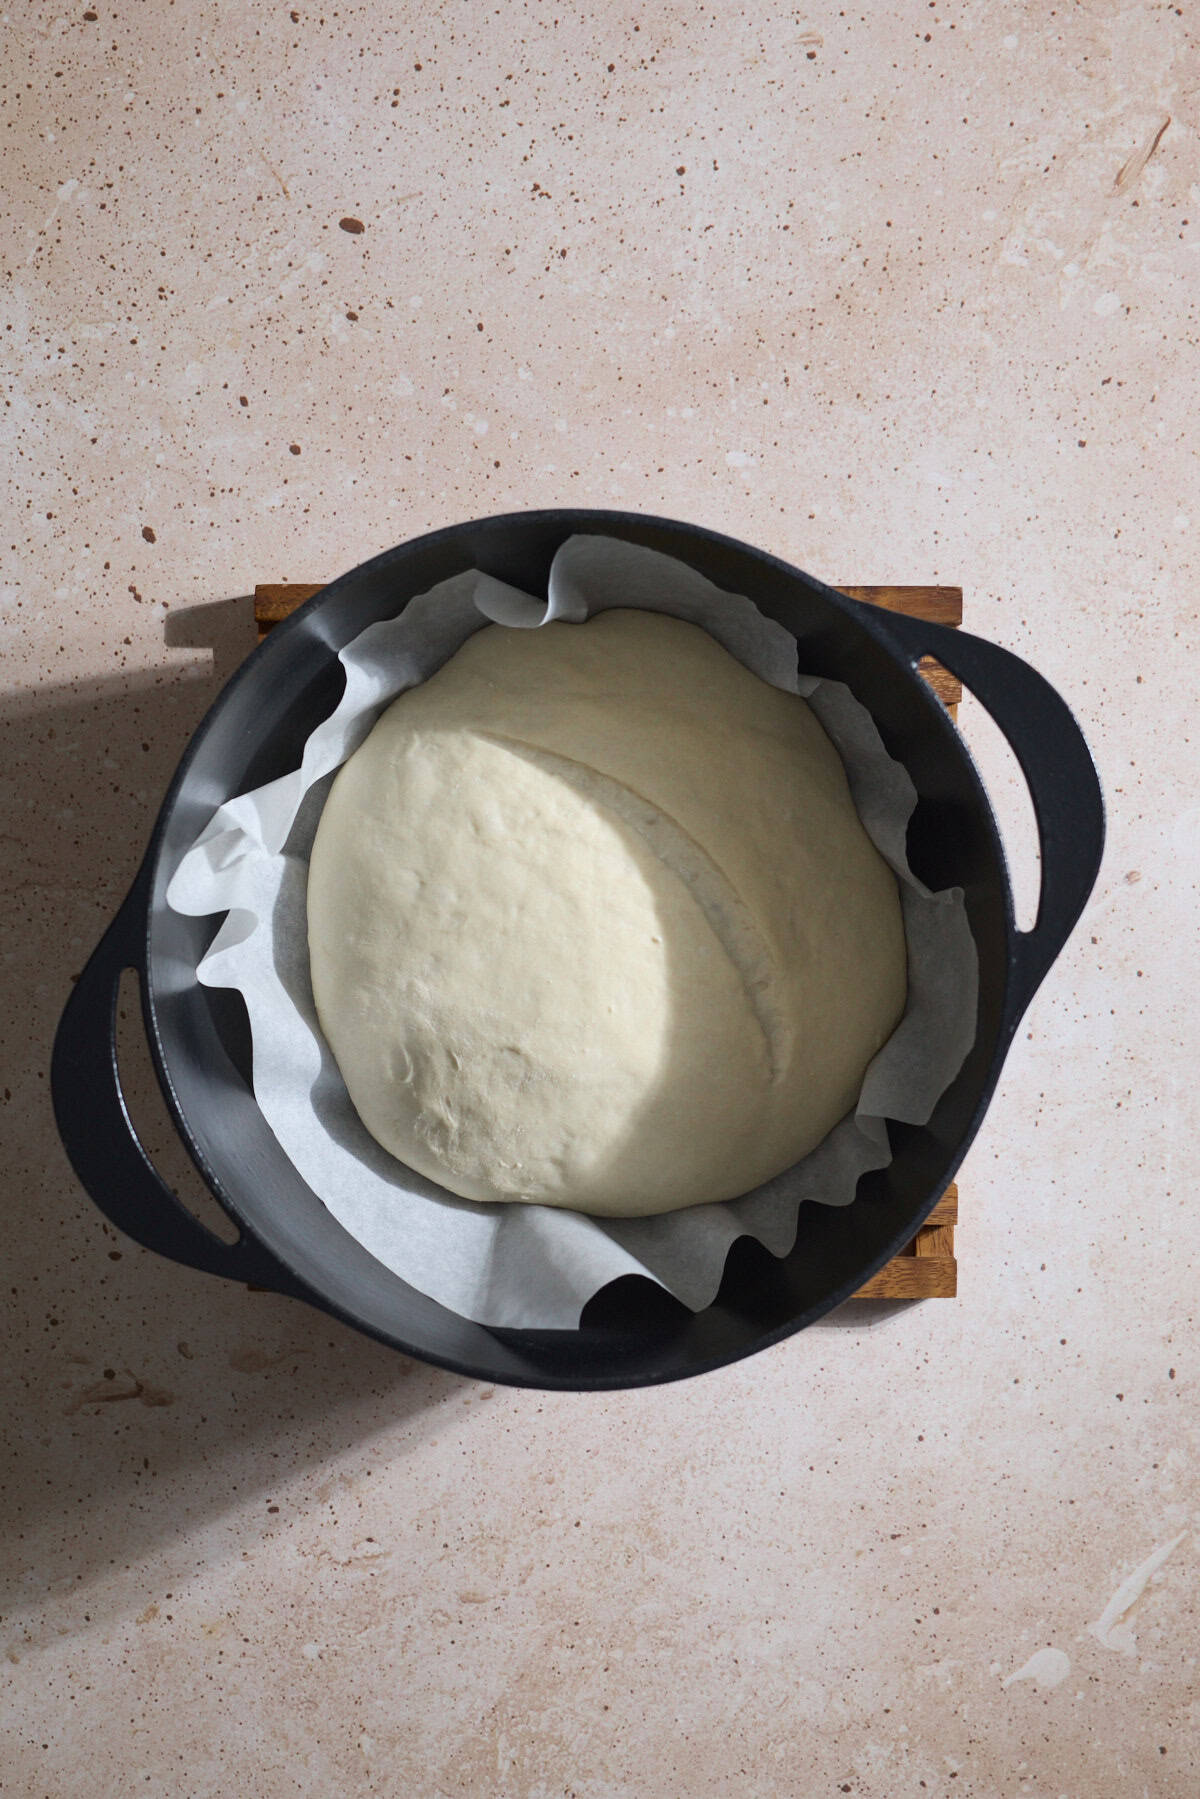
- Step 7: Turn the dough over, seam-side down, onto a piece of parchment paper (this will go inside your Dutch Oven for baking). Cover with a clean kitchen towel and let the dough rest for 30 minutes.
- Step 8: Score the dough using a sharp knife or bread lame. Pick up the loaf with the parchment paper and transfer it carefully into your hot Dutch Oven.
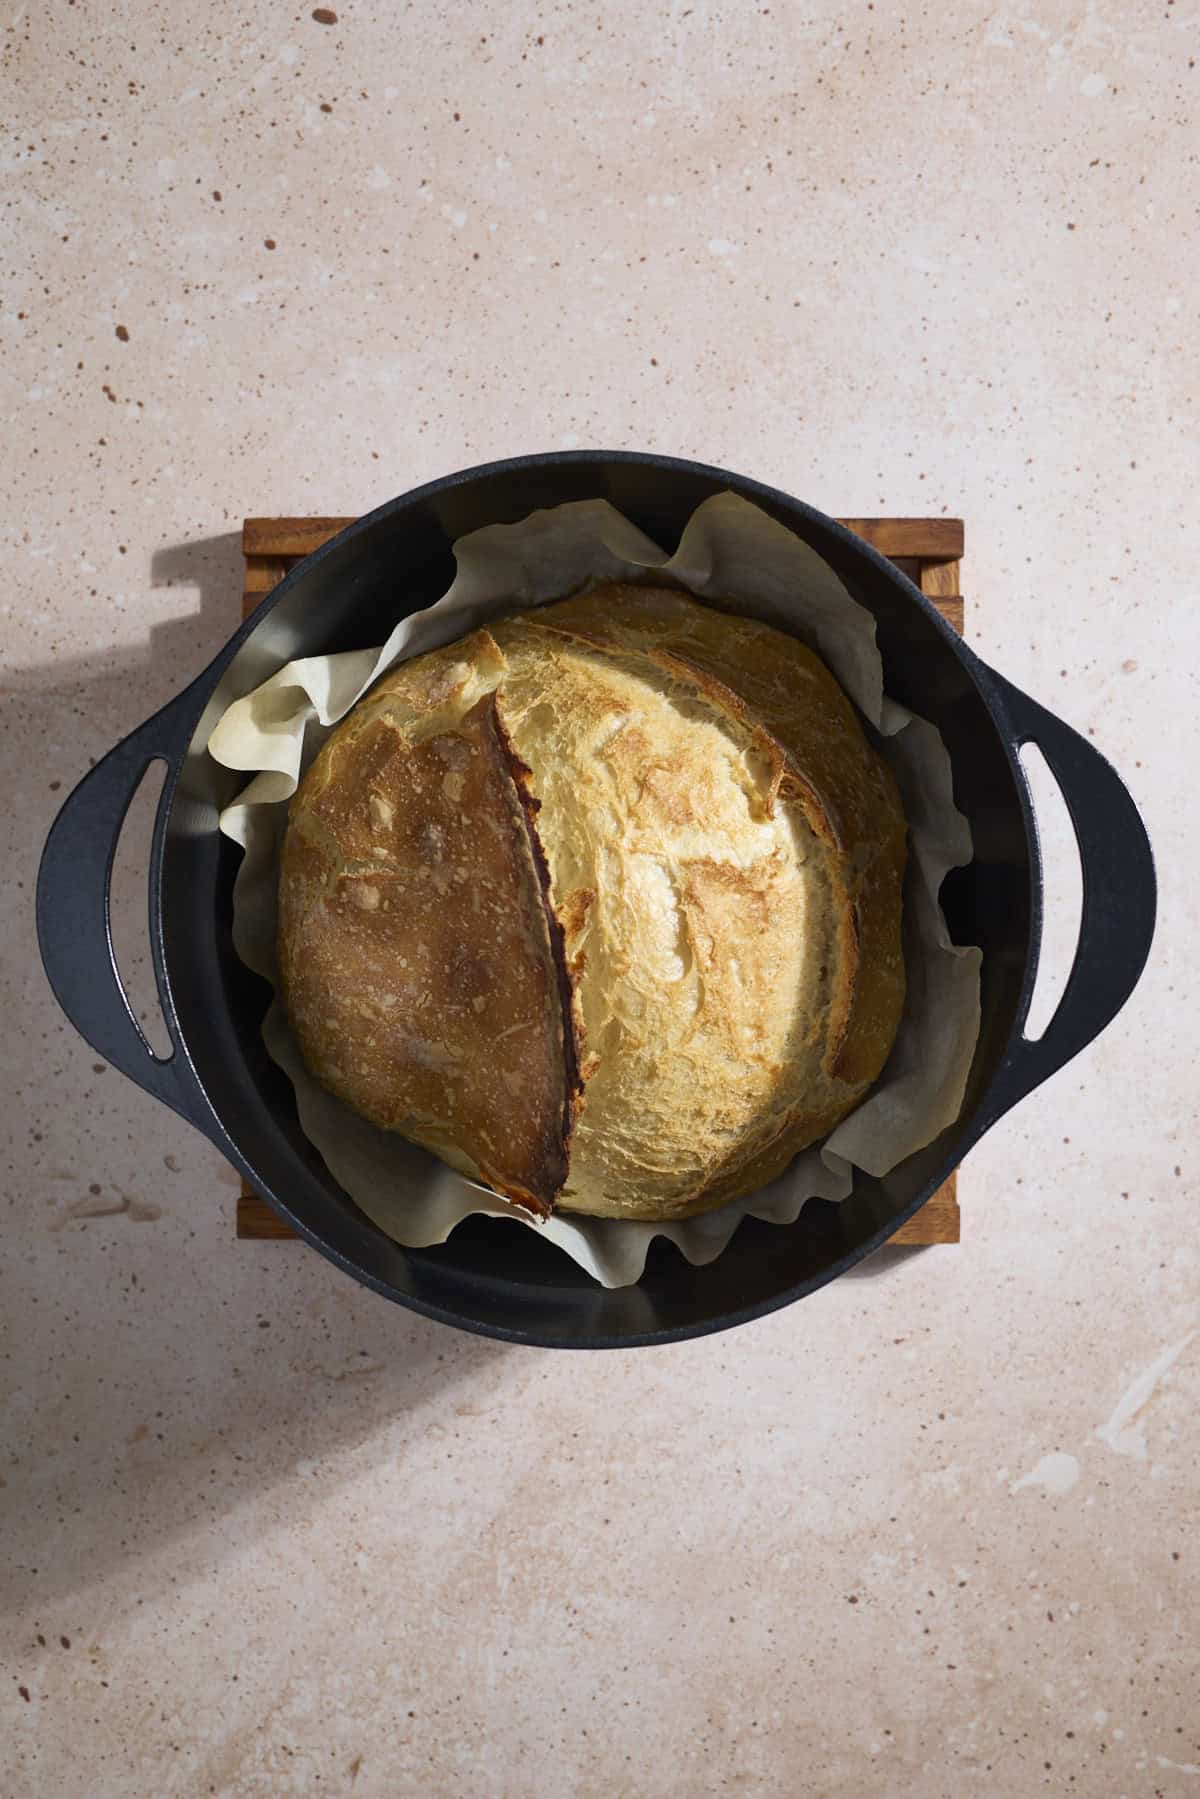
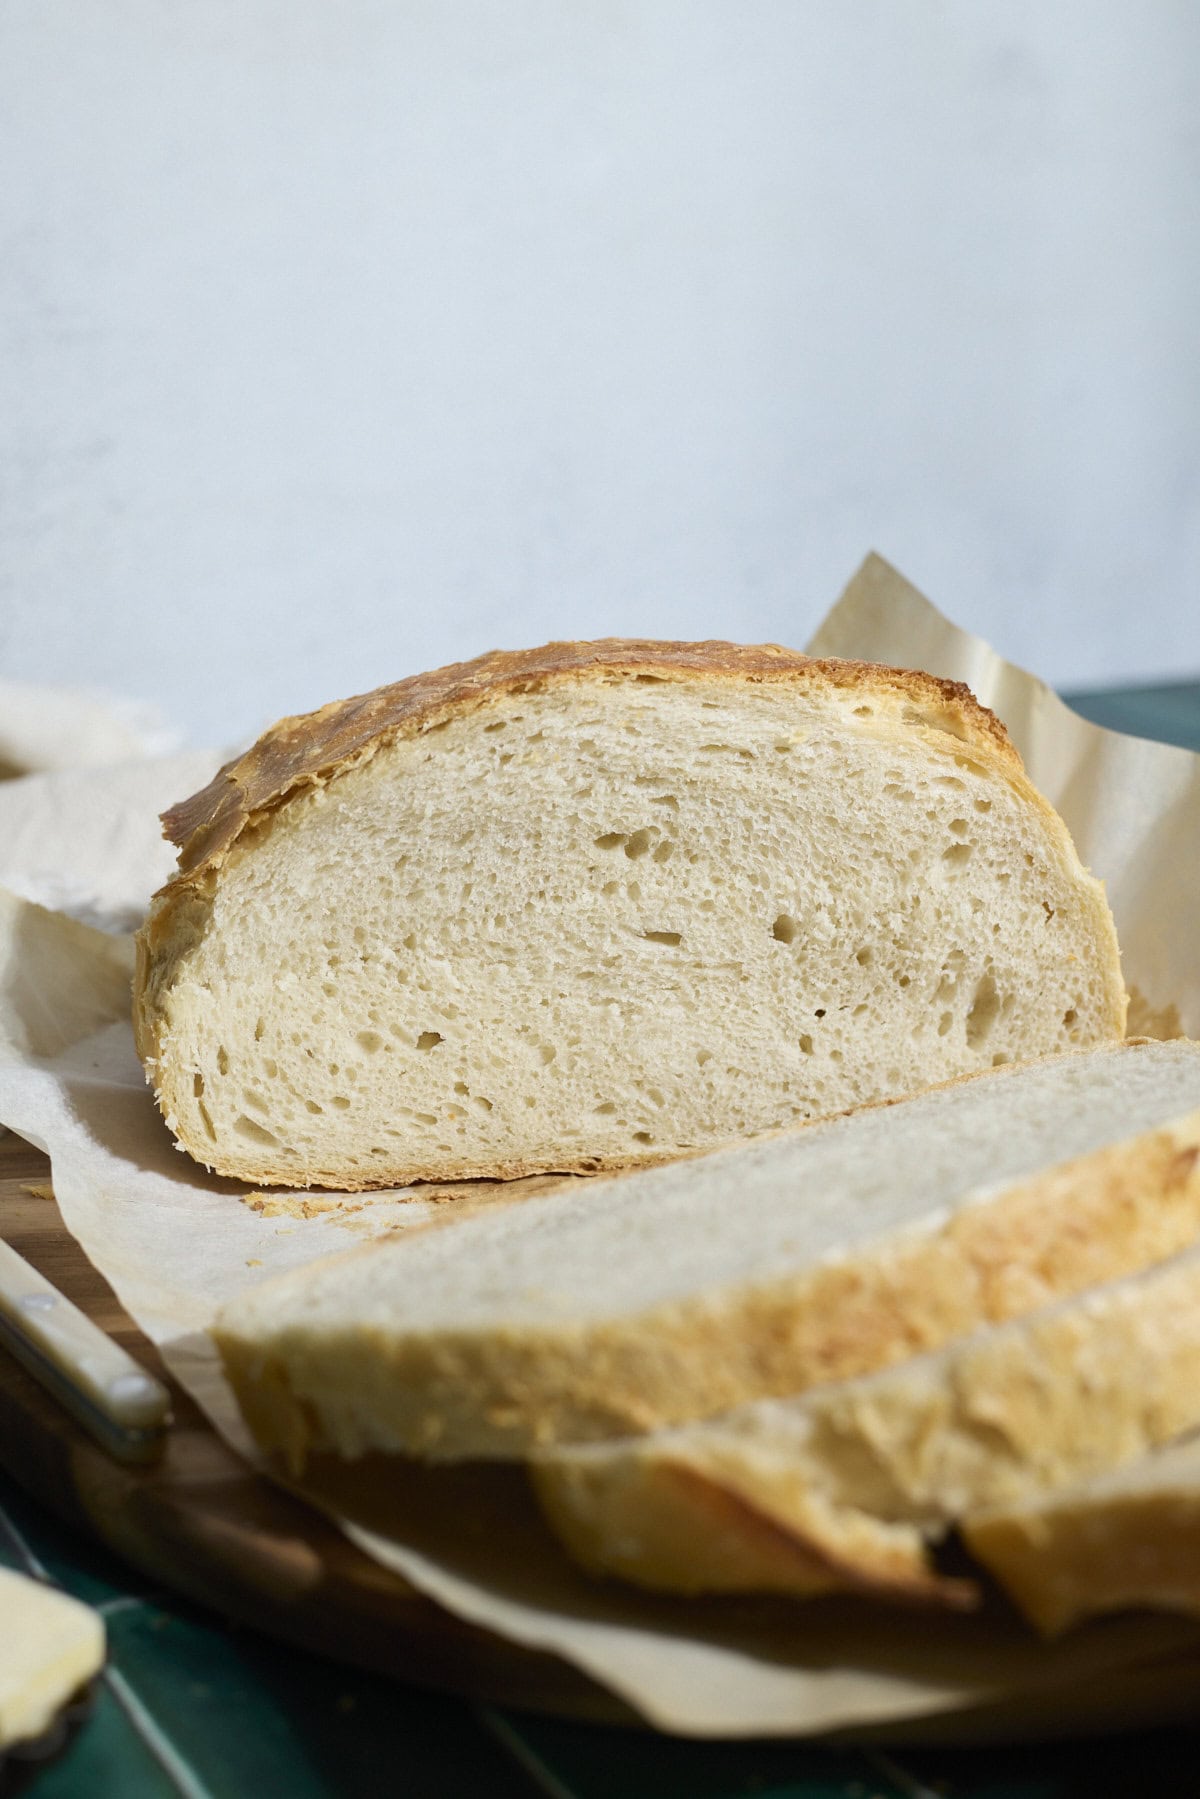
- Step 9: Bake covered for 35 minutes, then remove the lid and bake uncovered for an additional 10-15 minutes. Let the loaf cool for at least 1 hour before slicing.
Expert Baking Tips
- Measure your ingredients with a kitchen scale. It's much easier and more accurate than using US Customary / cups measurements.
- This is a 72% hydration dough, which means that it is going to be wet and sticky to work with. That is ok! Resist the urge to add more flour. If it's too sticky, slightly wet your hands before handling. You can do this!
- Don't stress too much! This recipe doesn't have to be perfect. Forgot to do stretch and folds, and did them during the rise instead? It'll be fine. Forgot to score the loaf? It'll be fine! This recipe is very forgiving.
- Your environment is going to make a difference in your bread baking, so you may find that baking the same loaf in the summer vs. the winter can feel very different. If your house is warmer, your dough will rise faster. If it's cooler, the dough will rise slower. Watch your dough and not the clock!
- Special equipment is not needed, but there are a few tools that will make baking easier for you if you do bake bread regularly. Those tools include:
- A bread lame (for scoring)
- A silicone bread sling (instead of the parchment paper)
- A dough whisk (for mixing the dough)
Hydration Percentages
You do not necessarily need to understand hydration percentages or baker's math to make this loaf. But even for a beginner, I would point out that you can add more or less liquid to this recipe, and it will still work out. I do recommend measuing ingredients with a kitchen scale, but if you're off by a little bit in either direciton, it's going to be ok. Baking bread is not precious, unlike some other, more complex bakes.
This loaf is a 72% hydration loaf, which means it will be a wet, sticky dough, so go in expecting that. This is a medium-high hydration level (over 80% hydration is considered high hydration). It is not the easiest dough to work with, but also not the hardest.
I will be working on more in-depth post about hydration percentages, so stay tuned!
Storage
Room Temperature Storage: Store the loaf in a paper or cloth bag at room temperature for up to 3 days. You can also keep this on a cutting board, cut-side down (to retain moisture), and cover with a kitchen towel. After 3 days, this bread will be best used for toast.
- To note: a plastic storage bag will seal in moisture, and cause your crust to become soggy.
Freezer Storage: Once the loaf has completely cooled, transfer the full loaf to a freezer-safe bag and freeze for up to 3 months. When you're ready to use it, let it thaw at room temperature. You can also freeze pre-cut slices if you'd like to pull out individual slices for use!
Recipe FAQs
The point of this recipe is to put your sourdough discard to good use. Whether you have an established starter or you're building one, you will have sourdough discard. And if you're eager to bake a loaf of bread, this recipe will help you do it!
I recommend using a Dutch Oven if you have one, as it will help you achieve a better crust. If you don't have a Dutch Oven, you can bake this bread on a regular baking sheet!
I have more sourdough discard recipes (check out these Sourdough Discard Blueberry Bagels and these Sourdough Discard Cinnamon Rolls). All of my sourdough discard recipes can also be modified to be made with active sourdough starter. And there may be some active sourdough starter recipes in the works!
More Sourdough Discard Recipes

If you tried this Easy Sourdough Discard Bread or any other recipe on my website, please leave a ⭐ star rating and let me know how it went in the comments below. I'd love to hear from you! Happy Baking!
Easy Sourdough Discard Bread
Equipment
- Dough whisk optional
- Bread lame optional
- Parchment paper or silicone dough sling
- Dutch oven or baking sheet
Ingredients
- 1 ½ cups warm water about 110℉ (43℃)
- 1 ¼ teaspoons active dry yeast
- 3 ½ cups all-purpose flour
- 200 grams (about ¾ cup) sourdough discard unfed, at room temperature
- 1 ½ teaspoons salt
Instructions
- In a large bowl, or in the bowl of a stand mixer fitted with a dough hook, sprinkle the yeast on top of the warm water. Let sit for 5 minutes until foamy. If your yeast does not foam, the yeast is dead, and you'll need to start over with fresh yeast.
- Add the remaining ingredients and mix (using a wooden spoon, a dough whisk, your hands, or the stand mixer) until combined and no dry spots remain. The dough will be wet and shaggy.
- Knead & Rise. Slightly wet your hands so the dough doesn't stick to your fingers. Gather an edge of the dough, pull up, and fold it over into the center. Turn the bowl and repeat, working around the bowl, making 12-14 folds, until the dough feels sturdier and is pushing back. Turn the dough over in the bowl so the seam side is down. Cover the bowl with plastic wrap and let rise for 2 hours.
- Preheat the oven to 450℉ (230℃), and place your Dutch Oven with a lid in the oven to warm up.
- Shape the dough. Transfer the dough to a very lightly floured surface (wet your hands if needed to help scoop the dough from the bowl). Do a few additional folds, gathering the dough from an outside edge, pulling up, and folding over into the center. Turn the dough in a circle, making folds around the dough until it feels sturdier (about 4-5 folds).
- Create surface tension. Wipe the flour from your countertop (or move to an area with no flour), and turn the dough over so the seam side is down on the countertop. Cup your hands around the dough, and gently pull the loaf towards yourself, letting the dough seam pull on the countertop to create surface tension. Rotate the dough and repeat, slowly tightening the dough. Repeat until you have a tall, round ball (about 5-6 pulls). Place the loaf on a piece of parchment paper (this will go into your Dutch Oven). Cover with a clean kitchen towel and let rise for 30 minutes.
- Score. Using a sharp knife or a bread lame, score the loaf by cutting a seam down the length of the loaf for steam to escape while baking. The cut should be about ¼-½ inch deep. Don't overthink this! And frankly, if you'd rather not score the loaf, the bread will create its own natural seam as it bakes.
- Bake. Carefully pick up the parchment paper and the dough and transfer both into your hot Dutch Oven. Cover with the lid and bake covered for 30 minutes. Remove the lid and bake uncovered for an additional 10-15 minutes until browned and crusty. It's hard to resist, but do not open your oven while the bread is baking, and do not remove the lid before 30 minutes.
- Cool. Remove the loaf from the Dutch Oven and let cool fully on a cooling rack (at least 1 hour) before slicing.
Patricia says
I started saving my discard on day five of my brand new, quite active new starter..will this be active enough to use in this particular recipe? I’m now on day 7 of my starter and am feeding it twice a day… thanks for your advice and help!
Jessica Vogl says
It's still a bit too early to start saving that discard! I generally say that after day 8, provided you are seeing some amount of activity in your starter, then you can start saving.
Becky says
Hi I was wondering if I could make this into baguettes? Or if you have a sourdough baguette recipe. I did not see one . I love all your recipes. They always come out great and yummy.
Thank you
Jessica Vogl says
I love the idea! I don't have a baguette recipe (and I'm not sure if it would work with this one), but it's something I'll have to put on the list to try!
Patti says
This is the best bread recipe ever!
Beautiful and great tasting in less than 4 hours. The first loaf was perfect. The 2nd one I spread out and did a cinnamon sugar spiral into a loaf. Need to bake a few minutes longer before removing lid and browning on that one.
Spectacular !!
Patricia says
Will unbleached, organic bread flour work just as well for this recipe?
Jessica Vogl says
Bread flour will give you a chewier final result, but yes, it will work.
Colleen says
"Just remember that you should not use the discard until after at least day 8 of making a new starter. In those early days, that discard should be literally discarded." Can you tell me more about what this means? I have discard that has been in the refrigerator and Sunday I just fed my starter and added the discard to what was already there. So can I not use the discard I have for this recipe? Thank you! I'm new at this!
Jessica Vogl says
How old is your sourdough starter? If your sourdough starter is already established, then you don't need to worry about using the discard (you can use it any time). Discard that has been in your fridge for a while is totally fine and perfect for this recipe.
Julie Phillips says
What size Dutch oven? Mine is 6qt. Is that too big?
Jessica Vogl says
It should be ok!
Mayra says
Thanks, it comes out perfectly!
Fay says
Mine looked just like yours in the picture.
Jessica Vogl says
I love that! Happy baking!
Shannon Angstadt says
This is the easiest sourdough discard bread I have found. I think part is yeast addition and other is preheating Dutch oven with lid before bread on parchment goes in. Excellent crust, beautiful soft inside.
Thanks so much.
Shannon in Clearwater, FL
Jessica Vogl says
If you're looking for an easy entry into making sourdough bread (and using up your discard), this is the place! Simple, forgiving, and delicious!